Changing the font in WordPress is easier than you think! Whether you’re using a free theme or a premium one, customizing your site’s typography can elevate its look. Ready to make your text pop? Let’s dive into the simple steps that work for any theme!
How to Change Font in WordPress (Works in All Themes)
Are you tired of the same old fonts on your WordPress site? Want to give your blog or website a fresh new look that truly reflects your style? You’re in the right place! Changing fonts in WordPress is not just about aesthetics; it’s also about making your content more engaging and easier to read. Whether you’re using a classic theme or something more modern, the good news is that changing fonts is easier than you might think, and it works across all themes! In this article, we’ll walk you through simple steps to customize your typography, ensuring your site stands out from the crowd. So, grab your favorite beverage, and let’s dive into the world of WordPress fonts together! Your visitors (and your eyes) will thank you!
Understanding the Importance of Font Choice in Your WordPress Site
When it comes to building your WordPress site, font choice plays a crucial role in shaping the user experience and establishing your brand identity. Choosing the right font can enhance readability, convey the right emotions, and even influence user engagement. Here are some key aspects to consider:
- Brand Consistency: Your font should align with your brand’s personality. For instance, a tech startup might opt for modern, sans-serif fonts, while a boutique hotel could choose elegant, serif fonts to evoke luxury.
- Readability: A font that’s easy to read across all devices ensures that your content is accessible to everyone. Scripts or overly decorative fonts can be visually appealing but may frustrate users if they can’t quickly comprehend your message.
- Emotional Impact: Different fonts evoke different feelings. Consider how you want your audience to feel when they visit your site. A playful font might work well for a children’s brand, while a more serious font suits professional services.
Moreover, using a combination of font styles can help create a visual hierarchy that guides users through your content. Here’s a simple way to structure your typography:
| Font Type | Use Case | Example |
|---|---|---|
| Heading Font | Main Titles | Montserrat |
| Body Font | Paragraph Text | Open Sans |
| Accent Font | Quotes/Callouts | Dancing Script |
Don’t forget about web-safe fonts! While custom fonts can elevate your design, they may slow down your site if not optimized properly. Stick to a few well-chosen fonts that complement each other to maintain your site’s speed and performance. Tools like Google Fonts offer a plethora of options that are both stylish and optimized for the web.
remember that the font size and spacing are just as important as the typeface itself. Properly sized fonts with adequate line spacing help maintain clarity and prevent reader fatigue. Use CSS to adjust these aspects easily, ensuring your site remains inviting and easy to navigate.
Exploring the Built-In Customization Options in WordPress
Customizing your WordPress site goes beyond just choosing a theme; it extends into the nitty-gritty details, like font selection. Fonts can dramatically influence the overall look and feel of your website, making it imperative to get them right. Fortunately, WordPress provides several built-in options that allow you to change fonts without needing to touch a line of code.
Most themes come with a built-in customizer that offers a user-friendly interface for changing fonts. To access these options, navigate to Appearance > Customize in your WordPress dashboard. From there, you can explore the Typography section, where you’ll find various settings to adjust font styles, sizes, and weights. Here are some typical settings you might encounter:
- Font Family – Choose from a variety of font families to match your site’s branding.
- Font Size – Adjust the size of your text for better readability.
- Font Weight – Make your text bold or light to emphasize certain elements.
- Line Height – Enhance text spacing for improved legibility.
If your theme supports it, you may also find an option for Google Fonts integration, allowing you access to a vast library of fonts. This feature is incredibly useful for creating a unique look that sets your site apart from the competition. To implement Google Fonts, simply select your desired font from the list and apply it to specific text elements like headings, paragraphs, or buttons.
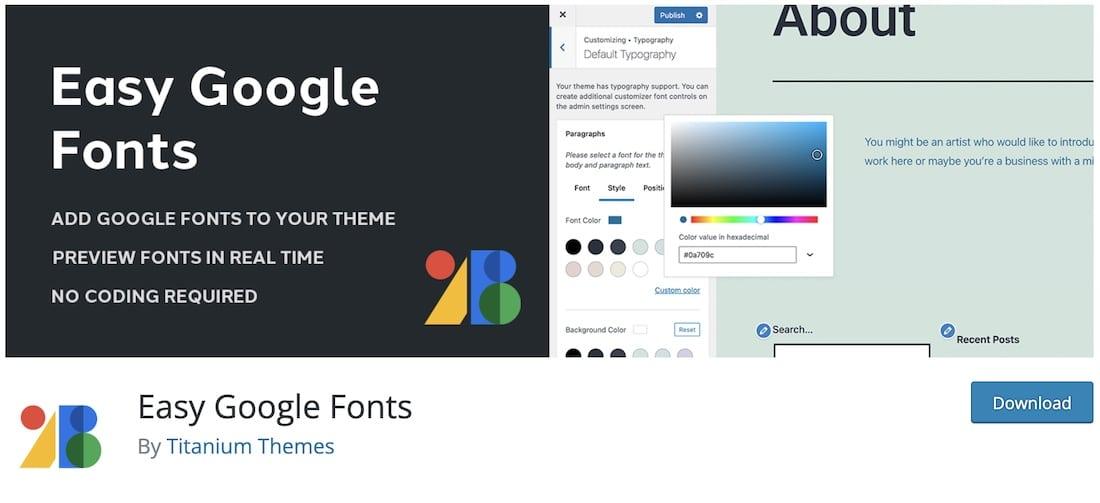
For themes that may not provide extensive customization options, consider utilizing a plugin like Easy Google Fonts. This plugin seamlessly integrates with the WordPress customizer, giving you even more control over your font selections. It allows you to modify font styles directly in the customizer without the need for coding knowledge, making it accessible for everyone.
Here’s a quick reference table summarizing various customization options:
| Customization Option | Description |
|---|---|
| Font Family | Choose a font style from the available options or Google Fonts. |
| Font Size | Set the size of your text for optimal readability. |
| Font Weight | Select between bold, normal, or light weights. |
| Line Height | Adjust the spacing between lines for better text flow. |
Lastly, don’t forget to preview your changes before hitting that publish button! The customizer provides a live preview feature, allowing you to see how your font choices affect your site’s aesthetics in real time. This is crucial for ensuring that your site remains visually appealing while also maintaining its functionality and user experience.
Using the WordPress Customizer to Easily Change Fonts
Changing fonts in WordPress is a breeze, especially with the built-in Customizer feature. This handy tool allows you to make real-time adjustments to your site’s typography without needing to dive into any complicated code. Whether you’re looking to enhance readability, align with your branding, or just want a fresh look, the Customizer puts the power in your hands.
To get started, navigate to your WordPress dashboard, and click on Appearance > Customize. This will open the Customizer interface, where you can see a live preview of your site along with various customization options. Look for the section typically labeled as Typography, Fonts, or something similar, depending on your theme.
Once you’re in the typography settings, you’ll usually have options to change:
- Font Family: Choose from a variety of fonts, including Google Fonts.
- Font Size: Adjust the size for headings, body text, and more.
- Font Weight: Control the thickness of your text for emphasis.
- Letter Spacing: Modify the space between characters for readability.
After making your selections, you can preview the changes immediately on your site. This live feedback makes it easy to experiment and find the perfect combination. Once you’re satisfied, simply click on the Publish button to make your changes live.
Additionally, if your theme supports it, you may find advanced options, such as:
| Advanced Option | Description |
|---|---|
| Text Transform | Change text case (uppercase, lowercase, capitalize). |
| Text Decoration | Add underlines or strikethroughs. |
Don’t forget about mobile responsiveness. The Customizer also allows you to preview how your font changes will look on different devices. Make sure your font choices maintain readability and aesthetic appeal across all screens. A well-designed site is not just about how it looks on desktop; it’s about providing an excellent experience for every user, no matter their device.
How to Implement Google Fonts for a Unique Look
Implementing Google Fonts into your WordPress site can significantly enhance its aesthetic and readability. With just a few simple steps, you can elevate your website’s design to make it stand out from the crowd. Let’s dive into how you can easily incorporate these stylish fonts into your themes!
First, visit the Google Fonts website. Here, you can explore a wide array of font styles. Once you find the perfect font, click on it to open the details page. You’ll see an option to “Select this style.” After selecting, a small panel will pop up at the bottom of the page where you can customize your selection further.
Next, you’ll want to grab the link that Google provides. It will look something like this:
Copy this link as you’ll need it for the next step.
Now, it’s time to add this link to your WordPress site. Navigate to your WordPress dashboard and go to Appearance > Theme Editor. Be cautious here—always back up your theme before making any changes. Look for the section of your theme’s header.php file and paste the link you copied just before the closing tag. If you prefer using a child theme or a custom plugin, you can add it there as well.
After successfully adding the Google Fonts link, it’s time to apply the font styles to your text. You can do this by adding custom CSS. Navigate to Appearance > Customize > Additional CSS and input the following:
body {
        font-family: 'Roboto', sans-serif;
    }
Feel free to replace 'Roboto' with the name of the font you chose from Google Fonts. This will ensure that all body text on your site uses the new font.
To apply different fonts to specific elements, like headings or links, you can expand your CSS further. Here’s a simple breakdown:
| Element | Font Family |
|---|---|
| Headings (h1, h2, h3) | ‘Oswald’, sans-serif |
| Paragraphs | ‘Roboto’, sans-serif |
| Links | ‘Lato’, sans-serif |
Feel free to adjust the font styles according to your design preferences. Remember, consistency is key when it comes to typography.
With these steps, you’ll not only change the look of your WordPress site but also create a unique identity that sets you apart. So, go ahead and experiment with different fonts until you find the perfect combination that resonates with your brand!
Enhancing Your Typography with Free Font Plugins
Typography plays a crucial role in the overall design of your WordPress site. It can influence readability, user engagement, and the overall aesthetic of your content. Fortunately, enhancing your site’s typography doesn’t have to be a daunting task, especially with the availability of free font plugins that can seamlessly integrate into any WordPress theme.
Here are some popular free font plugins that can elevate your site’s typography:
- Google Fonts Typography: This plugin allows you to easily add Google Fonts to your WordPress site. You can choose from a vast library of fonts and customize font sizes, weights, and styles.
- Easy Google Fonts: With this user-friendly plugin, you can add Google Fonts without any coding. It integrates with the WordPress Customizer, allowing you to preview font changes in real-time.
- Use Any Font: If you have a specific font in mind that you want to upload, this plugin lets you use custom fonts by simply uploading the font files directly to your WordPress dashboard.
When selecting a font plugin, consider the following features:
| Plugin Name | Key Features | Best For |
|---|---|---|
| Google Fonts Typography | Wide selection of fonts, customization options | General use, easy integration |
| Easy Google Fonts | Live preview, simple setup | Beginners, non-coders |
| Use Any Font | Upload custom fonts, versatile | Advanced users, specific branding needs |
Once you’ve installed your chosen plugin, customizing your fonts is a breeze. Navigate to the plugin settings in your WordPress dashboard, select the fonts you like, and apply them to different elements of your site, such as headings, body text, and buttons. Experimenting with font pairings can also enhance the visual hierarchy and readability of your content.
Don’t forget to consider the overall theme of your site when choosing fonts. A clean, modern theme might work well with sans-serif fonts, while a more traditional theme could benefit from serif fonts. Ensure that your typography aligns with your brand’s personality and message.
By leveraging these free font plugins, you can transform your website’s typography without the need for advanced design skills. The right fonts can make your content more inviting and easier to read, ultimately leading to a better user experience and increased engagement. Dive in, explore the options, and let your creativity shine!
Making Use of CSS for Advanced Font Customization
When it comes to customizing your WordPress site, one of the most visually impactful changes you can make is altering the font styling. With CSS, you can go beyond basic font choices to create a truly unique and engaging typography that resonates with your brand identity.
First, let’s explore some essential CSS properties that can elevate your font game:
- font-family: Specify the typeface you want to use. Don’t forget to include fallback options to ensure compatibility across different browsers.
- font-size: Control the size of your text. Remember, larger fonts can grab attention, while smaller sizes can convey sophistication.
- font-weight: Adjust the thickness of your font. A bolder font can create emphasis, while lighter weights can add elegance.
- text-transform: Use this property to manipulate the case of your text. All caps can make a statement, while lowercase can feel more casual.
To apply these styles, you can add custom CSS directly in the WordPress Customizer under Appearance > Customize > Additional CSS. Here’s an example of how you can implement some of these properties:
/* Custom Font Styling */
h1, h2, h3 {
    font-family: 'Arial', sans-serif;
    font-weight: bold;
    text-transform: uppercase;
}

p {
    font-family: 'Georgia', serif;
    font-size: 16px;
    line-height: 1.5;
}
Another great technique is to utilize Google Fonts, which provides a vast selection of typefaces. You can easily link to Google Fonts in your theme’s header or directly in the Customizer, and then apply them using the font-family property. Here’s a simple table to illustrate the process:
| Font Name | CSS Link | Usage Example |
|---|---|---|
| Roboto | @import url('https://fonts.googleapis.com/css2?family=Roboto:wght@400;700&display=swap'); | font-family: 'Roboto', sans-serif; |
| Lora | @import url('https://fonts.googleapis.com/css2?family=Lora:wght@400;700&display=swap'); | font-family: 'Lora', serif; |
don’t overlook the importance of accessibility in typography. Ensure that your font choices are legible and maintain sufficient contrast against the background. Using CSS properties like letter-spacing and line-height can also enhance readability, especially for longer texts. By focusing on these aspects, you not only improve the aesthetics of your site but also ensure that your content is accessible to all users.
Best Practices for Font Pairing and Readability
When it comes to design, the relationship between fonts can significantly impact your website’s overall aesthetic and readability. Choosing the right font pairings not only enhances your site’s visual appeal but also ensures that your content is easily digestible for your audience. Here are some best practices to keep in mind when selecting fonts for your WordPress site.
Start with a Hierarchy: Establishing a clear hierarchy is fundamental to effective typography. Utilize different font sizes and weights to guide your readers through the content. For example:
- Headings: Use bold, larger fonts to make headings stand out.
- Subheadings: Choose a slightly smaller font that complements your heading font.
- Body Text: Opt for a clean, legible font that is easy to read in smaller sizes.
Choose Complementary Fonts: Pairing fonts can be an art. The general rule is to combine a serif font with a sans-serif font for contrast. Here are a few successful pairings:
| Serif Font | Sans-Serif Font |
| Georgia | Arial |
| Merriweather | Open Sans |
| Playfair Display | Montserrat |
Limit Your Font Choices: Using too many different fonts can overwhelm your visitors and create a disjointed experience. Stick to two or three fonts for your entire site. This consistency will help establish a more professional look.
Focus on Readability: Always prioritize readability. This means considering factors like:
- Font Size: Ensure your body text is at least 16px for comfortable reading.
- Line Height: A line height of 1.5 times the font size can improve readability.
- Contrast: Choose font colors that stand out against the background for easy visibility.
By implementing these font pairing techniques and focusing on readability, you can create a WordPress site that not only captures attention but also provides a seamless reading experience for your audience. Remember, the right fonts can tell your brand’s story more effectively than words alone.

Tips for Ensuring Your Font Changes Are Mobile-Friendly
When changing fonts in WordPress, it’s crucial to ensure that your selections look great on mobile devices. Here are some practical tips to help you achieve a mobile-friendly design:
- Prioritize Readability: Choose fonts that are easy to read on smaller screens. Sans-serif fonts like Arial or Helvetica tend to be more legible on mobile.
- Test Font Sizes: Make sure your font sizes are responsive. A good rule of thumb is to keep body text between
16pxand20pxfor optimal readability. - Utilize Line Height: Setting an appropriate line height can improve the overall readability of your text. Aim for a line height of
1.5times the font size. - Limit Font Variations: Stick to two or three font styles to maintain a clean and cohesive look. Too many variations can be overwhelming on mobile.
Another critical factor is how your font changes interact with different screen sizes. Consider the following:
| Device Type | Recommended Font Size | Line Height |
|---|---|---|
| Mobile | 16-18px | 1.5 |
| Tablet | 18-20px | 1.6 |
| Desktop | 20-24px | 1.6 |
Don’t forget to utilize CSS media queries to adjust your font settings based on the device screen size. For instance:
@media (max-width: 768px) {
    body {
        font-size: 16px;
        line-height: 1.5;
    }
}
Lastly, make sure to test your changes. Preview your site on different devices or use browser tools to simulate various screen sizes. Ensure that your fonts remain clear and attractive across all platforms. By following these tips, you can create a seamless reading experience that enhances user engagement on your WordPress site.
Testing and Previewing Your Font Changes Before Going Live
When it comes to altering fonts on your WordPress site, making sure everything looks perfect before you hit that publish button is crucial. Here are some effective strategies to test and preview your font changes seamlessly:
Use the WordPress Customizer
The WordPress Customizer is a powerful tool that allows you to make real-time changes to your site’s appearance while providing an instant preview. Here’s how to utilize it for font changes:
- Navigate to Appearance > Customize in your WordPress dashboard.
- Look for the Typography or Fonts section—this may vary based on your theme.
- Adjust the font settings, and watch as the changes reflect in the preview pane on the right side. This feature allows you to experiment with different styles, sizes, and weights without making any permanent changes until you’re satisfied.
Utilize Browser Developer Tools
If you want to dive deeper into customization, browser developer tools can be a game-changer. Here’s how you can use them:
- Right-click on any text element on your website and select Inspect.
- In the developer tools panel that appears, you can modify the CSS styles directly to test out different fonts.
- Once you find a font that you love, make a note of the CSS code and apply it to your theme’s custom CSS section or style sheet.
Set Up a Staging Site
For those who prefer a more controlled environment, setting up a staging site is an excellent way to preview font changes without affecting your live site. Here’s a simple approach:
- Many hosting providers offer one-click staging environments.
- Create a copy of your live site to test out any changes, including fonts.
- This way, you can make adjustments, test for responsiveness, and ensure your typography aligns well with the overall design before pushing changes live.
Gather Feedback
Sometimes, the best way to decide on font styles is to gather a second opinion. You could:
- Share your font choices with friends or fellow bloggers for their input.
- Create a quick poll to see which font resonates most with your audience.
This feedback can be invaluable in helping you choose a font that not only looks good but also appeals to your target audience.
Final Font Check
Before making your final decision, conduct a thorough review by:
- Checking the readability of the chosen font on various devices (desktop, tablet, mobile).
- Ensuring consistency across different pages and post types on your site.
- Verifying that the font complements your brand identity and enhances user experience.
With these strategies in hand, you’ll be well-equipped to test and preview your font changes effectively. Embrace the opportunity to experiment, and don’t settle for anything less than what feels right for your brand!
Final Thoughts: Elevating Your Website’s Aesthetics with the Right Fonts
When it comes to enhancing your website’s overall aesthetics, the choice of font can’t be overstated. Fonts do more than convey text; they convey personality, professionalism, and even emotion. Choosing the right typeface can transform a mundane layout into a visually appealing masterpiece.
Here are some key points to consider when selecting fonts for your WordPress site:
- Readability: Prioritize fonts that are easy to read across various devices. San-serif fonts like Arial or Helvetica are often favored for body text.
- Brand Consistency: Your font choices should reflect your brand’s voice. A tech website might choose sleek, modern fonts, while an artisanal bakery could opt for whimsical, hand-written styles.
- Hierarchy: Use font variations (bold, italic) and sizes to create a visual hierarchy. This helps guide visitors through your content.
- Compatibility: Ensure that your chosen fonts are supported across different browsers and devices to maintain a consistent look.
One effective way to experiment with different fonts is to utilize Google Fonts, which integrates seamlessly with WordPress. With a vast collection to choose from, you can find a variety that resonates with your site’s theme. Here’s a simple table illustrating a few popular choices:
| Font Name | Style | Best For |
|---|---|---|
| Roboto | Modern, Clean | Tech & Business |
| Playfair Display | Elegant, Classic | Fashion & Art |
| Lobster | Bold, Playful | Food & Crafts |
As you revamp your site’s typography, don’t shy away from pairing fonts. Combining a bold header with a lighter body font can create a striking contrast that enhances user engagement. Just remember to keep it harmonious—too many font styles can lead to confusion.
Ultimately, the right font choice is a powerful tool in your design arsenal. It can evoke feelings, guide user behavior, and elevate your website’s professionalism. So take the time to explore and play around with different fonts, and watch as your website transforms into a visually captivating experience. Your visitors will appreciate the effort, and it just might keep them coming back for more!
Frequently Asked Questions (FAQ)
Q&A: How to Change Font in WordPress (Works in All Themes)
Q: Why should I change the font on my WordPress site?
A: Great question! The font you choose can significantly impact your website’s readability and overall aesthetic. A unique font helps you stand out, creates a better user experience, and can even influence how visitors perceive your brand. So, if you’re looking to make your site more engaging and visually appealing, changing the font is a fantastic first step!
Q: Can I change the font on any WordPress theme?
A: Absolutely! The best part about this guide is that it works across all themes. Whether you’re using a free theme or a premium one, you can customize your font easily. This means that no matter what your aesthetic is, you can find the perfect font that complements it!
Q: Do I need to know coding to change the font?
A: Not at all! While having some coding knowledge can be helpful, it’s not necessary for changing fonts in WordPress. We’ll walk you through user-friendly methods that don’t require any coding skills. Seriously, if you can click a few buttons, you can change your font!
Q: What are the methods to change the font in WordPress?
A: There are a few ways to go about it, and I’ll list the most popular ones:
- Using the WordPress Customizer: This built-in tool lets you change your site’s font in just a few clicks. Many themes offer font options here, so check it out!
- Page Builders: If you’re using a page builder plugin like Elementor or Beaver Builder, you can easily change fonts for specific sections without any hassle.
- Google Fonts Plugin: This is a fantastic option for those who want to add a variety of fonts to their site. With this plugin, you can integrate Google Fonts and apply them throughout your theme.
- Custom CSS: For those who are a bit more adventurous, adding custom CSS can give you the most control over your fonts. Don’t worry; we’ll provide examples so you won’t be lost!
Q: Will changing the font affect my site’s loading speed?
A: It’s a common concern! While adding web fonts can slightly impact loading times, using well-optimized fonts like those from Google Fonts can minimize this. Just remember to choose fonts wisely and limit the number of different types you use to keep your site speedy!
Q: Are there any font combinations that work especially well?
A: Yes! Mixing a serif font for headings with a sans-serif font for body text is a classic combo that enhances readability and visual hierarchy. For example, pairing “Merriweather” (serif) with “Open Sans” (sans-serif) creates a beautiful contrast. Keep it simple, and don’t go overboard with too many font styles!
Q: How often should I change my website’s font?
A: While there’s no hard and fast rule, consider refreshing your font every couple of years or whenever you redesign your site. Fonts can become outdated, and keeping your site looking fresh is essential for engaging your audience.
Q: Where can I find inspiration for my font choices?
A: There are tons of resources available! Websites like Google Fonts, Adobe Fonts, and even design inspiration sites like Behance or Dribbble can spark great ideas. Browse through these resources, and you’ll find fonts that resonate with your brand’s personality.
Q: Ready to change your font? What’s the first step?
A: Start by identifying the look and feel you want for your site. Do you want it to be modern, classic, or playful? Once you have that in mind, dive into the WordPress Customizer or your theme options and start experimenting! Remember, this is your chance to express creativity, so have fun with it!
Conclusion
Changing the font on your WordPress site is a simple yet impactful way to enhance your online presence. Whether you’re a novice or an experienced user, you can easily transform your site’s look and feel with just a few clicks. So why wait? Go ahead and give your website the typography makeover it deserves!
To Conclude
And there you have it! Changing the font in WordPress is a straightforward process that can elevate your website’s design and make it more engaging for your visitors. Whether you opt for a simple tweak in the customizer or dive into the world of CSS, you’ve got the tools to make your site truly yours, no matter which theme you’re using.
Remember, first impressions matter, and the right font can set the tone for your entire site. So, don’t hesitate to experiment with different styles until you find the perfect fit. If you found this guide helpful, why not share it with your fellow WordPress enthusiasts? Let’s spread the knowledge!
Now it’s your turn! Go ahead and give your website the makeover it deserves. Happy customizing!

New Providers
Enjoy The Speed Of Downloading & Uploading With 1GBPS Port
Affordable Dedicated Servers & Colocation Services. Services: Dedicated Servers Colocation Private Cabinet Colocation DDoS Protection
Up to 85% off hosting + website builder

We specialize in providing Web hosting reviews. Where you can search for potential hosts.