Looking to streamline communication on your website? Setting up Contact Form 7 is a breeze! In this beginner’s guide for 2024, we’ll walk you through each step, ensuring you can easily create forms that connect you with your visitors. Let’s get started!
How to Set Up Contact Form 7: Beginner’s Guide
Introduction
Hey there, future web wizard! If you’ve been diving into the world of WordPress, you’ve probably heard about Contact Form 7. It’s a fantastic plugin that lets you create beautiful, functional contact forms with just a few clicks. But if you’re new to it, the setup process might feel a bit daunting. Don’t worry, though! You’re not alone. Many beginners find themselves scratching their heads when it comes to integrating forms into their websites. But guess what? In this beginner’s guide for 2024, we’re breaking it down step-by-step. By the end of this article, you’ll have your own contact form up and running, ready to collect messages from visitors like a pro. So, grab your favorite beverage, settle in, and let’s make your website even more engaging—because every great site needs a way for visitors to reach out!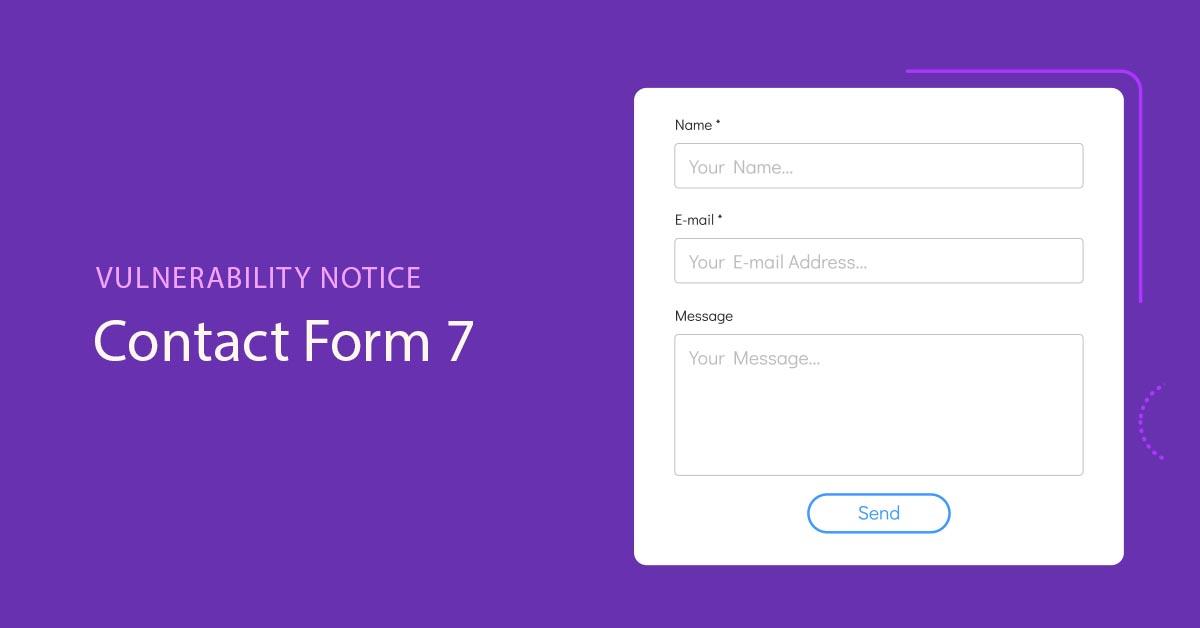
Understanding the Basics of Contact Form 7
When diving into the world of website development, one of the essential tools at your disposal is Contact Form 7. This popular WordPress plugin allows you to create responsive contact forms that seamlessly integrate with your website. Understanding its basics will empower you to enhance user interaction and streamline communication with your visitors.
First and foremost, installing Contact Form 7 is a breeze. Simply head to your WordPress dashboard, navigate to the Plugins section, and search for “Contact Form 7.” Once you find it, click Install Now, and then activate the plugin. After activation, you’ll see a new menu item labeled Contact in your dashboard, where all the magic begins.
Creating a new form is intuitive. Just click on Add New under the Contact menu. Here, you can customize your form by adding various fields such as:
- Text fields for basic information like names and emails.
- Textarea for messages, allowing users to input longer text.
- Checkboxes for users to select options.
- Drop-down menus to create a list of choices.
- File uploads if you want users to attach documents or images.
You can easily adjust settings like email notifications, where you specify who receives the form submissions. This is crucial for timely responses. In the Mail tab, you’ll find options to customize the email subject line, the sender’s address, and even the message body. Utilizing shortcodes, you can pull in the information provided by users directly into your email, ensuring you have all the details you need at a glance.
Don’t overlook the importance of form validation and spam protection. Contact Form 7 comes with built-in features such as CAPTCHA and Akismet integration to help keep your inbox free from spam. You can easily enable these options in the plugin settings to enhance security without burdening your users with cumbersome verification processes.
For further customization, you can style your forms using CSS. If you’re comfortable with a little coding, adding custom styles can enhance the appearance of your forms and make them more aligned with your website’s design. You can target specific classes that Contact Form 7 generates, allowing for a tailored user experience.
Lastly, it’s essential to test your forms after setting them up. Use different devices and browsers to ensure that everything functions correctly and looks good. Always remember that the ultimate goal is to provide a smooth and efficient way for users to get in touch with you, encouraging engagement and interaction on your site.
| Feature | Description |
|---|---|
| Email Notifications | Receive submissions directly to your email. |
| Spam Protection | Integrate CAPTCHA and Akismet to reduce spam. |
| Custom Styling | Use CSS for personalized form appearances. |
| Responsive Design | Ensure forms look great on all devices. |
Why Choose Contact Form 7 for Your Website
When it comes to creating a seamless user experience on your website, having a reliable contact form is essential. Contact Form 7 stands out as a leading choice for many webmasters, and here’s why:
- Easy to Use: Its user-friendly interface allows even beginners to set up forms without any coding knowledge. You can easily add fields, configure settings, and customize the look to fit your brand.
- Flexibility: From simple contact forms to complex multi-step forms, Contact Form 7 can handle them all. You can add various field types like checkboxes, radio buttons, and dropdowns to gather exactly the information you need.
- Customizable: With CSS styling options, you can craft your forms to match your website’s design. Whether you want a minimalist look or something vibrant, the choice is yours.
- Spam Protection: Integrated features like Akismet and CAPTCHA help keep spam at bay, ensuring that your inbox remains clutter-free.
- Multiple Languages: A huge advantage for global businesses is the multilingual support provided by Contact Form 7, making it accessible to a wider audience.
- Seamless Integration: Easily integrates with various third-party plugins and services, enhancing its functionality and allowing for expanded features such as email marketing tools.
Moreover, Contact Form 7 is regularly updated and maintained by a dedicated community. This means you can expect ongoing improvements and support, keeping your forms secure and efficient.
Here’s a quick comparison of Contact Form 7 against other popular form plugins:
| Feature | Contact Form 7 | Competitor A | Competitor B |
|---|---|---|---|
| User-Friendly | ✔️ | ✔️ | ❌ |
| Spam Protection | ✔️ | ✔️ | ✔️ |
| Custom Fields | ✔️ | ✔️ | ✔️ |
| Third-Party Integration | ✔️ | ❌ | ✔️ |
| Cost | Free | Premium | Free |
Choosing Contact Form 7 not only simplifies the process of collecting user information but also integrates well into the WordPress ecosystem. As you set up your contact form, you’ll find that the flexibility and customization options enable you to create forms that truly reflect your brand’s voice.
Ultimately, the decision to use Contact Form 7 boils down to its balance of usability, flexibility, and rich features—all while being completely free. Whether you’re running a blog, an e-commerce site, or a corporate website, Contact Form 7 can cater to your needs without breaking the bank.
Installing Contact Form 7: A Step-by-Step Approach
If you’re ready to enhance your website’s interaction capabilities, installing Contact Form 7 is a fantastic choice. This popular WordPress plugin allows you to create and manage multiple contact forms with ease, ensuring visitors can reach out to you without a hitch. Let’s dive into the straightforward process of installation and setup.
Step 1: Access Your WordPress Dashboard
To get started, log in to your WordPress admin area. This is where all the magic happens, and you’ll be navigating through various settings to install the plugin. Once logged in, locate the sidebar on the left side of the dashboard.
Step 2: Navigate to Plugins
In the sidebar, find the Plugins menu. Click on it to reveal more options, then choose Add New. This will take you to the plugin repository where you can search for Contact Form 7.
Step 3: Search for Contact Form 7
In the search bar at the top right corner, type in “Contact Form 7.” The results will populate below. You’ll notice the plugin at the top of the list, often with high ratings and thousands of installations. Click on the Install Now button to begin the installation process.
Step 4: Activate the Plugin
Once the installation is complete, the Install Now button will change to Activate. Click on it to enable Contact Form 7 on your website. You can now find it listed under the Plugins section within your dashboard.
Step 5: Configure Your First Form
With the plugin activated, you’ll see a new menu item labeled Contact in your dashboard. Click on it, and then choose Add New to create your first contact form. This is where you can customize your fields, such as name, email, message, and more. The user-friendly interface allows you to easily add or remove fields.
Step 6: Customize Form Settings
After creating your form, you can adjust its settings. Ensure to specify the email address where you want to receive messages. You can also set up confirmation messages for users, enhancing their experience. Don’t forget to check the Mail tab to configure these settings. Here’s a quick overview of the essential fields:
| Field | Description |
|---|---|
| To | Your email address for receiving messages |
| From | Sender’s email address |
| Subject | Subject line of the email |
| Message Body | The content of the message sent to you |
Step 7: Embed Your Form on a Page
After saving your form, you’ll receive a shortcode. This code snippet is what you will use to embed the form on any page or post. Simply copy the shortcode and paste it into the editor of the page where you want the form to appear. You can add it to a new page or an existing one.
Step 8: Test Your Form
Before you officially launch your form, it’s crucial to test it. Visit the page where you embedded it, fill out the form as a user would, and submit it. Check that you receive the message in your email. This step ensures that everything is functioning correctly and your visitors can easily get in touch with you.
Now you’re all set to interact with your audience! By following these steps, you’ve not only installed Contact Form 7 but also tailored it to your website’s needs. Enjoy the enhanced communication and engagement it brings to your online presence!
Configuring Your First Contact Form Like a Pro
Creating a contact form could seem daunting at first, but with Contact Form 7, it becomes a breeze. The first step is to install the plugin, which is straightforward. Simply navigate to Plugins > Add New in your WordPress dashboard, search for “Contact Form 7”, and click Install Now. Once installed, activate the plugin to get started.
Now that you have the plugin up and running, it’s time to create your first form. Head over to Contact > Add New. You’ll be greeted with a default form template that includes essential fields like your name, email, subject, and message. However, you can customize it to suit your needs.
To add more fields, you can use the buttons available above the form editor. Here are a few field types you might consider:
- Text Fields: Great for single-line inputs.
- Text Areas: Perfect for longer messages.
- Email Fields: Ensures that the input is a valid email format.
- Checkboxes: Useful for multiple selections.
- Drop-down Menus: Ideal for offering a set of options.
Once you’ve added all the necessary fields, don’t forget to configure the Mail tab. This is where you set the recipient email address, subject line, and the message body format. A well-structured email can significantly enhance the communication process. Here’s a simple table to guide you in setting up your email:
| Field | Details |
|---|---|
| To | Your email address (e.g., [email protected]) |
| From | [your-name] <[your-email]> |
| Subject | New message from [your-name] |
| Message Body | Message: [your-message] |
Additionally, you can utilize the Additional Settings tab for advanced configurations, like setting up autoresponders or enabling spam filters. A simple spam prevention method is to use the honeypot technique, which helps filter out bots.
Don’t overlook the Form Settings, where you can customize messages for successful submissions or errors. Crafting clear and concise messages can enhance user experience, ensuring that your visitors feel confident their messages have been sent successfully.
After you’ve configured your form, make sure to test it. A quick test will help you identify any issues or errors. Check if the emails are delivered correctly and that all fields function as expected. Once everything is working perfectly, embed the form in a post or page using the provided shortcode.
Congratulations! You now have a professional-looking contact form ready to capture inquiries and feedback. By following these steps, you’ve set the foundation for effective communication with your audience.

Essential Fields to Include in Your Contact Form
When setting up your contact form, it’s crucial to include fields that make it easy for users to reach out while also gathering the information you need. Here are some essential fields to consider:
- Name: This is a basic requirement that helps personalize your communications. Make it mandatory to ensure you know who you’re talking to.
- Email Address: A must-have for any contact form. Ensure this field is validated to avoid typos, allowing you to reach back to users effortlessly.
- Subject: This field gives users a chance to specify the reason for their inquiry. It helps you prioritize responses based on urgency or topic.
- Message: Allow users to express their thoughts or questions in detail. An open text area gives them the freedom to provide comprehensive information.
- Phone Number: While optional, providing a phone number field can facilitate quicker responses, especially for urgent matters.
In addition to these basic fields, you might consider including:
- Preferred Contact Method: Allow users to specify how they’d like you to get back to them, whether via email, phone, or even social media.
- Dropdown Menu for Inquiry Type: This can streamline the process for both you and the user. Offer options like ‘Support’, ‘Sales’, or ‘General Inquiry’ to help direct their requests appropriately.
- Attachment Field: If applicable, include an option for users to upload files. This is particularly useful for support queries where screenshots or documents may be required.
| Field Type | Purpose |
|---|---|
| Name | To personalize communication |
| To facilitate follow-up | |
| Subject | To prioritize inquiries |
| Message | To gather detailed information |
| Phone Number | To enable quick responses |
Lastly, don’t forget to integrate a CAPTCHA or similar verification tool to prevent spam. This not only protects your website but also ensures that you are engaging with real users. By carefully selecting the fields you include in your contact form, you’ll create a streamlined process that benefits both your users and your business.
Customizing Form Appearance for Better User Experience
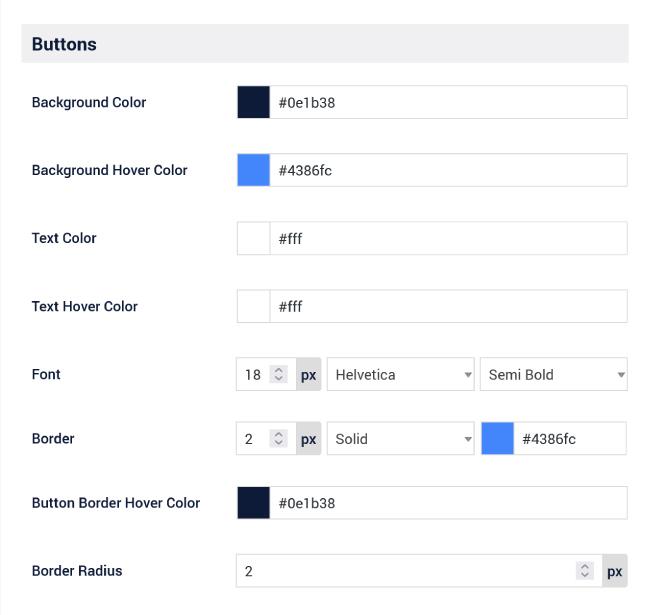
Creating a visually appealing form can significantly enhance user experience and increase submission rates. In this guide, we’ll explore ways to customize the appearance of your Contact Form 7, ensuring it not only functions well but also looks great.
One of the easiest ways to customize your form is through CSS styling. Here are some simple suggestions to get you started:
- Change Font Styles: Use custom fonts to match your website’s brand. You can apply different styles for labels, input fields, and buttons.
- Add Padding and Margins: Enhancing spacing between elements can make your form appear cleaner and more organized.
- Modify Background Colors: A subtle background color can help your form stand out without being overwhelming. Consider using soft shades that align with your overall design.
- Custom Button Styles: Make your submit button pop by adjusting its size, color, and hover effects. This small change can significantly impact user interactions.
To implement these changes, you can add custom CSS in the WordPress Customizer or directly into your theme’s stylesheet. Here’s a quick example:
/* Change the background color of the form */
.wpcf7 form {
    background-color: #f9f9f9;
    padding: 20px;
    border-radius: 5px;
}

/* Style the submit button */
.wpcf7 .wpcf7-submit {
    background-color: #0073aa;
    color: white;
    border: none;
    padding: 10px 20px;
    border-radius: 5px;
    transition: background-color 0.3s ease;
}

.wpcf7 .wpcf7-submit:hover {
    background-color: #005177;
}
Another option to consider is the use of placeholders in your input fields. This technique not only provides guidance but can also enhance visual appeal. By using placeholders, you make it clear what information is required without cluttering the form with additional labels.
| Field Type | Placeholder Example |
|---|---|
| Name | e.g., John Doe |
| e.g., [email protected] | |
| Message | Type your message here… |
Don’t forget about mobile responsiveness! As more users access websites through mobile devices, ensuring your form looks good on all screen sizes is crucial. You can achieve this by using flexible layouts and media queries to adjust styles according to the screen width. For instance, stacking form elements vertically on smaller screens can enhance accessibility and usability.
consider adding visual elements like icons or images next to fields to guide users visually. These small touches can create a friendly, engaging atmosphere, encouraging users to fill out the form. Icons can symbolize actions and reduce the cognitive load on users.
By implementing these customization strategies, you’ll create a contact form that not only meets functional requirements but also enhances overall user satisfaction and engagement. Happy customizing!
Setting Up Email Notifications That Work for You
When you create a contact form using Contact Form 7, setting up email notifications is crucial to ensure you never miss a message from your users. Properly configured email alerts allow you to respond quickly to inquiries, feedback, or potential leads, enhancing your communication and customer service. Let’s dive into how you can tailor these notifications to suit your specific needs.
First, it’s essential to navigate to the Contact Form 7 settings in your WordPress dashboard. From there, locate the form you want to edit and click on it. You’ll see several tabs, but the one that interests us most is the Email tab. Here, you can set up the email address that will receive the notifications.
Consider the following key components when setting up your email notifications:
- To: Enter the email address where you want the notifications sent. This can be a single address or multiple addresses separated by commas.
- From: Choose a recognizable email address to make it easier for recipients to identify who the email is from.
- Subject: Personalize the subject line. Use tags like [your-name] or [your-subject] to create dynamic subjects based on the form responses.
- Message Body: Customize the message body to include all relevant form details. Utilize the various tags provided by CF7 to pull in specific user inputs.
To ensure your emails are received and not lost in spam folders, consider the following best practices:
- Use a professional email address connected to your domain (e.g., [email protected]).
- Keep the subject lines clear and informative.
- Regularly check your spam folder to ensure emails are being delivered correctly.
Want to make your notifications even more effective? Implement conditional notifications based on user inputs. For example, if a user selects urgent in a dropdown, you can set up an email that notifies a specific team member immediately. This is done using the Additional Settings section, where you can write custom scripts to define rules for when and how emails are sent.
Here’s a simple table layout to help you visualize your email settings:
| Field | Example |
|---|---|
| To | [email protected] |
| From | [email protected] |
| Subject | New Message from [your-name] |
| Message Body | You’ve received a new message: [your-message] |
testing is essential. After setting everything up, submit a test entry through your form to ensure that the email notifications are functioning as expected. Check that all the information appears correctly and that the email lands in the right inbox. This step will save you time and headaches later on.
By customizing your email notifications, you create a more efficient workflow that helps you stay engaged with your audience. The clearer and more tailored your notifications are, the better your chances of responding promptly and effectively.
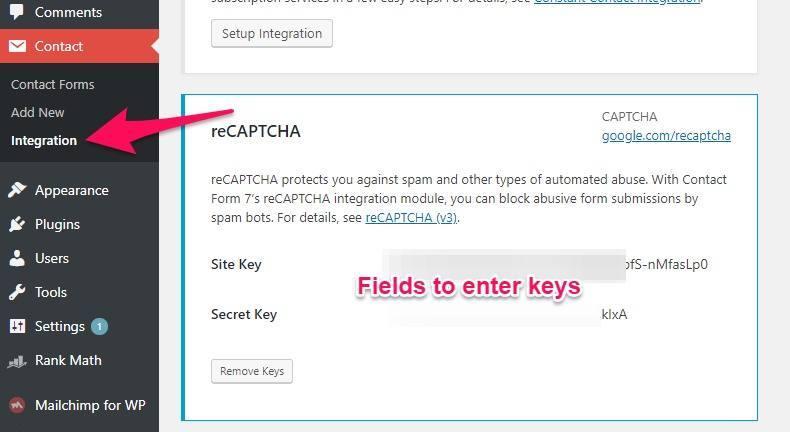
Integrating Captcha for Added Security
To enhance the security of your forms, integrating a Captcha is a highly effective strategy. This functionality acts as a gatekeeper, preventing automated bots from spamming your contact forms and ensuring that only real users can reach you. By implementing a Captcha, you not only protect your data but also maintain the integrity of your communication.
There are various types of Captcha options available, but the two most popular integrations for Contact Form 7 are:
- Google reCAPTCHA: A widely-used option that provides a seamless user experience while effectively blocking spam.
- hCaptcha: An alternative to reCAPTCHA that prioritizes user privacy and security.
To set up Google reCAPTCHA, follow these simple steps:
- Visit the Google reCAPTCHA site and register your site to obtain the necessary keys.
- Choose the type of reCAPTCHA you prefer (v2 or v3) and copy the site key and secret key provided.
- In your WordPress dashboard, navigate to the Contact Form 7 settings.
- Paste the site key and secret key into the respective fields under the “Integration” tab.
- Save your changes, and you’re all set!
For hCaptcha, the setup process is equally straightforward:
- Visit the hCaptcha site and sign up for an account to receive your site key and secret key.
- Access the Contact Form 7 settings in your WordPress dashboard.
- Navigate to the “Integration” tab, and enter the site key and secret key.
- Save the changes to activate hCaptcha on your forms.
Once integrated, both Captcha options will add a verification step to your forms. This not only deters spam submissions but also provides a sense of security to your visitors, reassuring them that their information is safe. You can easily customize the Captcha settings from the Contact Form 7 interface, allowing you to adjust according to your preference.
Here’s a quick comparison table to help you decide which Captcha might suit your needs better:
| Feature | Google reCAPTCHA | hCaptcha |
|---|---|---|
| User Experience | Simple and familiar | Privacy-focused but slightly different |
| Cost | Free | Free with premium options |
| Customization | Limited | More customization options |
By integrating Captcha into your Contact Form 7 setup, you significantly bolster your website’s defenses against unwanted submissions. Choosing the right Captcha solution can enhance user experience while ensuring that your forms remain functional and secure. Ultimately, a small step in integrating Captcha can lead to larger benefits for your site’s security and user trust.
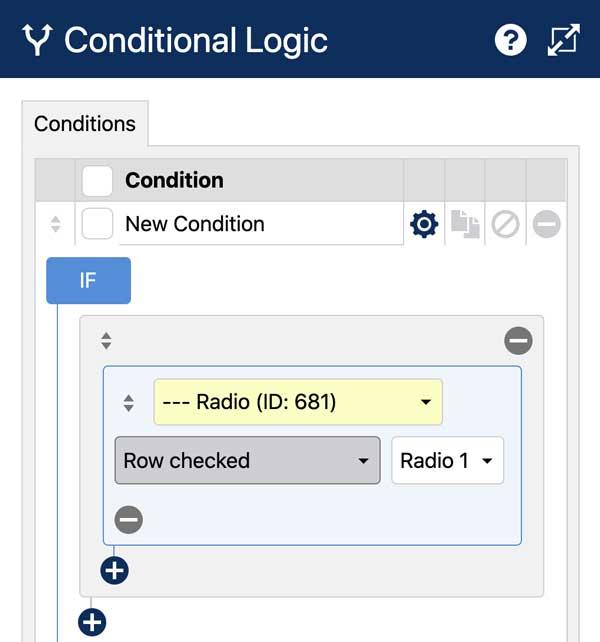
Exploring Advanced Features: Conditional Logic and More
As you dive deeper into setting up your contact forms, understanding conditional logic becomes essential. This feature allows you to create a more personalized experience for your users by showing or hiding fields based on their responses. Imagine a form that dynamically adapts as users fill it out, making it easier for them to provide the information you need while enhancing their overall experience.
To implement conditional logic in Contact Form 7, you’ll need to install an additional plugin, such as Contact Form 7 Conditional Fields. This extension enables you to add rules that dictate which fields should appear based on previous answers. Here’s a quick overview of how to set it up:
- Install the plugin: Go to your WordPress dashboard, navigate to Plugins, and search for the Conditional Fields plugin. Install and activate it.
- Edit your form: In the Contact Form 7 interface, select the form you want to edit.
- Add conditional logic: Use the new fields provided by the plugin to create rules that determine when specific fields should be displayed.
For instance, let’s say you have a form that collects information for a newsletter. If a user selects “Yes” for receiving promotional emails, you could show fields asking for additional preferences like content type or frequency. This not only helps gather relevant information but also shows users that you value their choices.
Another advanced feature worth exploring is form submissions. By integrating with email marketing services or CRM tools, you can automatically send submitted form data directly to your preferred platform. This seamless integration saves time and ensures that no lead falls through the cracks.
Consider using an HTML table to visualize how various plugins or integrations can enhance your forms:
| Plugin/Integration | Benefits | Best For |
|---|---|---|
| Contact Form 7 Conditional Fields | Dynamic fields based on user response | Personalized user experience |
| Zapier Integration | Automated workflows | Connecting multiple apps |
| Mailchimp for WordPress | Directly add users to mailing lists | Email marketing |
By leveraging these advanced features, you not only streamline your data collection process but also enhance user engagement. Remember, a well-designed form can significantly impact conversion rates, so don’t hesitate to explore various configurations that best suit your needs. Play around with different fields, test out the conditional logic, and observe how your users interact with the form.
Ultimately, the goal is to create a form that feels intuitive and tailored to your audience. With the right tools and strategies in place, you can transform a simple contact form into a powerful communication tool that not only gathers information but also builds relationships with your visitors.
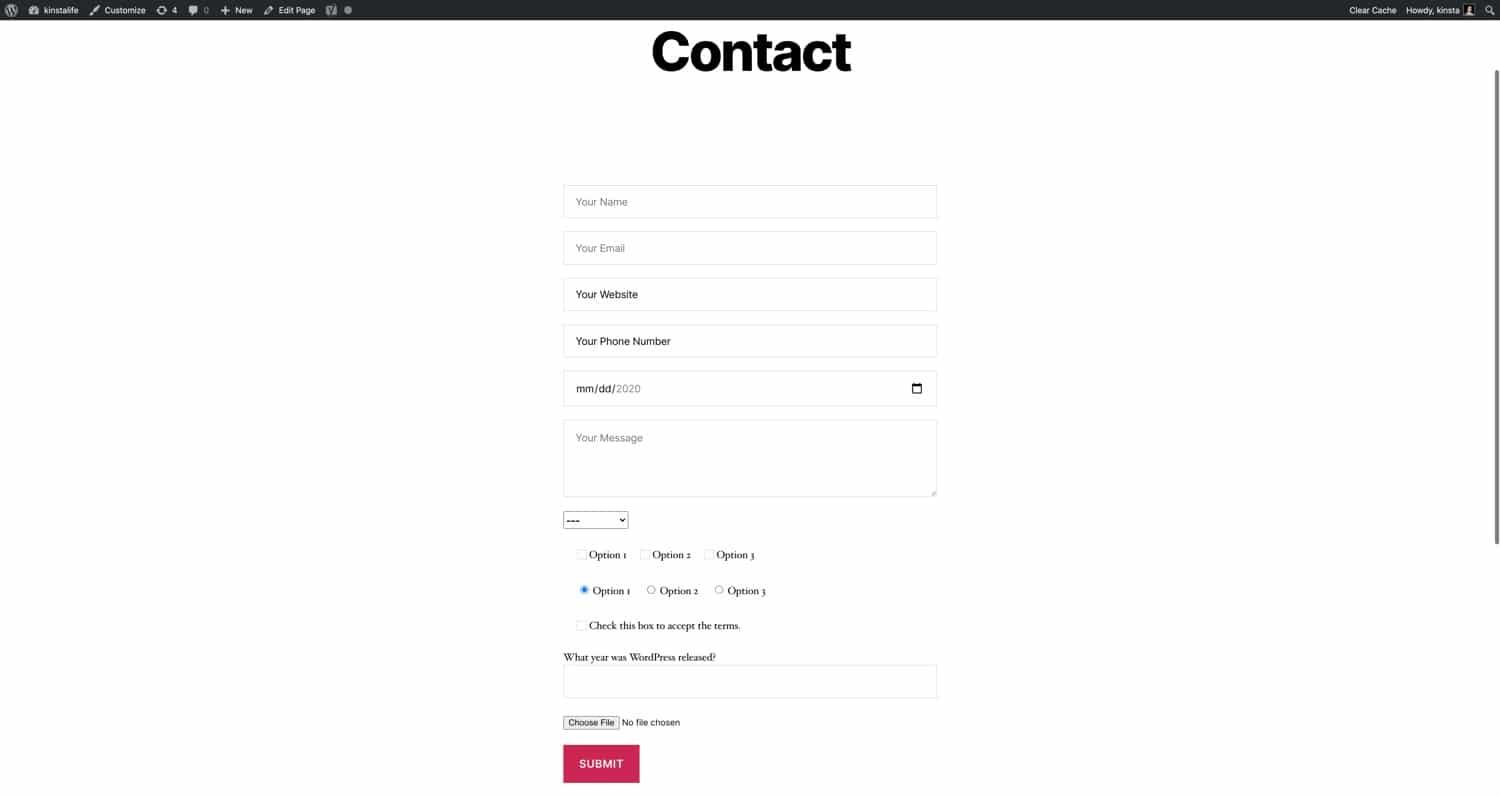
Troubleshooting Common Issues with Contact Form 7
Even with a robust plugin like Contact Form 7, issues can arise that may prevent your forms from working correctly. Let’s dive into some common problems and their solutions to ensure your contact forms are functioning smoothly.
Form Not Sending Emails
This is perhaps the most common issue users face. If your form submissions aren’t arriving in your inbox, consider the following:
- Check Spam Folder: Sometimes, emails get filtered into spam. Always check this folder first.
- Correct Email Address: Ensure that the email address in the “To” field is correct.
- Use SMTP Plugin: If you’re still having issues, consider using an SMTP plugin like WP Mail SMTP to enhance email deliverability.
Validation Errors
If users are receiving validation errors when submitting the form, it could be due to a few reasons:
- Required Fields: Ensure that all required fields are filled out correctly.
- Format Issues: Check if fields like email and URL follow the proper format; mismatches can trigger validation errors.
- JavaScript Conflicts: Sometimes, themes or other plugins can interfere. Try disabling other plugins to see if the issue persists.
Styling and Layout Problems
It’s not uncommon to encounter layout issues, especially if you’re using a custom theme. Here are a few tips:
- Custom CSS: Use custom CSS to adjust the styles of your form. Inspect elements using browser tools to target specific components.
- Theme Compatibility: Make sure your theme is compatible with Contact Form 7. Consider switching to a standard theme to test this.
- Responsive Design: Always check your form on mobile devices. Use media queries to adjust styles for different screen sizes.
Spam Submissions
Spam is another common issue, but you can implement measures to combat it:
- Use reCAPTCHA: Integrate Google reCAPTCHA to verify that submissions are from real users.
- Honeypot Fields: Add hidden fields to catch automated spam bots. If these fields are filled, you can discard the submission.
- Form Limitations: Limit the number of submissions from the same IP address within a certain timeframe.
| Issue | Potential Solution |
|---|---|
| Form Not Sending Emails | Check spam folder and email settings |
| Validation Errors | Ensure required fields are completed |
| Styling Problems | Use custom CSS and check theme compatibility |
| Spam Submissions | Implement reCAPTCHA and honeypot fields |
By understanding these common issues and their solutions, you can ensure your Contact Form 7 is functioning optimally. Regularly check your forms and make adjustments as needed to keep your communication channels open and effective.
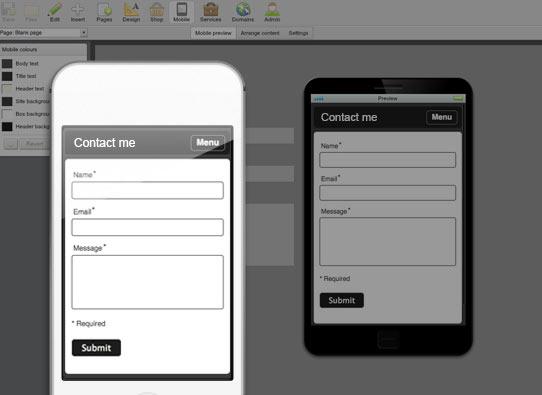
Optimizing Your Contact Form for Mobile Users
In today’s digital landscape, ensuring that your contact form is mobile-friendly is no longer an option but a necessity. With more users accessing websites through their smartphones, it’s crucial to create a seamless experience that encourages interaction. Here are some strategies to enhance your contact form for mobile users:
- Responsive Design: Make sure your contact form adjusts to fit any screen size. Utilizing a responsive design approach will ensure that labels, input fields, and buttons remain user-friendly on mobile devices.
- Keep It Simple: Limit the number of fields to the essentials. A shorter form reduces friction and makes it easier for users to submit their information. Consider using dropdowns, checkboxes, or radio buttons where applicable to simplify the process.
- Large Touch Targets: Finger taps are less precise than mouse clicks, so increase the size of buttons and form fields. Ensure that touch targets are at least 44×44 pixels to enhance usability.
Another important factor is the loading speed of your contact form. A slow loading time can deter users from reaching out. Here are a few tips to improve performance:
- Minimize Plugins: While plugins can offer additional features, too many can slow down your site. Only use essential plugins that enhance your contact form functionality.
- Optimize Images: Ensure any images used within or around your form are optimized for the web. Use file formats that maintain quality while keeping file sizes low.
- Use Asynchronous Loading: Load scripts asynchronously to avoid blocking rendering on your page. This helps your contact form load faster, leading to higher user engagement.
| Element | Mobile Optimization Tip |
|---|---|
| Form Fields | Use larger touch targets and avoid complex input types. |
| Buttons | Ensure buttons are prominent and easy to tap. |
| Labels | Use clear, concise labels to guide users. |
| Feedback Messages | Provide instant feedback after form submission to reassure users. |
Lastly, consider the overall user experience by testing your form across different devices and screen sizes. This will help identify any issues that may arise and ensure a smooth interaction for all users. Tools like Google’s Mobile-Friendly Test can provide valuable insights into how well your contact form performs on mobile devices.
By prioritizing mobile optimization, you create a more accessible and engaging contact form. This not only enhances user satisfaction but can also lead to increased conversions and improved relationships with your audience.

Best Practices for Testing Your Contact Form
Testing your contact form is a crucial step to ensure it performs seamlessly and meets user expectations. Here are some best practices to consider:
- Use Multiple Email Addresses: Test the form with different email addresses to verify that submissions reach the intended recipients. This helps confirm that your email settings are correct.
- Check Required Fields: Make sure all mandatory fields are functioning properly. Attempt to submit the form with missing information and ensure the correct error messages are generated.
- Test with Various Input Types: Enter different formats of data (e.g., text, numbers, special characters) to see how the form handles them. This will help identify any potential issues with data validation.
Another valuable practice is to check the form responsiveness. Ensure it displays correctly on various devices, including desktops, tablets, and smartphones. A responsive design enhances user experience, reducing the likelihood of abandoned submissions.
Consider implementing automated tests as part of your quality assurance process:
| Test Type | Description |
|---|---|
| Functional Testing | Verify that all form fields work as intended. |
| Usability Testing | Evaluate how easy it is for users to navigate and complete the form. |
| Performance Testing | Check the form’s speed and responsiveness under various conditions. |
Don’t forget about spam protection. Implementing CAPTCHA or honeypot techniques helps minimize unwanted submissions. After setting this up, test the form again to ensure legitimate submissions are still being received.
consider reviewing the thank you message users receive after submitting the form. This confirmation not only reassures users that their message was sent successfully but also serves as an opportunity to encourage further engagement, such as following your brand on social media.

Enhancing Functionality with Add-Ons and Integrations
To truly unlock the potential of Contact Form 7, consider enhancing its functionality through various add-ons and integrations. By leveraging these tools, you can create a more robust and user-friendly experience for both you and your visitors. The ability to customize forms, manage submissions, and integrate with third-party services can significantly elevate your site’s capabilities.
Here are some popular add-ons you might want to explore:
- Contact Form 7 Multi-Step Forms: This add-on breaks down lengthy forms into manageable steps, improving user experience and boosting completion rates.
- Contact Form 7 Conditional Fields: It allows you to show or hide fields based on user selections, making your forms dynamic and tailored to individual needs.
- Contact Form 7 PayPal: Integrate payment options directly within your forms, enabling smooth transactions without needing to redirect users elsewhere.
- Flamingo: This add-on stores submitted messages in your WordPress database, making it easy to manage and review all incoming inquiries.
Integrating Contact Form 7 with popular CRM and email marketing platforms can streamline your workflow. Consider the following integrations:
- Mailchimp: Automatically add form submissions to your Mailchimp lists, allowing for efficient email marketing campaigns.
- Zapier: Connect your form submissions to over 2,000 web applications, automating tasks and saving you time.
- Slack: Receive instant notifications in your Slack channel for new form submissions, keeping your team in the loop.
| Integration | Benefits |
|---|---|
| Mailchimp | Effortless email list management |
| Zapier | Automation across multiple apps |
| Slack | Real-time alerts for submissions |
Customizing your forms further with CSS can enhance their appearance and align them with your website’s branding. Contact Form 7 allows you to add custom classes to elements, enabling you to style them directly from your theme’s CSS file. This gives you full control over how your forms look, making them visually appealing and consistent with your overall design.
Lastly, don’t overlook the importance of user experience. Utilize tools like Google reCAPTCHA to prevent spam submissions and ensure that your forms are secure. Additionally, consider implementing AJAX submission to improve loading times and avoid page refreshes, creating a smoother experience for your users.
By exploring these add-ons and integrations, you can not only enhance the functionality of Contact Form 7 but also provide a seamless experience for your users. The right combination of tools will help you gather the information you need while keeping your audience engaged and satisfied.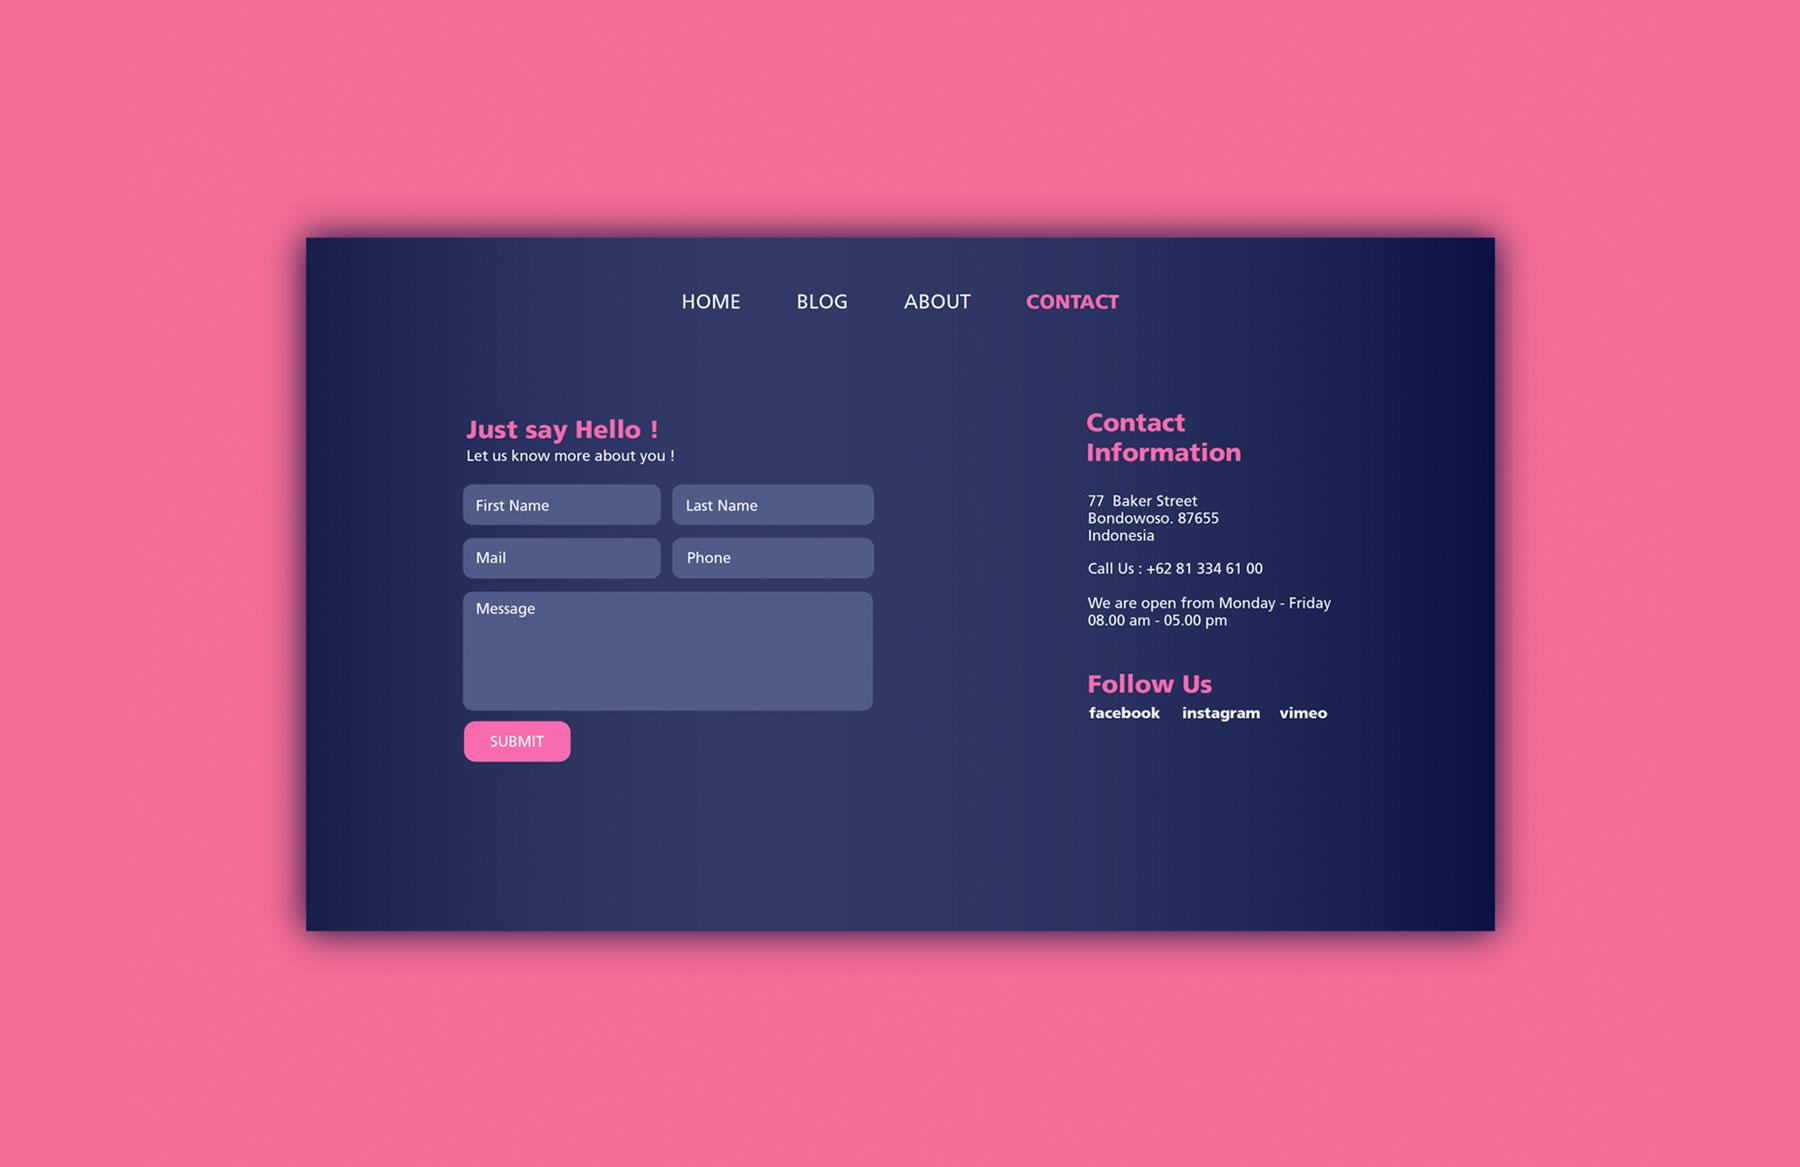
Final Touches: Making Your Contact Form Stand Out
Enhancing Your Contact Form’s Appeal
Once you have your contact form set up, the next crucial step is to ensure it grabs attention and encourages users to engage. Here are some effective strategies to make your form not just functional, but inviting:
- Choose the Right Color Scheme: Colors evoke emotions. Utilize contrasting colors that align with your brand identity. For example, if your brand uses blues and greens, consider a bright orange button to stand out.
- Utilize Eye-Catching Fonts: Typography can greatly influence readability and aesthetics. Select a font style that is not only visually appealing but also easy to read on all devices.
- Add a Personal Touch: A simple message or tagline above your form can make visitors feel more connected. Consider phrases like “We’d love to hear from you!” or “Your feedback matters!”
Additionally, incorporating visual elements can further enhance the user experience. Here are a few ideas:
- Incorporate Icons: Small icons next to input fields can make your form more engaging and can visually guide users through the process.
- Use Background Images: A subtle, relevant background image can add depth and interest to your form, but ensure it doesn’t distract from the text.
- Responsive Design: Your form should look great on both desktop and mobile devices. Test it on multiple screen sizes to ensure functionality and aesthetics are on point.
To further assist in conversion, consider the placement and structure of your form. Positioning is key. Here’s what to keep in mind:
| Position | Effectiveness |
|---|---|
| Top of the Page | High visibility, encourages immediate interaction. |
| End of Blog Posts | Captures interest after engaging content. |
| Sidebar | Consistent presence, encourages continuous engagement. |
don’t forget about the power of feedback. After submission, a friendly thank-you message or confirmation can reassure users that their input has been valued. Consider using:
- Custom Redirects: Send users to a thank-you page or a special offer to keep them engaged.
- Email Notifications: Keep users in the loop about what happens next, reinforcing their choice to reach out to you.
By implementing these final touches, your contact form will not only stand out but will also drive more engagement and foster a stronger connection with your audience.
Frequently Asked Questions (FAQ)
Q&A: How to Set Up Contact Form 7: Beginner’s Guide for 2024
Q: What is Contact Form 7, and why should I use it?
A: Great question! Contact Form 7 is a popular WordPress plugin that allows you to create and manage multiple contact forms. It’s super user-friendly and flexible, making it ideal for beginners. Plus, it’s completely free! Using it can help you improve communication with your website visitors, gather feedback, or even process inquiries smoothly. Trust me, having a contact form can make a world of difference for any website.
Q: Is it really easy to set up? I’m not very tech-savvy.
A: Absolutely! Setting up Contact Form 7 is a breeze, even if you’re new to WordPress. The interface is straightforward, and with this guide, you’ll be up and running in no time. Just follow the steps, and soon you’ll have a professional-looking contact form that enhances user engagement on your site.
Q: What do I need to get started with Contact Form 7?
A: You’ll need a WordPress website (of course!), and then you can simply install the Contact Form 7 plugin via your WordPress dashboard. Once that’s done, you’re ready to customize your form! It’s that simple.
Q: Can I customize the contact form?
A: Yes, you can! Contact Form 7 is all about flexibility. You can add or remove fields, change labels, and even customize the email notifications you receive. Want a dropdown menu for your users? You got it! The customization options are extensive, allowing you to create a form that fits your specific needs perfectly.
Q: What about spam? Will my form be safe?
A: Spam can be an issue, but Contact Form 7 has built-in features to combat it. You can integrate Google reCAPTCHA to help prevent spam submissions. It’s a straightforward process and adds an extra layer of security, so your inbox stays clean and spam-free.
Q: How can I ensure that my form looks good on all devices?
A: That’s a smart consideration! Many WordPress themes are designed to be responsive, meaning they automatically adjust to fit different screen sizes. Contact Form 7 forms are generally responsive too, but you can always use custom CSS for further adjustments if needed. Don’t worry; it won’t require a degree in web design—just a bit of trial and error!
Q: What if I run into problems while setting it up?
A: No need to worry! There’s a vast community of users and tons of resources available. The Contact Form 7 documentation is very comprehensive, and you can find plenty of tutorials online. Plus, you can always reach out to forums or the WordPress support community for help. You’re definitely not alone in this!
Q: Why should I read your beginner’s guide?
A: Our beginner’s guide is tailored specifically for 2024, so it includes the latest features, tips, and best practices to help you set up Contact Form 7 effortlessly. We break everything down into easy-to-follow steps, making the whole process enjoyable. By the end, you’ll feel confident and empowered to create a contact form that truly reflects your brand. Plus, who doesn’t love a solid resource that saves you time and hassle?
Q: Ready to get started?
A: Absolutely! With our guide, you’ll be creating your very own contact form in no time. So grab a cup of coffee, dive in, and let’s make your website more engaging together! Your visitors will appreciate the ease of reaching out to you.
In Conclusion
Wrapping It Up: Your Path to Effortless Communication!
And there you have it—setting up Contact Form 7 is not just a task; it’s your gateway to better communication with your audience in 2024! Whether you’re a small business owner, a blogger, or someone looking to streamline their communication, mastering this nifty plugin can make all the difference.
Remember, the first step is often the hardest, but now that you’ve got the inside scoop, you’re well-equipped to create forms that suit your needs perfectly. Don’t hesitate to experiment with the customization options and explore the plethora of extensions available. Your forms can be as unique as your brand!
So, what are you waiting for? Dive into the world of Contact Form 7 and start connecting with your audience today. If you found this guide helpful, share it with your friends or colleagues who might also benefit. After all, nothing beats the joy of seamless communication!
Happy form building!


