Installing a WordPress plugin is a breeze, even for beginners! Just think of plugins as tools that enhance your site’s functionality. Ready to supercharge your website? Let’s dive into this simple guide and unlock new features with just a few clicks!
How to Install a WordPress Plugin (Beginner’s Guide)
How to Install a WordPress Plugin: A Beginner’s Guide
Have you ever stumbled upon a website that had all the features you wished your own site had? You’re not alone! Many of us dream about transforming our online presence into something extraordinary, but it often feels daunting—especially if you’re a beginner. The good news is, there’s a secret weapon at your disposal: WordPress plugins. These handy tools can enhance your website’s functionality, improve user experience, and even boost your SEO—all with just a few clicks!
In this beginner’s guide, we’ll walk you through the simple steps to install a WordPress plugin, demystifying the process and empowering you to take your website to the next level. Whether you want to add social sharing buttons, optimize your site for search engines, or create stunning galleries, plugins are your go-to solution. Ready to dive in and unlock the full potential of your WordPress site? Let’s get started!

Understanding the Importance of WordPress Plugins
When it comes to enhancing your WordPress site, plugins play a crucial role. They are like the special ingredients in a recipe, transforming a basic dish into something extraordinary. With thousands of plugins available, each designed to add functionality, improve design, or optimize performance, understanding their importance can significantly impact your website’s success.
WordPress plugins can help you:
- Extend Functionality: Want to add a contact form, Instagram feed, or an online store? Plugins allow you to do just that without needing to write a single line of code.
- Improve SEO: Certain plugins are specifically designed to help you optimize your website for search engines, making it easier for potential visitors to find you.
- Enhance Security: With the rise of cyber threats, security plugins are vital in protecting your website from vulnerabilities and attacks.
- Boost Performance: Speed is crucial for user experience. Plugins that optimize images or cache data can significantly speed up your site.
- Facilitate Backup and Recovery: Regularly backing up your site is essential. Plugins can automate this process, ensuring your data is safe in case of emergencies.
Choosing the right plugins means you can tailor your site to meet your specific needs. However, it’s important to remember that with great power comes great responsibility. Not all plugins are created equal; some may conflict with others or slow down your site if not chosen wisely. Researching and reading reviews can save you from unwanted headaches.
Additionally, the right combination of plugins can lead to improvements in your site’s overall user experience. When visitors find it easy to navigate, interact, and access information, they are more likely to stay longer and return in the future. Think of plugins as tools that empower you to create a unique experience that aligns with your brand.
Here’s a quick look at some popular types of plugins that can enhance your WordPress site:
| Plugin Type | Example | Benefit |
|---|---|---|
| SEO Plugins | Yoast SEO | Improves search engine visibility. |
| Security Plugins | Wordfence | Protects against hacks and malware. |
| Backup Plugins | UpdraftPlus | Automates website backups. |
| Performance Plugins | WP Rocket | Boosts site speed and performance. |
| E-commerce Plugins | WooCommerce | Transforms your site into an online store. |
Ultimately, the right plugins can help you achieve your website goals, whether that’s generating leads, providing valuable content, or building a community. By understanding their importance, you can make informed choices that set your site up for long-term success.
Finding the Right Plugin for Your Needs
Choosing the perfect plugin for your WordPress site can feel daunting, especially with thousands available at your fingertips. However, understanding your specific needs is crucial in narrowing down your options effectively. Start by identifying the primary functionalities you wish to enhance. This could be anything from improving SEO, creating contact forms, or speeding up your website.
Once you’ve established your requirements, consider the following factors:
- Compatibility: Ensure the plugin is compatible with your current WordPress version.
- Reviews and Ratings: Look for plugins with high ratings and positive reviews from users who have similar needs.
- Support and Updates: Opt for plugins that are frequently updated and have a responsive support team.
- Active Installations: A plugin with a large number of active installations usually indicates reliability.
Another helpful approach is to explore the WordPress Plugin Repository. You can filter plugins by categories or search for specific keywords. This allows you to discover the most popular and highly recommended options tailored to your requirements. Don’t overlook the importance of checking the plugin’s documentation as well; a well-documented plugin can save you time and headaches in the long run.
Here’s a quick comparison table of popular plugin types:
| Plugin Type | Top Plugin Examples | Key Features |
|---|---|---|
| SEO | Yoast SEO, All in One SEO Pack | On-page analysis, XML sitemaps, social media integration |
| Security | Wordfence, Sucuri Security | Firewall protection, malware scanning, login security |
| Performance | W3 Total Cache, WP Super Cache | Page caching, minification, CDN support |
| Contact Forms | Contact Form 7, WPForms | Drag-and-drop builder, spam protection, email notifications |
Lastly, don’t hesitate to test multiple plugins if necessary. Sometimes the first plugin you try may not meet all your expectations. Experimenting can help you find the best fit for your website’s unique needs. Just remember to keep backup copies of your site before making significant changes, so you can always revert if needed.

Preparing for Installation: What You Should Know
Before diving into the installation process of a WordPress plugin, there are several crucial aspects you should be aware of. Understanding these elements will not only streamline your experience but also enhance the performance and security of your website.
Compatibility is Key: Always check if the plugin is compatible with your current version of WordPress. Incompatible plugins can cause your site to crash or lead to performance issues. Visit the plugin’s page in the WordPress Plugin Directory to find detailed compatibility information.
Read Reviews and Ratings: While considering a plugin, take the time to read user reviews and ratings. This feedback can provide insight into the plugin’s reliability and any potential issues other users have encountered. A plugin with a history of positive reviews is often a safer choice.
Backup Your Site: Before installation, it’s wise to backup your website. This precaution ensures you can restore your site to its previous state if anything goes awry during the plugin installation. You can use plugins like UpdraftPlus or BackupBuddy for this purpose.
| Backup Plugin | Features | Price |
|---|---|---|
| UpdraftPlus | Cloud backup, easy restoration | Free / Premium $70 |
| BackupBuddy | Scheduled backups, migration tools | Starting at $80 |
Check Support and Updates: An essential part of plugin preparation is ensuring the plugin is actively supported and regularly updated. Active support channels, such as forums or dedicated support teams, can be invaluable for troubleshooting any issues that arise post-installation.
Consider Your Needs: Lastly, evaluate what functionalities you need from the plugin. With countless options available, it’s easy to get overwhelmed. Focus on plugins that fulfill specific needs without adding unnecessary bloat to your site.
How to Install a Plugin from the WordPress Dashboard
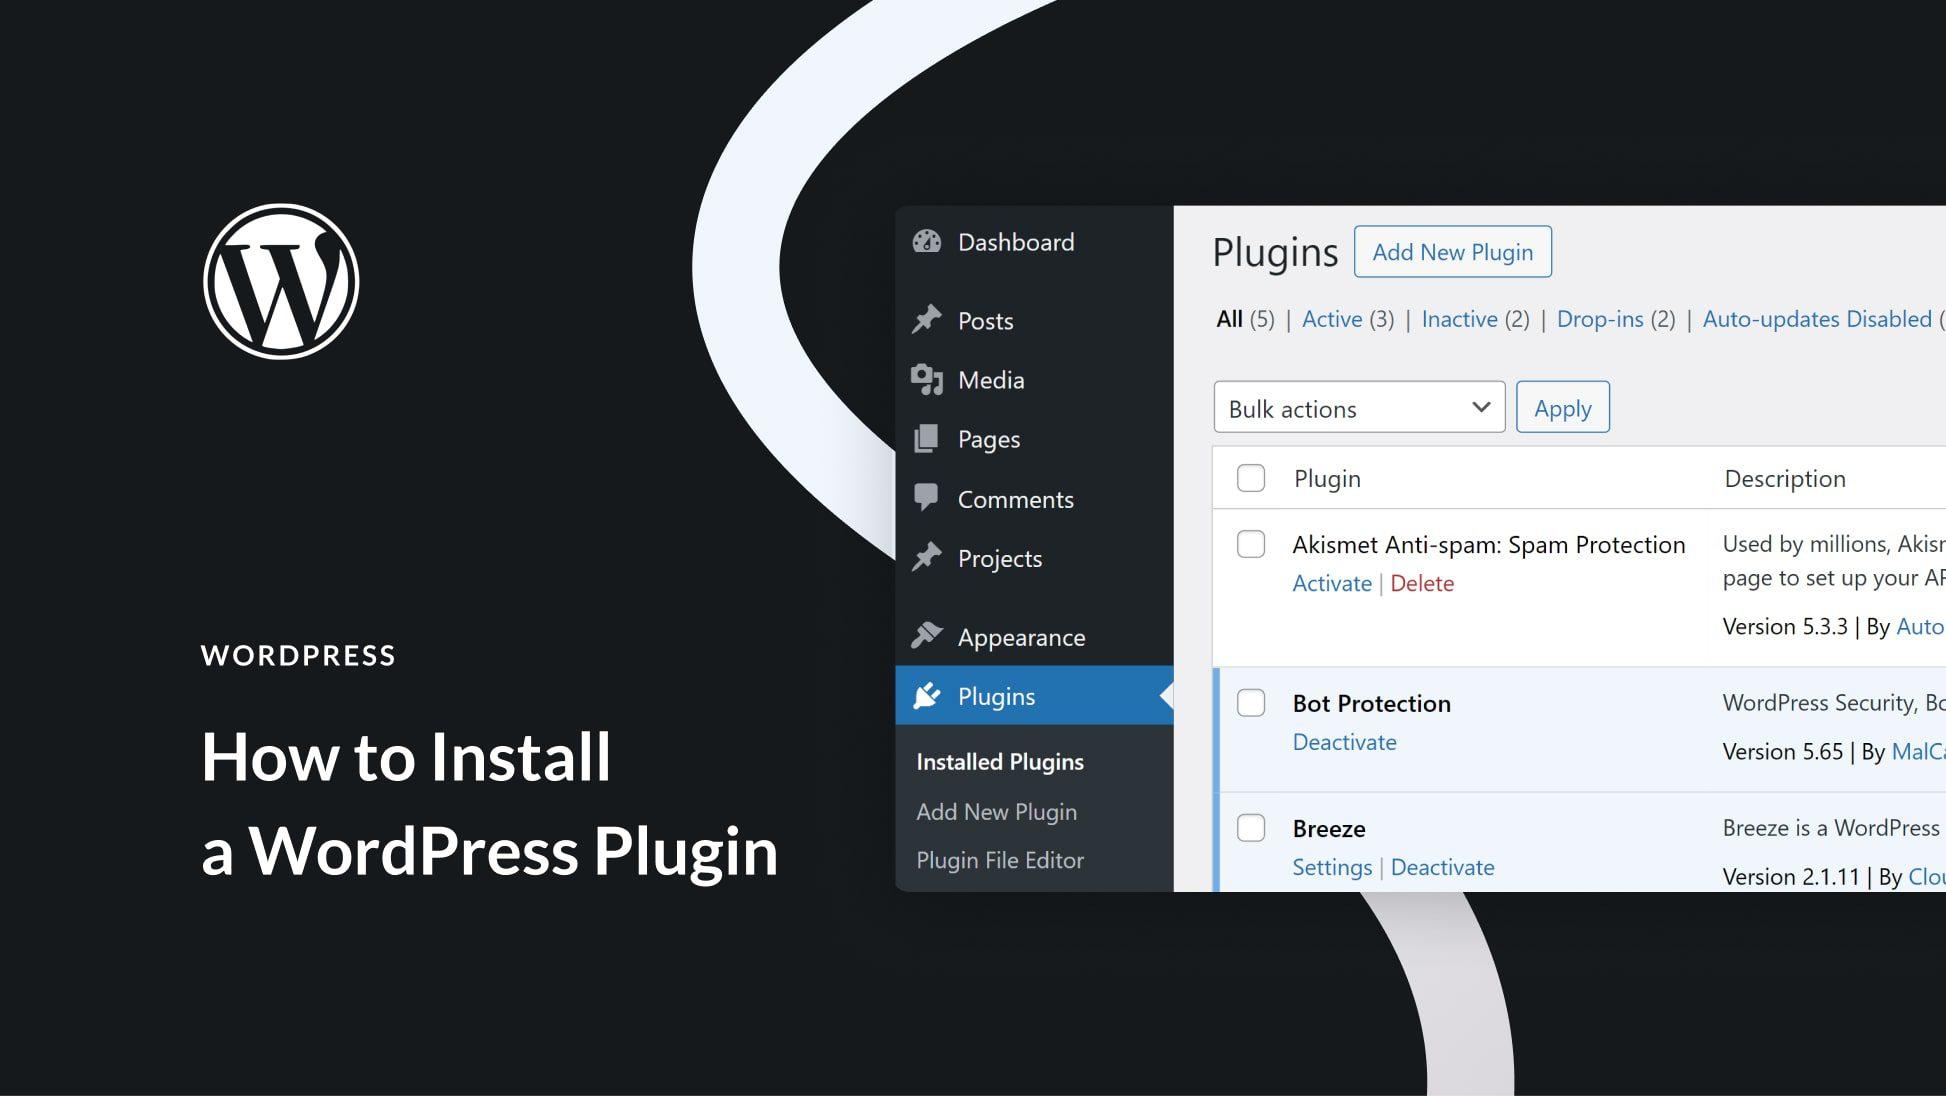
First, log in to your WordPress admin dashboard. Once you’re logged in, navigate to the Plugins section located on the left-hand sidebar. Click on Add New, and you’ll be greeted with a page showcasing popular, recommended, and featured plugins. This area is not just a browsing space; it’s your gateway to a vast library of tools that can elevate your site.
To find a specific plugin, utilize the Search Plugins box at the top right corner of the screen. Simply type in the name or a keyword related to the functionality you’re seeking. As you type, you’ll notice relevant plugins appearing in real-time. This makes it easy to explore options tailored to your specific needs.
Once you’ve identified the plugin you wish to install, click the Install Now button next to its name. The installation process will commence immediately, and you’ll see the button change to Installing…. Once the installation is complete, the button will transform into an Activate button. Click on it to enable the plugin on your site.
After activation, many plugins will prompt you to configure settings or guide you through the setup process. Look out for a new menu item added to your WordPress dashboard related to the plugin. This is where you can customize the plugin’s features to suit your preferences.
It’s important to keep your plugins updated, as this not only ensures you have access to the latest features but also maintains the security of your site. You can manage your installed plugins by going back to the Plugins section of your dashboard. Here, you’ll see a list of all active, inactive, and recently added plugins.
| Plugin Name | Functionality | Rating |
|---|---|---|
| Yoast SEO | Search Engine Optimization | ⭐️⭐️⭐️⭐️⭐️ |
| Wordfence | Website Security | ⭐️⭐️⭐️⭐️⭐️ |
| WooCommerce | eCommerce Solutions | ⭐️⭐️⭐️⭐️ |
| Contact Form 7 | Form Creation | ⭐️⭐️⭐️⭐️⭐️ |
Now you’re ready to explore and implement the endless possibilities that plugins offer! Remember, the right plugin can not only enhance user experience but also contribute to the overall success of your site. Happy plugin hunting!
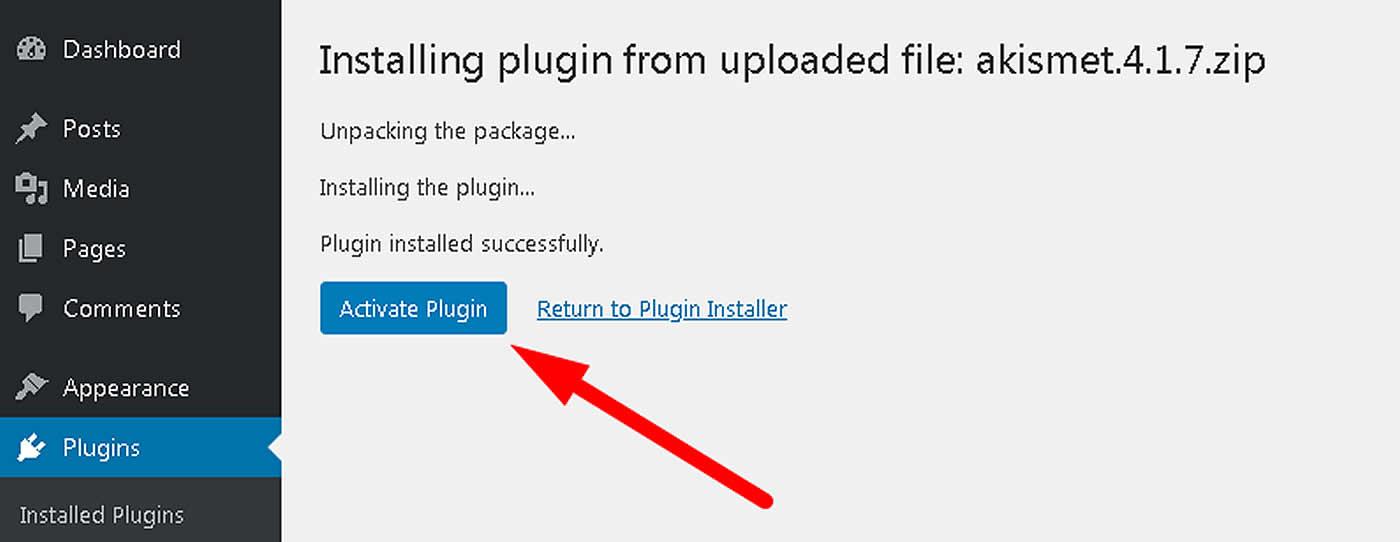
Installing a Plugin Manually: A Step-by-Step Guide
Installing a WordPress plugin manually is a straightforward process, and it can be a great way to enhance your website’s functionality. If you’ve downloaded a plugin in a .zip format, here’s how you can upload it to your site.
First, you’ll need to access your WordPress dashboard. Once you’re logged in, follow these simple steps:
- Navigate to the Plugins section on the left sidebar.
- Click on Add New to open the plugin installation page.
- At the top, you’ll see a button labeled Upload Plugin. Click on this to proceed.
After clicking the upload option, you will be prompted to choose a file. Here’s what to do next:
- Click on Choose File, and select the .zip file of the plugin you downloaded.
- Once the file is selected, click on Install Now to start the installation process.
Once the installation is complete, you’ll see a success message along with an option to activate the plugin. To do this:
- Click on Activate Plugin to enable its functionality on your site.
- Alternatively, you can navigate back to the Plugins page later to activate it from there.
Now that your plugin is activated, it’s important to configure its settings to suit your needs. Most plugins will add their own settings menu item in the WordPress dashboard. Make sure to:
- Explore the plugin settings thoroughly.
- Refer to any specific documentation provided with the plugin for detailed instructions.
If you ever need to troubleshoot or uninstall a plugin, you can easily do so from the same Plugins page. Just find the plugin you want to manage and use the available options to deactivate or delete it.
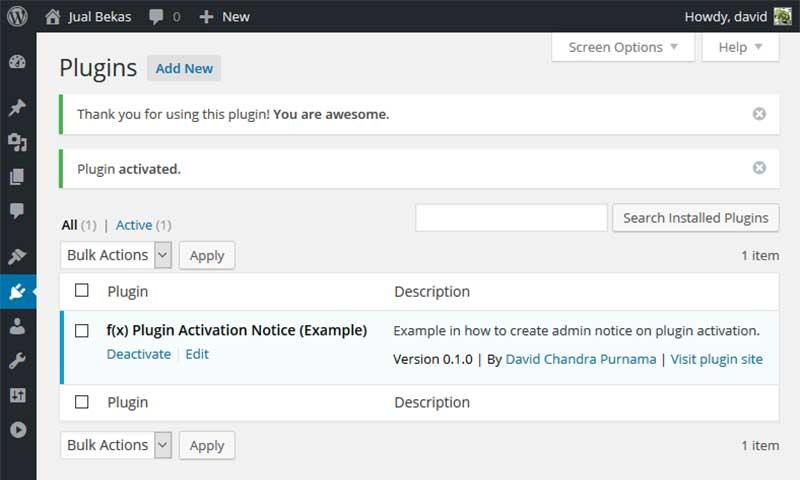
Activating Your New Plugin and Exploring Settings
Once your new plugin is successfully installed, it’s time to activate it and dive into its settings. Activating a plugin is as simple as clicking a button, but what comes next is where the real magic happens. Your plugin may offer a variety of features tailored to enhance your website’s functionality, and exploring these settings is essential to get the most out of your new tool.
To activate your plugin, navigate to the Plugins section in your WordPress dashboard. You’ll see a list of all installed plugins with an Activate option next to each one. Simply click on Activate for your newly installed plugin, and you will witness its potential unfold. Depending on the plugin, you may notice new menu items or settings appear in your dashboard, ready for exploration.
After activation, it’s crucial to fine-tune the settings to match your website’s needs. Most plugins come with their own unique settings page. Here’s how to navigate:
- Locate the newly added menu item on the dashboard.
- Click on it to access the plugin’s settings page.
- Take a moment to familiarize yourself with the available options.
Many plugins will present you with a variety of settings, and it can be tempting to stick with the default options. However, customizing these settings can greatly enhance performance and user experience. Here are some common settings you might encounter:
| Setting | Description |
|---|---|
| General Settings | Basic configurations like site visibility and user permissions. |
| Display Options | Customize how content or features show up on your site. |
| Integration | Connect the plugin with other tools or platforms. |
| Advanced Settings | Detailed options for tech-savvy users to optimize performance. |
Make sure to save any changes you make. Many plugins have a Save Changes button at the bottom of the settings page. Remember, tweaking and revisiting these settings can lead to better performance as your website evolves. Don’t hesitate to experiment, as most plugins are designed to be user-friendly.
consider checking the plugin documentation or support forums for insights and tips on maximizing its use. Many plugin developers provide valuable resources that can help you unlock hidden features and troubleshoot any issues. Engaging with the community can also provide inspiration and ideas on how best to utilize your new tool!
Troubleshooting Common Installation Issues
Installing a WordPress plugin should be a straightforward process, but sometimes things don’t go as planned. Here are some common issues you might encounter and how to resolve them effectively.
Plugin Compatibility
One of the most frequent problems arises from plugin compatibility. Not all plugins work seamlessly together or with every version of WordPress. If you experience issues after installing a plugin, consider these steps:
- Check Requirements: Each plugin has specific requirements. Look for compatibility information in the plugin details.
- Update WordPress: Ensure your WordPress installation is up to date, as newer plugins may not function properly on older versions.
- Disable Other Plugins: Temporarily deactivate other plugins to identify if there’s a conflict.
Installation Errors
Occasionally, you might encounter installation errors either during upload or activation. Here’s how to tackle them:
- File Permissions: Incorrect file permissions can prevent plugins from installing. Ensure your directories have the right permissions (typically 755 for folders and 644 for files).
- Corrupted Files: If the plugin files are corrupted during download, try re-uploading the ZIP file.
- PHP Memory Limit: Low PHP memory limits can cause installation failures. Consider increasing the memory limit in your wp-config.php file like this:
define('WP_MEMORY_LIMIT', '256M');
White Screen of Death
Encountering a blank screen after plugin activation can be alarming. Here’s how to troubleshoot this issue:
- Access via FTP: Use an FTP client to access your site files and rename or delete the problematic plugin folder in the /wp-content/plugins/ directory.
- Enable Debugging: Add the following line to your wp-config.php to enable debugging and get error messages:
define('WP_DEBUG', true);
Common Error Messages
Familiarizing yourself with common error messages can save you time and frustration. Here’s a quick reference table to help you diagnose issues:
| Error Message | Possible Cause | Solution |
|---|---|---|
| Installation Failed | File permissions issue | Check and correct file permissions. |
| Plugin Not Found | Corrupted ZIP file | Re-download and re-upload the plugin. |
| Memory Exhausted | Low PHP Memory Limit | Increase memory limit in wp-config.php. |
By following these troubleshooting steps, you can overcome the most common installation hurdles and enjoy the full benefits of the plugins you wish to use. Remember, patience and a methodical approach are your best allies when dealing with installation issues.
Keeping Your Plugins Updated for Optimal Performance
When it comes to maintaining a smoothly running WordPress site, one of the most crucial tasks is ensuring that your plugins are always up to date. Plugins enhance the functionality of your website, but outdated versions can lead to security vulnerabilities, compatibility issues, and a decline in performance. By keeping your plugins updated, you can leverage the latest features and improvements while safeguarding your site from potential threats.
Here are some key reasons why plugin updates should be a priority:
- Security Enhancements: Developers regularly update plugins to patch security flaws. Running outdated plugins can expose your site to hackers.
- Performance Improvements: Updates often include optimizations that improve the speed and efficiency of your site.
- New Features: Plugin updates can bring exciting new functionalities that can enhance user experience and engagement.
- Compatibility Checks: WordPress itself gets regular updates. Keeping your plugins updated ensures they remain compatible with the latest version of WordPress.
Many users overlook the update process, thinking it’s a minor task. However, it’s essential to make it a regular part of your website maintenance routine. You can set reminders or schedule a specific time each month to check for updates. This proactive approach can save you from future headaches.
To make the update process seamless, follow these simple steps:
- Navigate to the Plugins section in your WordPress dashboard.
- Look for any notifications indicating available updates.
- Select the plugins that require updates and click on Update.
If you want to keep track of the performance improvements after updates, consider using a simple table to compare loading times before and after updating plugins. Here’s a quick example:
| Plugin Name | Before Update (ms) | After Update (ms) |
|---|---|---|
| SEO Optimizer | 350 | 280 |
| Contact Form 7 | 400 | 320 |
| Jetpack | 500 | 450 |
keeping your plugins updated not only enhances your site’s security and performance but also ensures that you provide the best possible experience for your visitors. Make it a habit to check for updates regularly and reap the benefits of a well-maintained WordPress site.
Best Practices for Managing Your WordPress Plugins
- Regularly Audit Your Plugins: Take time every few months to review the plugins you have installed. Ask yourself if each one is still necessary for your site’s functionality.
- Update Frequently: Keep your plugins up to date to ensure you have the latest features and security patches. WordPress notifies you when updates are available, so make it a habit to check regularly.
- Limit the Number of Plugins: While plugins can enhance functionality, having too many can slow down your site. Aim to use only the plugins that add significant value.
- Choose Reputable Plugins: Before installing a plugin, check its ratings, reviews, and the number of active installations. Opt for plugins that are regularly updated and supported by the developer.
- Backup Before Changes: Always back up your website before making changes to plugins. This way, you can restore your site if something goes wrong during an update or installation.
Keeping track of the performance of your plugins is equally important. You can do this with performance monitoring tools that measure how plugins affect your site’s speed. A slow-loading site can lead to higher bounce rates, negatively impacting your SEO.
Another key aspect is ensuring compatibility with your theme and other plugins. Sometimes, plugins can conflict with one another, leading to errors or functionality issues. Testing them on a staging site before going live can save you a lot of hassle.
| Plugin Name | Purpose | Active Installs |
|---|---|---|
| Yoast SEO | Search Engine Optimization | 5+ million |
| WooCommerce | E-commerce Solutions | 5+ million |
| Wordfence Security | Website Security | 4+ million |
Lastly, consider utilizing a plugin management tool to streamline your plugin usage. These tools can help you track updates, performance statistics, and even security vulnerabilities in one place. By adopting these practices, you’ll not only enhance your website’s performance but also provide a better experience for your visitors.
Exploring Popular Plugins Worth Considering
When diving into the world of WordPress, one of the most exciting aspects is the vast array of plugins available to enhance functionality and improve user experience. Plugins can transform your website, making it more dynamic, user-friendly, and efficient. Here are some popular options that are definitely worth considering:
- Yoast SEO: This plugin is a must-have for anyone looking to improve their site’s search engine optimization. With its user-friendly interface and comprehensive features, it helps you optimize your content for better visibility.
- WooCommerce: If you’re aiming to set up an online store, WooCommerce is the go-to plugin. It allows you to create a fully functional eCommerce site with numerous extensions to suit your business needs.
- Elementor: For those who want to build stunning pages without coding, Elementor offers an intuitive drag-and-drop interface. Design customization becomes a breeze, enabling you to create unique layouts.
- Wordfence Security: Security is crucial, and Wordfence provides comprehensive protection against hacks and malware. Its firewall and malware scanner ensure your site remains secure.
- Akismet: If you want to keep your comments section free from spam, Akismet is the plugin to use. It automatically filters out unwanted messages, allowing for genuine interaction with your audience.
Choosing the right plugins can significantly enhance your site’s performance. Here’s a quick comparison table of some of these plugins to help you make an informed decision:
| Plugin | Primary Function | Best For |
|---|---|---|
| Yoast SEO | SEO Optimization | Bloggers & Businesses |
| WooCommerce | eCommerce Solutions | Online Stores |
| Elementor | Page Builder | Design Customization |
| Wordfence Security | Website Security | All Websites |
| Akismet | Spam Protection | Comment Moderation |
Integrating these plugins is simple once you understand how to install them. They can help you not only to streamline your workflow but also to enhance the overall visitor experience on your site. So, whether you’re running a blog, a portfolio, or a business website, considering these tools will undoubtedly take your WordPress journey to the next level.
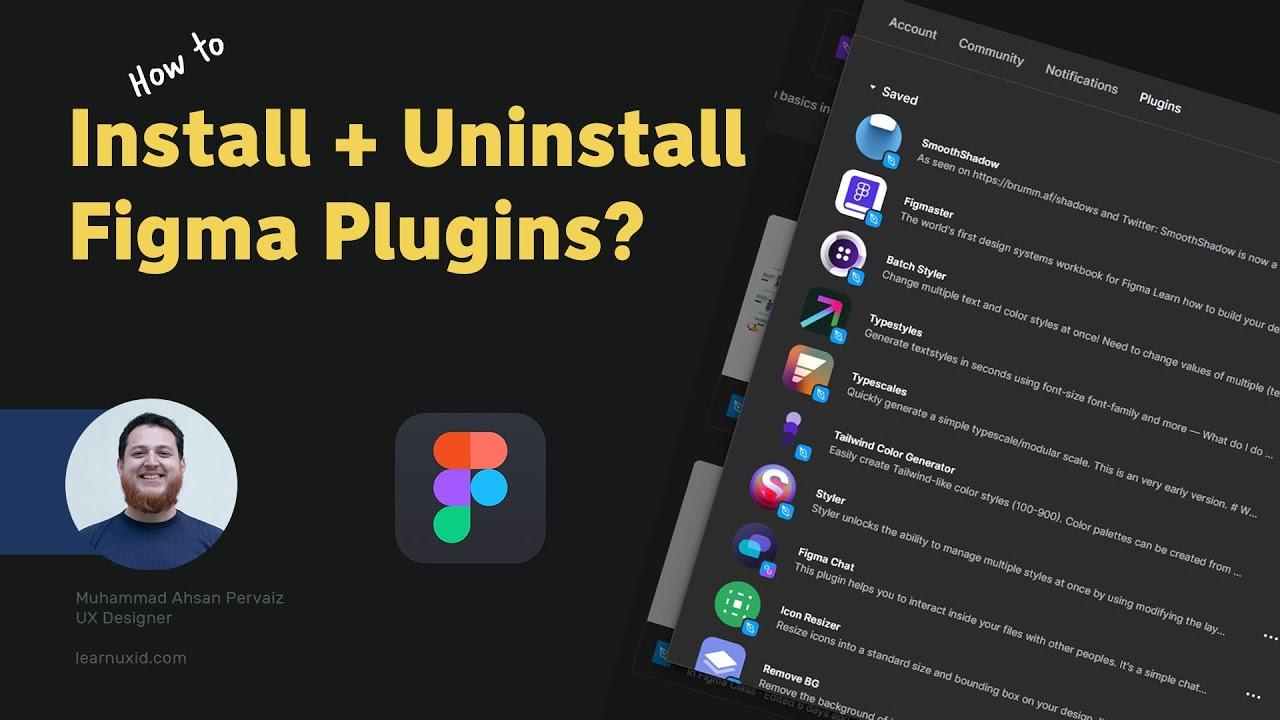
How to Uninstall a Plugin Safely and Effectively
Uninstalling a plugin from your WordPress site can seem daunting, especially if you’re concerned about maintaining the functionality and security of your website. However, with a few straightforward steps, you can safely and effectively remove any plugin without a hitch.
Before you dive into the uninstallation process, it’s a good practice to back up your website. This way, you can restore it to its previous state if anything goes wrong. You can use plugins like UpdraftPlus or BackupBuddy to simplify this task. Once you have a backup in place, follow these steps:
- Navigate to the Plugins Menu: From your WordPress dashboard, go to Plugins > Installed Plugins.
- Deactivate the Plugin: Find the plugin you wish to uninstall and click on Deactivate. This step is crucial as it ensures that no active processes are running when you remove it.
- Delete the Plugin: After deactivation, you’ll see an option to Delete. Click on it, and confirm the action.
It’s important to note that some plugins may leave residual data or settings behind even after deletion. To completely remove these remnants, consider utilizing a cleaning plugin like WP-Optimize or Advanced Database Cleaner. These tools can help you:
- Remove orphaned tables from the database.
- Delete old plugin settings and options.
- Optimize your database for better performance.
| Plugin Name | Purpose | Recommended Action |
|---|---|---|
| SEO Yoast | Improve SEO | Deactivate and Delete |
| Contact Form 7 | Manage Forms | Deactivate and Delete |
| WooCommerce | E-commerce | Deactivate only (if it’s no longer needed) |
After uninstalling, don’t forget to check your site’s functionality. Visit various pages and make sure everything is working smoothly. If you notice any issues, consider restoring your website using the backup created earlier. This will help you ensure that your site remains intact after removing plugins.
By following these steps, you can confidently uninstall any plugin while minimizing disruptions to your website. A well-maintained site not only improves user experience but also enhances security and performance, so keep it clean and clutter-free!
Enhancing Your Site’s Security with the Right Plugins
When it comes to keeping your WordPress site secure, the right plugins can make a world of difference. Security plugins help protect your site from a variety of threats, including hacks, malware attacks, and unauthorized access. By selecting the best options available, you can ensure that your website remains safe and secure while you focus on creating content and growing your audience.
Here are some essential plugins that can significantly enhance your site’s security:
- Wordfence Security: This comprehensive plugin offers a firewall, malware scanner, and login security features. It’s a must-have for any serious WordPress user.
- iThemes Security: With over 30 ways to secure your website, this plugin provides features such as two-factor authentication and malware scanning.
- Sucuri Security: A powerful tool that offers security activity auditing, file integrity monitoring, and even post-hack security actions.
- All In One WP Security & Firewall: This user-friendly plugin includes a visual representation of your site’s security status and suggests actions to improve it.
Each of these plugins has its unique features, but they all share a common goal: to protect your website from cyber threats. Installing them is straightforward, and once set up, they often run in the background, continuously safeguarding your site without requiring constant attention from you.
When selecting security plugins, consider the following factors:
| Feature | Wordfence | iThemes Security | Sucuri |
|---|---|---|---|
| Firewall | Yes | Yes | Yes |
| Malware Scanner | Yes | Yes | Yes |
| Two-Factor Authentication | No | Yes | No |
| Activity Logging | Yes | Yes | Yes |
Remember, having a security plugin is just one part of a robust security strategy. Regularly updating your WordPress core, themes, and plugins also plays a crucial role in keeping your site secure. Additionally, consider implementing SSL certificates and regular backups to further enhance your website’s defenses.
By being proactive about your site’s security, you not only protect your data but also foster trust with your users. In a world where online threats are increasingly sophisticated, investing time and resources into the right security plugins is not just smart; it’s essential for the longevity of your WordPress site.

The Benefits of Regularly Reviewing Your Plugins
- Improved Performance: Outdated plugins can slow down your site. By reviewing and updating them, you ensure that your website runs at optimal speed.
- Enhanced Security: Security vulnerabilities often arise from outdated plugins. Keeping your plugins current mitigates the risk of breaches and hacks.
- Compatibility Issues: Themes and other plugins are frequently updated. Regular reviews help you identify any compatibility issues before they become problems.
- Feature Optimization: New versions of plugins often come with new features or improvements. Reviewing them regularly allows you to take advantage of these enhancements.
- Clutter Reduction: Over time, you might install plugins that are no longer necessary. Periodic reviews help you remove excess plugins that may bloat your site.
- Better Insights: By assessing the plugins you use, you can gain valuable insights into your website’s performance and user experience, allowing for informed decisions about future changes.
To make the review process easier, consider setting a schedule. For example, you could plan to review your plugins:
| Frequency | Action |
|---|---|
| Monthly | Check for updates and review performance. |
| Quarterly | Assess the necessity of each plugin and remove unused ones. |
| Annually | Conduct a full security audit of plugins in use. |
Incorporating these reviews into your routine not only keeps your site secure but also enhances the overall user experience. A well-maintained plugin environment contributes to higher user satisfaction and retention, ultimately leading to better engagement on your site.
Final Tips for a Smooth Plugin Installation Experience
When it comes to installing a WordPress plugin, a few final tips can make your experience smoother and more efficient. First and foremost, always ensure that your WordPress installation is up to date. Outdated versions may lead to compatibility issues with new plugins, which can result in a less-than-ideal experience.
Before you proceed with any installation, it’s wise to:
- Backup Your Site: Regular backups can save you from the headaches of lost data. Utilize plugins or manual methods to create a backup before making changes.
- Check Plugin Compatibility: Always verify that the plugin you intend to install is compatible with your current version of WordPress.
- Review User Ratings and Feedback: Take a moment to read through user reviews. This can provide insights into the plugin’s performance and any potential issues.
Another essential tip is to limit the number of plugins you install. While it can be tempting to add numerous features, having too many plugins can slow down your site and lead to conflicts. Focus on quality over quantity, and choose plugins that serve multiple purposes or combine the functionalities you need.
Consider the following when managing your plugins:
| Plugin Type | Purpose | Recommended Limit |
|---|---|---|
| SEO Plugins | Improve search visibility | 1 |
| Security Plugins | Enhance site security | 1-2 |
| Caching Plugins | Boost site speed | 1 |
Lastly, after installation, don’t forget to check your website’s performance. Test for speed, functionality, and responsiveness to ensure that the new plugin enhances rather than hinders your site. If you notice any issues, don’t hesitate to deactivate or uninstall the plugin and look for alternatives.
By following these tips, you can create a more enjoyable and effective plugin installation experience that enhances your WordPress site’s functionality without compromising performance. Happy blogging!
Frequently Asked Questions (FAQ)
Q&A: How to Install a WordPress Plugin (Beginner’s Guide)
Q: What exactly is a WordPress plugin?
A: Great question! Think of a WordPress plugin as an app for your website. Just like apps enhance your smartphone’s functionality, plugins add features to your WordPress site. Whether you want to improve SEO, add social media sharing buttons, or create a contact form, there’s likely a plugin for that!
Q: Why should I even bother with plugins?
A: If you want your website to stand out and function smoothly, plugins are essential! They allow you to customize your site without needing to code. Plus, many plugins are free or low-cost, making it easy to enhance your site without breaking the bank.
Q: How do I find the right plugin for my needs?
A: Start by identifying what you want to achieve. Do you need better security, an SEO tool, or perhaps a gallery for your images? Once you know that, head over to the WordPress Plugin Directory, or simply browse within your WordPress dashboard. Look for plugins that have good ratings and reviews—they’re often tried and tested by other users!
Q: Can I install a plugin directly from my WordPress dashboard?
A: Absolutely! It’s super easy. Just log in to your WordPress dashboard, go to “Plugins,” then click on “Add New.” From there, you can search for plugins, install, and activate them with just a few clicks. It’s like ordering takeout—quick and convenient!
Q: Is it really that simple? What if I run into issues?
A: Yes, it really is that simple! But like any tech journey, you might hit a snag. If a plugin isn’t working as expected, check for compatibility with your WordPress version or see if it conflicts with other plugins. The support forum for the plugin is often a goldmine for troubleshooting tips!
Q: Are there any risks in using plugins?
A: While plugins are fantastic, they can come with risks. Poorly coded plugins might slow down your site or create security vulnerabilities. That’s why it’s crucial to stick with reputable plugins and keep them updated. Just like a car, your website needs regular maintenance!
Q: How do I install a plugin manually?
A: Manual installation is a breeze, too! Download the plugin .zip file from the source, go to your WordPress dashboard, click “Plugins,” then “Add New,” and select “Upload Plugin.” Choose the .zip file and hit ”Install Now.” Activate it, and you’re good to go!
Q: Should I install multiple plugins, or is there a limit?
A: You can install multiple plugins, but be mindful of performance! Too many plugins can slow your site down. A good rule of thumb is to only install plugins that really add value and functionality to your site. Quality over quantity!
Q: What happens if I no longer want a plugin?
A: If you decide a plugin isn’t for you anymore, you can easily deactivate and delete it from your dashboard. Just go to “Plugins,” find the one you want to remove, and click “Deactivate” first, then “Delete.” It’s like cleaning out your closet—refreshing and necessary!
Q: Ready to dive in? Any final tips?
A: Absolutely! Start by exploring the plugins that align with your website’s goals. Always read reviews, keep your plugins updated, and don’t hesitate to ask for help in the WordPress community if you encounter issues. Installing a plugin can be a game-changer for your website, so get excited and make your site shine!
In Summary
And there you have it! Installing a WordPress plugin is like adding a powerful new tool to your toolbox—it’s a simple step that can have a big impact on your website’s functionality and performance. Whether you’re looking to enhance your site’s design, improve SEO, or add new features, plugins are your best friends in the WordPress world.
Now that you’ve got the basics down, why not dive in and start exploring the vast ocean of plugins available? Don’t hesitate to experiment and find the ones that truly resonate with your goals. Remember, the more you play around, the more you’ll learn!
If you ever feel stuck or have questions, the WordPress community is full of helpful folks ready to lend a hand. So go ahead—take that leap and start enhancing your site today. Happy plugin hunting!


