Transform your learning experience by integrating Canva with your LMS! Empower learners to create visually stunning projects effortlessly. With seamless integration, you can boost engagement, foster creativity, and elevate understanding. Embrace the future of education!
How To Integrate Canva to LMS?
In today’s fast-paced digital age, the fusion of creativity and education has never been more essential. As educators and trainers strive to engage and inspire learners, the integration of innovative tools into Learning Management Systems (LMS) presents a golden opportunity. Enter Canva—a powerful design platform that empowers users to create stunning visuals with ease. Imagine transforming mundane course materials into vibrant, interactive experiences that captivate your audience and elevate their learning journey. In this article, we will explore the seamless integration of Canva into your LMS, unlocking a world of possibilities for dynamic content creation. Whether you are an educator looking to enhance your curriculum or a corporate trainer aiming to boost employee engagement, the synergy between Canva and your LMS can revolutionize the way you share knowledge. Join us as we delve into practical steps and inspiring ideas that will help you harness the power of design to enrich your educational offerings!
Understanding the Power of Canva in E-Learning Environments
In today’s fast-paced digital landscape, e-learning platforms are constantly seeking tools that enhance user engagement and content delivery. Canva emerges as a powerful ally in this quest, offering a suite of design tools that can transform ordinary learning materials into visually captivating resources. By seamlessly integrating Canva with Learning Management Systems (LMS), educators can elevate the e-learning experience for students and instructors alike.
Benefits of Using Canva in E-Learning
- Visual Appeal: Create stunning graphics, infographics, and presentations that capture learners’ attention and facilitate better understanding.
- User-Friendly Interface: With its drag-and-drop functionality, Canva allows even the most novice users to produce professional-quality designs without a steep learning curve.
- Collaboration Tools: Canva’s collaborative features enable educators and students to co-create content in real-time, fostering teamwork and enhancing learning outcomes.
To integrate Canva with your LMS effectively, it’s essential to understand the various methods available. One of the most straightforward approaches is to utilize the embed code that Canva provides for each design. By embedding Canva designs directly into course modules, you can ensure that learners engage with interactive and aesthetically pleasing content. This integration not only enriches the learning material but also encourages learners to interact with the content actively.
Key Steps for Integration
- Create a design in Canva.
- Click on the “Share” button and select “Embed.”
- Copy the HTML code provided.
- Access your LMS and navigate to the desired course section.
- Paste the embed code into the HTML editor of your LMS.
In addition to embedding, consider using Canva to produce downloadable resources. For instance, e-books, worksheets, and promotional materials can be designed and then exported as PDFs or image files. This allows students to download supplementary materials that reinforce their learning, providing them with more resources to explore the subject matter in depth.
Examples of Canva Resources for E-Learning
| Resource Type | Description | Usage |
|---|---|---|
| Infographics | Visually represent complex information for easy comprehension. | Course materials, newsletters. |
| Presentations | Create engaging slide decks for lectures or seminars. | Live classes, recorded sessions. |
| Social Media Graphics | Promote your course on social platforms with eye-catching visuals. | Marketing campaigns, announcements. |
By leveraging Canva’s tools within your LMS, you not only enhance the aesthetic quality of educational content but also foster a more engaging and interactive learning environment. This integration empowers educators to break free from traditional methods, embracing creativity and collaboration that resonate with today’s digital learners.
Exploring the Benefits of Integrating Canva with Your LMS
Integrating Canva with your Learning Management System (LMS) can transform the way you deliver educational content. By combining these powerful tools, you can create visually stunning materials that engage learners and enhance their understanding. Here are some compelling benefits of this integration:
- Enhanced Visual Learning: Canva allows educators to design eye-catching infographics, presentations, and visuals that cater to different learning styles. By embedding these designs directly into your LMS, you provide students with a rich visual experience that complements textual information.
- Improved Student Engagement: Interactive and appealing content captures the attention of students more effectively than standard text-based resources. With Canva’s design capabilities, you can create dynamic course materials that encourage participation and foster a deeper connection with the subject matter.
- Streamlined Content Creation: The integration simplifies the process of creating and uploading multimedia content. Educators can quickly design and publish materials, saving time and allowing them to focus on teaching rather than administrative tasks.
- Collaboration Opportunities: Canva’s collaborative features enable students to work together on projects in real-time. This not only enhances their teamwork skills but also allows for peer feedback, leading to a more interactive and enriching learning environment.
Moreover, embedding Canva designs within your LMS facilitates seamless content updates. As educational content evolves, you can easily revise visuals to keep materials current and relevant. This agility ensures that students always have access to the best resources, enhancing their learning experience.
Consider how this integration also supports varied assessment methods. By using Canva, educators can create unique assessments that go beyond traditional quizzes. For example, students might submit graphic designs or presentations as part of their coursework, demonstrating their understanding in creative ways.
| Benefit | Impact on Learning |
|---|---|
| Visual Engagement | Increases retention and understanding |
| Time Efficiency | Allows more focus on teaching |
| Enhanced Collaboration | Fosters teamwork and communication skills |
| Creative Assessments | Encourages critical thinking and innovation |
By leveraging the benefits of Canva integration, educators can create a more engaging, efficient, and enjoyable learning experience. This synergy not only elevates the quality of educational materials but also empowers students to take charge of their learning journey, making education a vibrant and dynamic process.
Step-by-Step Guide to Setting Up Canva Integration
Integrating Canva with your Learning Management System (LMS) can elevate your educational content and provide a more engaging experience for your learners. Follow these straightforward steps to seamlessly connect Canva with your LMS and unlock a world of creative possibilities.
Step 1: Access Your Canva Account
Begin by logging into your Canva account. If you don’t have one, create an account at www.canva.com. This platform is user-friendly and offers a plethora of design templates that can enhance your learning materials.
Step 2: Explore Integration Options
Once you’re logged in, navigate to the “Apps” menu on the left sidebar. Here, you can find various integrations available for Canva. Look for the LMS you wish to connect with, such as Moodle, Blackboard, or others. Click on the LMS to explore the integration options.
Step 3: Authorize Access
To integrate, you will need to authorize the connection between Canva and your LMS. This usually involves:
- Granting Canva permission to access your LMS account.
- Entering your LMS credentials if prompted.
- Confirming the integration settings to ensure smooth functionality.
Step 4: Create and Share Designs
With the integration established, you can begin creating captivating designs in Canva. Use templates designed for educational purposes or craft your own from scratch. Once your design is complete, utilize the sharing options to upload your creations directly to your LMS.
Step 5: Monitor Feedback and Adjust
After integrating Canva, pay attention to how your learners engage with the materials. Collect feedback through quizzes or surveys embedded in your LMS. Based on this feedback, continuously refine your designs to improve engagement and learning outcomes.
By following these steps, you’ll not only enrich your LMS with visually appealing content but also inspire your learners to engage more deeply with the material. Embrace this integration and watch your educational impact soar!
Designing Engaging Learning Materials through Canva
Creating captivating and effective learning materials is essential for engaging today’s learners. With Canva, educators can harness the power of design to produce visually appealing resources that not only capture attention but also enhance understanding. Integrating Canva into your Learning Management System (LMS) allows instructors to create a seamless experience for students, enriching their educational journey.
To begin the integration process, consider the following steps:
- Create a Canva Account: Start by signing up for a free or pro account on Canva. This will give you access to a plethora of templates tailored for educational content.
- Design Your Materials: Use Canva’s intuitive interface to design lesson plans, infographics, or presentations. Customize templates to fit your brand and educational objectives.
- Export and Upload: Once your materials are ready, export them in a suitable format like PDF or PNG and upload them directly to your LMS.
- Embed Canva Designs: Some LMS platforms allow you to embed Canva designs directly. Simply copy the embed code from Canva and paste it into your LMS’s content editor.
- Collaborate and Share: Use Canva’s collaboration features to work with other educators, gaining insights and enhancing your materials before finalizing them.
When designing materials, remember that visual hierarchy plays a crucial role. Use bold headings to catch attention, and ensure that important information stands out through contrasting colors and fonts. Canva’s extensive library of icons and images can further illustrate key points, making your content more memorable.
Consider organizing your materials using a clear layout. Here’s a simple table that can guide your design process:
| Element | Design Tips |
|---|---|
| Headings | Use larger, bold fonts to signify importance. |
| Images | Incorporate relevant visuals to support text. |
| Colors | Choose a palette that reflects your theme and maintains readability. |
| White Space | Don’t overcrowd your design; allow for breathing room. |
Additionally, gather student feedback on the materials you create. Their insights can help you refine your designs and make them even more engaging. Encourage students to share their experiences with the materials and suggest improvements. This not only fosters a collaborative learning environment but also empowers students to take an active role in their education.
Incorporating Canva into your LMS doesn’t just enhance individual learning materials; it revolutionizes the entire educational experience. By providing visually stimulating resources, you cater to diverse learning styles and keep your students motivated. Embrace the creativity that Canva offers and watch your educational content come alive!
Personalizing Your Course Content with Canva Templates
One of the most engaging ways to enhance your course material is by integrating Canva templates. With its user-friendly interface and extensive library of designs, your educational content can be transformed into visually appealing assets that keep learners motivated and focused. Personalizing your course materials not only caters to varied learning styles but also fosters a sense of ownership among your students.
Consider the following benefits of using Canva templates in your courses:
- Visual Appeal: Bright, engaging graphics can capture attention and enhance learning retention.
- Customization: Tailor templates to fit your branding or specific course themes, creating a cohesive experience.
- Time Efficiency: Pre-designed templates save you valuable time, allowing you to focus on content quality instead.
- Accessibility: Canva’s cloud-based platform enables easy access for both instructors and students, facilitating collaboration.
To get started, identify the type of content you want to create. Whether you need infographics, presentations, or social media posts, there’s a template for every educational need. Once you select a template, you can easily modify text, colors, and images to align with your course goals.
Here’s a simple comparison table that highlights various Canva templates suitable for different course content:
| Template Type | Best For | Customization Features |
|---|---|---|
| Infographic | Visual Data Representation | Colors, Icons, Layouts |
| Presentation | Classroom Lectures | Transitions, Text Styles |
| Social Media Post | Course Promotion | Images, Fonts, Filters |
Furthermore, integrating these personalized templates into your LMS can streamline the learning process. Upload your customized content directly to your platform, ensuring that students can easily access and engage with the materials. Encourage them to collaborate by allowing them to create their own versions of the templates, fostering creativity and deeper understanding of the subject matter.
By leveraging Canva templates, you empower your learners to connect with course content on a more personal level, making the educational journey not only informative but also enjoyable. The effort you put into personalizing your course materials will undoubtedly pay off as students become more invested in their learning experience.
Enhancing Collaboration among Educators and Learners
In today’s digital landscape, the integration of tools like Canva into Learning Management Systems (LMS) can significantly transform the educational experience for both educators and students. By harnessing the power of visual design, teachers can create engaging content that resonates with learners on a deeper level. This not only enhances comprehension but also fosters an atmosphere where creativity flourishes.
Utilizing Canva within an LMS encourages collaboration in several meaningful ways:
- Interactive Projects: Educators can assign group projects that require students to work together using Canva. This not only promotes teamwork but also allows learners to share their unique perspectives and skills.
- Instant Feedback: When educators use Canva to create visually appealing presentations or assignments, learners can provide real-time feedback. This open channel of communication enhances the learning process and builds a collaborative community.
- Resource Sharing: Teachers can design templates and resources that can be shared among students. This creates a repository of ideas and designs that everyone can learn from, encouraging peer learning.
Moreover, incorporating Canva into an LMS can streamline the workflow for both students and educators. By embedding Canva directly into the platform, assignments can be created, shared, and submitted all in one place, reducing the need for multiple tools and platforms. This seamless integration not only saves time but also helps maintain focus on the learning objectives.
Here’s a simple comparison of the traditional method versus the Canva-integrated approach:
| Traditional Method | Canva-Integrated Approach |
|---|---|
| Static assignments through text documents | Dynamic projects with engaging visual content |
| Limited collaboration opportunities | Real-time collaboration in shared designs |
| Feedback via email or physical papers | Instant feedback within the LMS platform |
Ultimately, the key to enhancing collaboration lies in recognizing the potential of tools like Canva to create a more engaging learning environment. By bridging the gap between creativity and education, educators can inspire learners not just to consume information, but to contribute actively to their educational journeys.
Maximizing Student Engagement with Visual Learning Tools
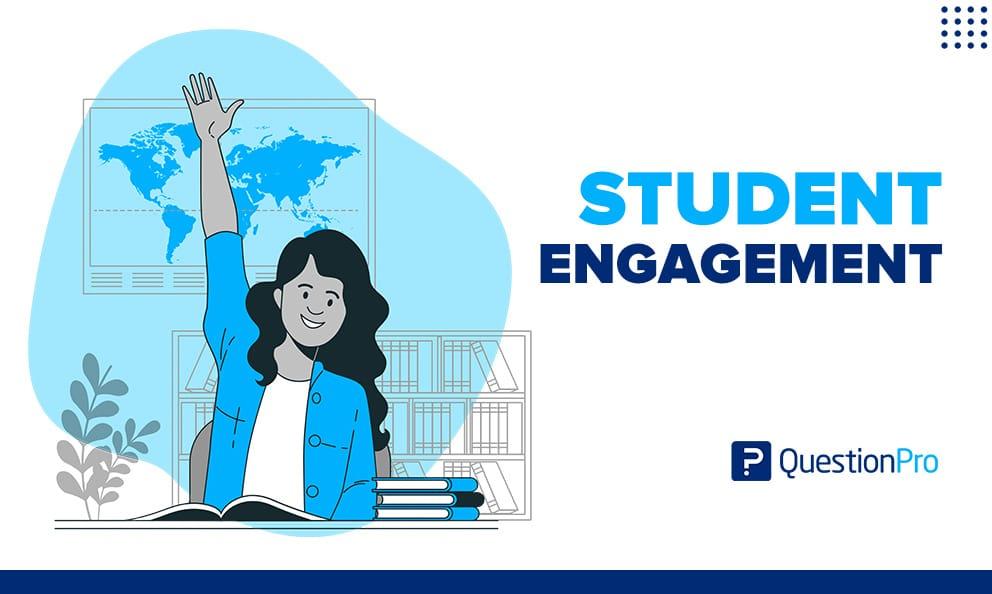
Integrating Canva into your Learning Management System (LMS) can transform the way students interact with course materials. By utilizing visually engaging content, educators can significantly enhance student motivation and retention. Here’s how you can effectively incorporate Canva into your LMS.
Create Interactive Assignments: Encourage students to use Canva for assignments that require creativity. Here are some ways you can facilitate this:
- Presentations: Have students create visually appealing presentations to demonstrate their understanding of course topics.
- Infographics: Assign tasks where students must summarize information through infographics, which can help them grasp complex concepts.
- Posters: Allow students to design posters that convey essential information in a visually compelling way.
Embed Canva Designs: Many LMS platforms allow for embedding content directly into course modules. Here’s how you can do it:
- After creating a design in Canva, use the Share button to get the embed code.
- Copy the HTML embed code and paste it into the appropriate section of your LMS.
- Ensure that the design is set to be viewable by anyone with the link to maximize accessibility.
Foster Collaboration: Canva’s collaborative features can be a game-changer. Here’s how you can leverage them:
- Group projects can be managed by allowing students to work together on designs, enhancing teamwork skills.
- Provide feedback directly on their designs, creating a dynamic learning experience.
Track Progress and Engagement: Use analytics tools available in your LMS to monitor how students are interacting with the Canva materials. Key metrics to observe include:
| Metric | Description |
|---|---|
| View Count | Number of times a design has been viewed by students. |
| Engagement Rate | Percentage of students interacting with Canva assignments. |
| Feedback Quality | Assessment of constructive feedback provided by peers. |
By integrating Canva into your LMS, you not only enhance the learning experience but also empower students to express themselves creatively. The combination of visual tools and collaborative learning fosters an environment where students are eager to participate and excel.
Tips for Tracking and Analyzing Learner Progress
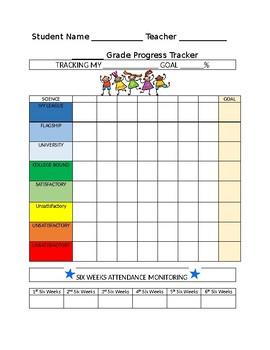
Understanding how learners interact with your content is crucial for optimizing their educational journeys. By effectively tracking and analyzing progress, you can tailor your instructional strategies to better meet their needs. Here are some practical tips to enhance your approach:
Utilize Built-in Analytics: Most Learning Management Systems (LMS) come with built-in analytics tools that allow you to monitor learner engagement. Leverage these features to:
- Track completion rates for courses and modules.
- Identify patterns in time spent on tasks.
- Evaluate quiz performance to pinpoint areas needing improvement.
Set Clear Objectives: Establish specific, measurable learning goals for your courses. Clear objectives not only guide your learners but also provide benchmarks for you to assess their progress. Consider implementing:
- SMART goals (Specific, Measurable, Achievable, Relevant, Time-bound).
- Checkpoints for feedback throughout the course.
- Self-assessment opportunities for learners to reflect on their own progress.
Engage in Regular Feedback: Providing timely and constructive feedback is essential for maintaining learner motivation. Use various methods to facilitate this, such as:
- Automated feedback from LMS assessments.
- Personalized comments on assignments.
- Encouraging peer reviews to foster collaboration.
Analyze Data Trends: Once you have collected data on learner performance, take the time to analyze it for trends. This can provide insights into:
| Data Point | Analysis Insights |
|---|---|
| High Drop-off Rates | Review course content and engagement strategies to identify barriers. |
| Consistent Low Quiz Scores | Consider revising instructional materials or providing additional resources. |
| Positive Peer Review Feedback | Highlight successful collaborative activities and replicate their structure in future courses. |
Customize Learning Paths: Tailoring learning experiences based on data insights helps cater to individual learner needs. Use analytics to:
- Offer personalized recommendations for further study.
- Group learners with similar needs for collaborative projects.
- Adjust course pace based on learner progress and feedback.
By implementing these strategies, you can create a more engaging and responsive learning environment. Remember, the ultimate goal is to empower learners to take ownership of their progress and achieve their educational aspirations!
Creating a Seamless User Experience between Canva and LMS
Integrating Canva with your Learning Management System (LMS) opens up a world of possibilities for creating visually appealing and engaging educational content. By harnessing the design capabilities of Canva, educators can enhance their courses, making learning not only informative but also visually stimulating. This synergy allows for a seamless transition between creating compelling visuals and delivering impactful learning experiences.
One of the significant advantages of this integration is the ability to maintain consistency in branding across all learning materials. When educators utilize Canva’s branding tools, they can ensure that every piece of content—whether it’s a presentation, infographic, or social media post—aligns with their institution’s identity. This branding consistency fosters recognition and trust among learners.
Moreover, the ease of use offered by Canva complements the structured environment of most LMS platforms. Educators can quickly turn their ideas into polished designs without the need for advanced graphic design skills. This user-friendly approach to design encourages teachers to incorporate more visual content into their courses, such as:
- Custom Course Materials: Tailored resources that resonate with students.
- Engaging Infographics: Visual summaries that aid in comprehension.
- Interactive Presentations: Dynamic slides that captivate learners’ attention.
Furthermore, when integrated effectively, the transition from Canva to an LMS can be streamlined, ensuring that the materials are uploaded without hassle. Utilizing tools like Zapier or API connections can automate this process, allowing educators to focus more on teaching than on technicalities. A well-planned integration process might include the following steps:
| Step | Description |
|---|---|
| 1. Design in Canva | Create visuals tailored to your course objectives. |
| 2. Export Designs | Download designs in formats compatible with your LMS. |
| 3. Upload to LMS | Seamlessly integrate visuals into the course framework. |
| 4. Customize & Share | Adjust settings and share with students. |
Ultimately, the fusion of Canva’s design capabilities with the functionality of an LMS revolutionizes the way educational content is delivered. It empowers educators to create a dynamic learning environment that not only informs but also inspires. By taking advantage of these tools, you can elevate your teaching methods and provide students with a richer, more interactive educational experience.

Best Practices for Maintaining Consistency in Design
Achieving a cohesive and visually appealing design is essential for any successful integration of Canva into an LMS. By adhering to best practices, you can ensure that your materials not only look professional but also enhance the learning experience for users.
Define a Color Palette: Selecting a limited color palette can significantly contribute to visual consistency. Here are a few tips:
- Choose a primary color that reflects your brand.
- Limit your palette to 3-5 complementary colors.
- Use consistent colors for headings, links, and buttons throughout your materials.
Utilize Typography Strategically: Fonts play a pivotal role in establishing a brand’s identity. Consider the following:
- Select 1-2 typefaces that align with your brand ethos.
- Maintain consistent font sizes for headings and body text.
- Utilize bold and italic styles sparingly to emphasize key points without overwhelming the design.
Incorporate Visual Elements: Using consistent imagery and graphic styles can significantly enhance your design. Aim for:
- High-quality images that reflect your brand’s voice.
- Consistent iconography that supports text content.
- Templates that allow for easy customization without losing design integrity.
| Element | Best Practice |
|---|---|
| Color | Stick to a 3-5 color scheme |
| Fonts | Limit to 1-2 typefaces |
| Images | Use high-quality, relevant visuals |
| Templates | Utilize for uniformity |
Feedback and Iteration: Regularly seek feedback from users regarding the design elements of your materials. This not only helps in understanding user preferences but also aids in making iterative improvements. Create a feedback loop that allows learners to voice their opinions and suggest changes, fostering an environment of continuous improvement.
By committing to these best practices, you create an enriching learning environment that resonates with users. A unified design not only captivates attention but also enhances retention, making your LMS a powerful tool for education.
Innovative Ways to Use Canva for Assessments and Feedback
As technology continues to redefine education, utilizing tools like Canva for assessments and feedback can elevate the learning experience significantly. With its user-friendly interface and creative features, Canva empowers educators to design engaging assessments that not only test knowledge but also stimulate creativity among students.
Customized Assessment Designs
Canva allows teachers to create personalized assessments that reflect their teaching style and objectives. Instead of standard multiple-choice questions, consider designing:
- Interactive infographics that require students to analyze data.
- Visually appealing posters for project submissions that showcase students’ understanding of a topic.
- Digital storytelling prompts, inviting students to present information in a narrative format.
By using Canva, educators can break away from traditional assessment formats and foster a more engaging learning environment. The collaborative features also enable students to work together on assessments, promoting teamwork and communication skills.
Feedback Through Visual Communication
Providing feedback can be a daunting task, but Canva’s design capabilities can transform it into a constructive experience. Create visually appealing feedback templates that include:
- Color-coded performance indicators to highlight strengths and areas for improvement.
- Infographics summarizing feedback points and actionable steps for growth.
- Personalized certificates recognizing student achievements and milestones.
These tools not only make feedback more accessible but also encourage students to engage with it actively. When feedback is presented visually, it resonates more profoundly, motivating students to strive for excellence.
Integrating Canva into Learning Management Systems (LMS)
Integrating Canva into an LMS can streamline the assessment and feedback process. Here’s a simple table showcasing how to effectively embed Canva designs into popular LMS platforms:
| Learning Management System | Integration Method |
|---|---|
| Moodle | Upload Canva designs as PDF or image files directly into course modules. |
| Google Classroom | Create assignments with Canva links for students to edit and submit their work. |
| Canvas | Use Canvas pages to embed Canva designs, making them interactive. |
By integrating Canva into your LMS, you’re not just enhancing the assessment process; you’re creating a dynamic space where students can thrive. The combination of visual design and educational content can stimulate deeper learning and retention, making assessments an enjoyable experience.
Addressing Common Challenges in Canva and LMS Integration
Integrating Canva with your Learning Management System (LMS) can significantly enhance the educational experience, but it does not come without its challenges. Understanding these hurdles is the first step in overcoming them and ensuring a seamless integration process.
One of the primary challenges is compatibility. Different LMS platforms have varying requirements and capabilities. It’s essential to verify that your LMS supports the specific file types and integration features of Canva. Failure to do so can lead to frustrating experiences, such as inability to upload or display content properly. To mitigate this, consider these actions:
- Check the documentation for both Canva and your LMS.
- Use common file formats like PDF or PNG for better compatibility.
- Test integrations in a sandbox environment prior to full implementation.
Another significant issue is user training. While Canva is user-friendly, not all educators or learners may be familiar with its functionalities. Investing time in training sessions can bridge this gap, ensuring that users can create and utilize resources effectively. Consider implementing:
- Workshops to familiarize users with Canva’s features.
- Creating tutorial videos or guides that users can refer to.
- Setting up a support system for ongoing questions and assistance.
Data management can also pose a challenge. When content is created in Canva, it needs to be effectively tracked and managed within your LMS. Ensure that you have a clear strategy for organizing and updating content to prevent confusion among users. Here’s how to streamline data management:
| Strategy | Description |
|---|---|
| Centralized Storage | Keep all Canva assets in a designated folder within the LMS. |
| Regular Updates | Schedule periodic reviews to refresh and reorganize content. |
| Version Control | Maintain different versions of your materials to avoid confusion. |
Lastly, consider the issue of feedback and assessment. While Canva allows for the creation of visually appealing materials, the effectiveness of these resources hinges on user engagement and comprehension. Establish clear mechanisms for feedback on the materials created, and utilize assessments that leverage the content effectively. Strategies to enhance feedback include:
- Incorporating quizzes directly associated with Canva materials.
- Using discussion forums to foster dialogue about the content.
- Implementing peer-review processes for collaborative projects.
By proactively addressing these common challenges, you can create a powerful and cohesive learning environment that leverages the strengths of both Canva and your LMS. This integration not only enriches the educational experience but also empowers educators and students alike to engage more deeply with the content.

Future Trends: The Role of Design in E-Learning Success
As the digital landscape continues to evolve, the integration of design tools like Canva into Learning Management Systems (LMS) is becoming essential for e-learning success. The visual appeal of course materials significantly impacts learner engagement and retention. By leveraging Canva’s user-friendly features, educators can create visually captivating content that resonates with diverse learning styles.
Canva empowers educators to:
- Create professional-looking graphics: Users can design infographics, presentations, and social media posts that enhance the learning experience.
- Customize templates: With a wide range of customizable templates, educators can match the design aesthetic of their LMS, ensuring brand consistency.
- Enhance collaboration: Canva’s collaborative tools allow teams to work together in real-time, fostering creativity and innovation.
- Utilize multimedia: Integrating images, videos, and graphics helps in breaking down complex information into digestible formats.
To effectively integrate Canva with your LMS, consider the following steps:
| Step | Action |
|---|---|
| 1 | Sign up for Canva and explore available templates tailored for educational content. |
| 2 | Create engaging visuals that align with your course objectives and theme. |
| 3 | Export designs in compatible formats (JPEG, PNG, PDF) to upload to your LMS. |
| 4 | Incorporate interactive elements, such as clickable links in designed materials. |
| 5 | Gather feedback from learners to continuously improve design effectiveness. |
Moreover, the importance of user experience cannot be overstated. A well-designed e-learning environment that incorporates stunning visuals not only captivates learners but also fosters a sense of accessibility and inclusivity. Integrating Canva into your LMS makes it easier to create content that is not only informative but also aesthetically pleasing, which is crucial in today’s visually-oriented world.
Incorporating design into e-learning strategies encourages creativity and keeps learners motivated. By utilizing tools like Canva, educators can break the monotony of traditional learning materials, paving the way for innovative educational experiences. As we move forward, the blend of design, technology, and education will undoubtedly shape the future of e-learning, leading to more engaging and impactful learning journeys.
Empowering Educators to Transform Learning through Design
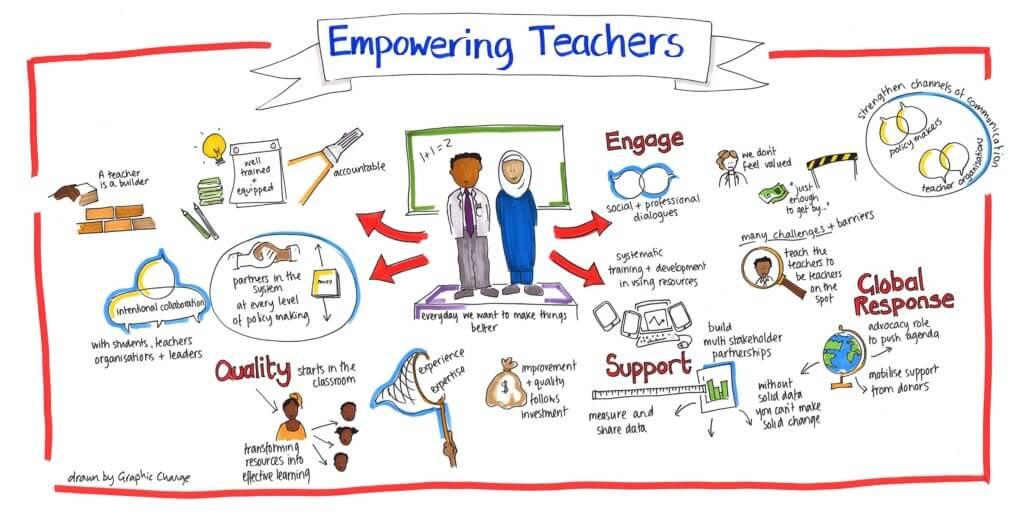
Integrating Canva into your Learning Management System (LMS) can revolutionize the way educators design and deliver content. By harnessing the visual storytelling power of Canva, teachers can create engaging materials that captivate students and enhance the learning experience. The seamless integration not only simplifies design processes but also empowers educators to focus on what truly matters: student engagement and knowledge retention.
The first step in this integration journey is to explore the compatibility of your LMS with Canva. Many popular platforms offer built-in integration or allow for easy embedding of Canva designs. This compatibility means educators can effortlessly incorporate graphics, presentations, and interactive elements into their courses. Here are some key LMS platforms that support Canva integration:
- Google Classroom
- Moodle
- Schoology
- Brightspace
Once you’ve confirmed compatibility, the next step is to maximize the potential of Canva’s features. Encourage educators to leverage templates tailored for various subjects and age groups. These templates not only save time but also provide a framework for creativity. Here’s how educators can utilize these features:
- Create visually appealing lesson plans
- Design interactive quizzes and assessments
- Develop engaging infographics for complex topics
- Produce multimedia presentations that captivate learners
To further streamline the process, consider providing a step-by-step guide on how to use Canva within the LMS. This guide can include:
| Step | Description |
|---|---|
| 1 | Log into your LMS and navigate to the course module. |
| 2 | Select the section where you want to add Canva content. |
| 3 | Open Canva and create your design or choose a template. |
| 4 | Download your design and upload it to the LMS. |
| 5 | Share your design with students and encourage feedback. |
foster a culture of creativity by encouraging collaboration among educators. Canva allows users to share designs and collaborate in real-time, making it an ideal platform for team projects or peer reviews. This collaborative approach not only enhances the quality of educational materials but also builds a supportive community of educators dedicated to transforming learning.
Frequently Asked Questions (FAQ)
Q&A: How To Integrate Canva to Your Learning Management System (LMS)
Q1: What is Canva, and why should I consider integrating it with my LMS?
A1: Canva is a powerful and user-friendly design tool that allows you to create stunning visuals, presentations, and educational content effortlessly. When integrated with your Learning Management System (LMS), Canva can elevate the learning experience by enabling you to craft visually appealing materials that capture attention and enhance understanding. Imagine transforming your course content into engaging graphics, infographics, and interactive presentations that inspire learners to dive deeper into the subject matter!
Q2: What are the benefits of integrating Canva with my LMS?
A2: The benefits are abundant! By integrating Canva with your LMS, you can:
- Enhance Engagement: Eye-catching visuals significantly increase student interaction and retention.
- Streamline Content Creation: Save time with pre-designed templates tailored for educational purposes.
- Encourage Creativity: Empower both instructors and students to express ideas through visual content.
- Foster Collaboration: Encourage teamwork by allowing learners to create shared projects or presentations.
Imagine the impact when your learners not only receive information but also engage with it creatively!
Q3: How can I start integrating Canva with my LMS?
A3: Getting started is simpler than you might think! Follow these steps:
- Choose the Right LMS: Ensure your LMS supports third-party integrations or has an API for custom solutions.
- Explore Canva’s API: Check Canva’s developer documentation for integration details.
- Connect Your Accounts: Utilize integration tools like Zapier or direct plugins available for your LMS.
- Create and Share: Once connected, begin designing in Canva and seamlessly share your materials within your LMS.
Embrace the journey of bringing creativity into your educational environment—it’s an exhilarating step towards a more dynamic learning experience!
Q4: What types of content can I create with Canva for my LMS?
A4: The possibilities are endless! You can create:
- Infographics: Simplify complex information into visual formats.
- Presentations: Craft engaging slide decks that captivate your audience.
- Social Media Graphics: Promote your courses on various platforms with striking visuals.
- Printable Materials: Design worksheets, posters, and flyers that students can take home.
- Videos and Animations: Create short, captivating clips to supplement your lessons.
Each piece you design can make learning not just informative but also a delightful visual journey!
Q5: Are there any tips for making the most out of Canva and my LMS integration?
A5: Absolutely! Here are a few inspiring tips to maximize your experience:
- Stay Consistent: Use a uniform color scheme and font style across all materials to create a cohesive brand identity.
- Leverage Templates: Utilize Canva’s vast library of templates to save time and ensure professional quality.
- Encourage Feedback: Invite students to provide feedback on the materials created, fostering an atmosphere of continuous improvement.
- Experiment and Innovate: Don’t hesitate to try new designs and formats—your creativity can lead to groundbreaking learning experiences!
Remember, the more you experiment, the more you inspire! Your innovative approach can transform traditional learning into a visually engaging adventure.
Q6: How can I measure the impact of integrating Canva into my LMS?
A6: Measuring impact is vital for growth! Consider using these strategies:
- Engagement Metrics: Track student interaction rates with the content created in Canva versus traditional materials.
- Surveys and Feedback: Gather feedback from learners about the visual content’s effectiveness and appeal.
- Performance Analysis: Compare assessment results before and after implementing Canva-designed materials to evaluate learning outcomes.
By assessing these factors, you’ll pinpoint the value of your integration and inspire ongoing improvement!
Conclusion:
Integrating Canva into your LMS is not just a technical enhancement; it’s a transformative experience that empowers educators and inspires learners. With creativity at your fingertips, you have the potential to revolutionize the way knowledge is shared and absorbed. So take that leap, and let your educational journey be as vibrant and engaging as the content you create!
Concluding Remarks
As we wrap up our exploration of how to seamlessly integrate Canva into your Learning Management System (LMS), it’s clear that the potential for enhancing your educational experience is immense. By harnessing the power of Canva, you can transform your course materials into visually stunning and engaging content that captivates your learners and stimulates their creativity.
Imagine a classroom where every lesson comes alive, where students are not just passive recipients of information but active participants in their learning journey. This integration is not just about aesthetics; it’s about empowering both educators and learners to express themselves and communicate ideas more effectively.
Now is the time to take action! Embrace the tools at your disposal and start implementing Canva into your LMS today. The transition might come with challenges, but remember, every great achievement begins with a single step. As you embark on this journey, you’ll not only enhance your teaching methods but also inspire your students to explore their own creative potential.
Let’s not settle for standard; let’s strive for extraordinary. With Canva and your LMS working in tandem, you have the opportunity to create a vibrant, interactive learning environment that prepares your students for success in a visually-driven world. So, roll up your sleeves, dive into this integration, and watch as your educational goals soar to new heights. Together, we can redefine the learning experience—one design at a time!

