Is your WordPress site feeling sluggish? Boosting your memory limit can work wonders! In this article, we’ll explore four easy, expert-tested methods to increase your WordPress memory limit in 2025. Say goodbye to performance issues and hello to a faster site!
How to Increase WordPress Memory Limit: 4 Easy Methods (Expert-Tested for 2025)
Are you tired of encountering the dreaded “memory limit exhausted” error on your WordPress site? You’re not alone! Many website owners face this frustrating hurdle, especially as their content grows and plugins multiply. But don’t worry—boosting your WordPress memory limit is not only crucial for performance, it’s also easier than you might think! In this article, we’ll explore four expert-tested methods to increase your WordPress memory limit in 2025. Whether you’re a seasoned pro or just starting out, these simple yet effective techniques will have your site running smoothly and efficiently in no time. Let’s dive in and get your WordPress site back on track!
Understanding the WordPress Memory Limit and Its Importance
When it comes to optimizing your WordPress site, understanding the memory limit is essential for ensuring smooth operation and superior performance. The WordPress memory limit dictates how much memory your site can utilize while executing scripts and loading plugins. If your site exceeds this limit, you might encounter slow loading times, error messages, or even complete crashes. This is particularly critical for sites with heavy plugins, large themes, or high traffic, where resource demands can spike unexpectedly.
So, why is the memory limit so important? Here’s a quick rundown:
- Performance: An adequate memory limit allows your site to run smoothly, reducing load times and improving user experience.
- Functionality: Certain plugins and themes require more memory to function properly. Insufficient memory can lead to features breaking or not displaying correctly.
- Error Prevention: Running out of memory can result in fatal errors, which frustrate users and can impact your site’s reputation.
In general, the default PHP memory limit for WordPress is set to 40MB, which may be sufficient for basic sites. However, as your site grows in complexity, increasing this limit can be crucial. Many experts recommend setting the limit to at least 128MB, especially for sites that rely on resource-heavy plugins or have multimedia content.
Here’s a simple table summarizing the recommended memory limits for various types of WordPress sites:
| Site Type | Recommended Memory Limit |
|---|---|
| Small Blog | 64MB |
| Medium Business Website | 128MB |
| High-Traffic E-commerce | 256MB+ |
| Multisite Setup | 512MB+ |
It’s important to note that simply increasing the memory limit might not resolve all performance issues if other factors are at play, such as poor hosting or unoptimized themes. Therefore, it’s a good practice to regularly monitor your site’s performance and adjust resources as necessary to maintain an optimal user experience.
By comprehending the significance of the WordPress memory limit, you empower yourself to take proactive steps in enhancing your website’s efficiency. A well-maintained memory limit is the backbone of a responsive and reliable site, ensuring that both you and your visitors can enjoy a seamless experience.
Signs That Your WordPress Site Needs More Memory
If you’ve noticed your WordPress site running slower than usual or crashing unexpectedly, it could be a sign that it’s time to up your memory limit. A well-performing site is crucial for maintaining user satisfaction and SEO rankings, so addressing memory issues is essential.
Here are some clear indicators that your site might be struggling with memory constraints:
- Frequent Error Messages: Encountering
Allowed memory size exhaustedor similar errors while performing tasks like updating themes, plugins, or the core WordPress installation. - Slow Loading Times: A noticeable lag when loading your pages can indicate that the server is working hard to execute your requests, suggesting that more memory might help improve performance.
- Plugin Conflicts: If certain plugins cause your website to break or crash, it may be due to insufficient memory allocation to handle their processes.
- Back-end Performance Issues: A sluggish admin dashboard can often point to memory limitations, making it difficult to manage your site effectively.
- High Traffic Tips Over the Edge: If your site is experiencing increased traffic and you find it struggles to keep up, it may be time to bolster its memory capabilities.
In addition to the above signs, you may also want to monitor your site’s performance metrics. Tools like Google PageSpeed Insights or GTmetrix can provide concrete data on loading times and performance bottlenecks. If your site is consistently underperforming, it might be time for a memory increase.
it’s essential to keep in mind that a lack of memory is not just about performance; it can also impact your site’s security and stability. Frequent crashes and slowdowns can frustrate users, leading to higher bounce rates and a drop in site credibility. Taking proactive steps to monitor and increase your memory can ensure a smoother experience for both you and your visitors.
Method One: Editing the wp-config.php File for a Quick Fix
Editing the wp-config.php file is often the quickest method to boost your WordPress memory limit. This file plays a crucial role in your site’s configuration, and with just a few simple tweaks, you can enhance your website’s performance significantly.
To get started, you’ll first need to access your WordPress site’s files. You can do this via an FTP client like FileZilla or through your web hosting provider’s file manager. Once you’ve navigated to the root directory of your WordPress installation, locate the wp-config.php file.
Before making any changes, it’s always wise to back up the wp-config.php file. Simply download a copy to your computer, so you have a safe version to revert to if anything goes awry. Now, let’s add the memory limit code:
define('WP_MEMORY_LIMIT', '256M');Insert the above line just before the line that says /* That's all, stop editing! Happy blogging. */. If you’re unsure about the amount of memory to allocate, consider the following options:
- 64M: Suitable for small blogs with minimal plugins.
- 128M: Ideal for medium-sized sites with multiple plugins.
- 256M: Recommended for larger sites or those with heavy resource needs.
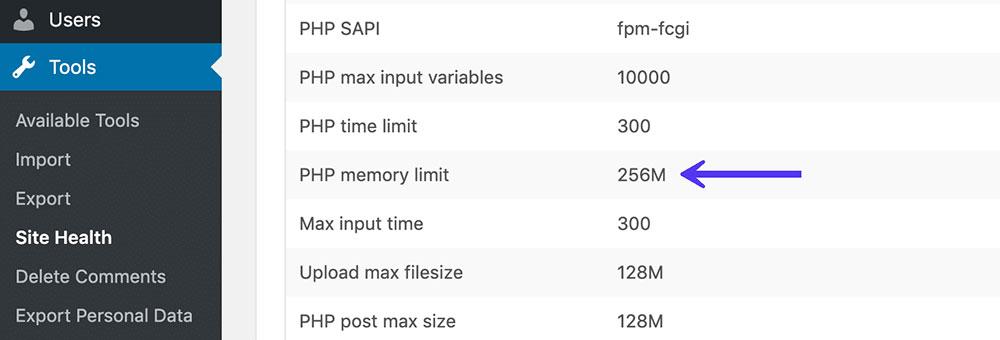
After adding your chosen value, save the changes and upload the file back to your server. Refresh your WordPress admin dashboard, and you should see an improvement in performance. If you want to check if the memory limit has been updated successfully, you can use a plugin like Site Health or check your server info.
Lastly, if your edits don’t seem to take effect, it might be worth reaching out to your hosting provider. Some hosts have server-level restrictions that could prevent your changes from being applied. But with just a few clicks, you’ll be well on your way to a faster, more efficient WordPress site!
Method Two: Adjusting the php.ini File for Advanced Users
For those who are comfortable navigating the intricacies of server configurations, adjusting the php.ini file can significantly enhance your WordPress memory limit. This method offers advanced users the flexibility to customize their server settings to better suit their website’s needs. Follow these simple steps to get started:
- Locate the php.ini File: This file is typically found in the root directory of your website or within a directory for your hosting account. If you’re unsure where to find it, consult your hosting provider’s documentation or support team.
- Edit the File: Use your preferred code editor to open the
php.inifile. Look for the line that sets the memory limit—often displayed as memory_limit = 128Mor similar. - Increase the Memory Limit: Change the value to a higher number, such as
256M,512M, or even 1024M, depending on your website’s requirements and your server capabilities. - Save Your Changes: After you’ve made the necessary adjustments, save the file and close the editor. If you’re using an FTP client, make sure to upload the modified file back to the server.
- Restart Your Server: Some servers may require a restart for changes to take effect. Check your hosting provider’s guidelines on how to perform this action.
It’s important to note that increasing the memory limit can help improve your site’s performance, especially if you’re running multiple plugins or a complex theme. However, be cautious not to exceed the limits set by your hosting provider, as this could lead to throttling or even suspension of your account.
If you’re unsure whether the changes were successful, you can easily verify this by creating a simple PHP file in your site’s root directory with the following code:
Access this file via your browser, and search for memory_limit in the output. This will display the current memory limit, confirming whether your adjustments have been applied.
| Memory Limit | Recommended Use Case |
|---|---|
| 128M | Basic blogs and sites |
| 256M | Medium-sized sites with some plugins |
| 512M | Resource-intensive sites or e-commerce |
| 1024M | Complex sites with high traffic |
By making these adjustments, you can ensure that your WordPress site runs smoothly, offering a seamless experience for your visitors. Just remember, this method is best suited for those who are comfortable working with server configurations, so proceed with caution!
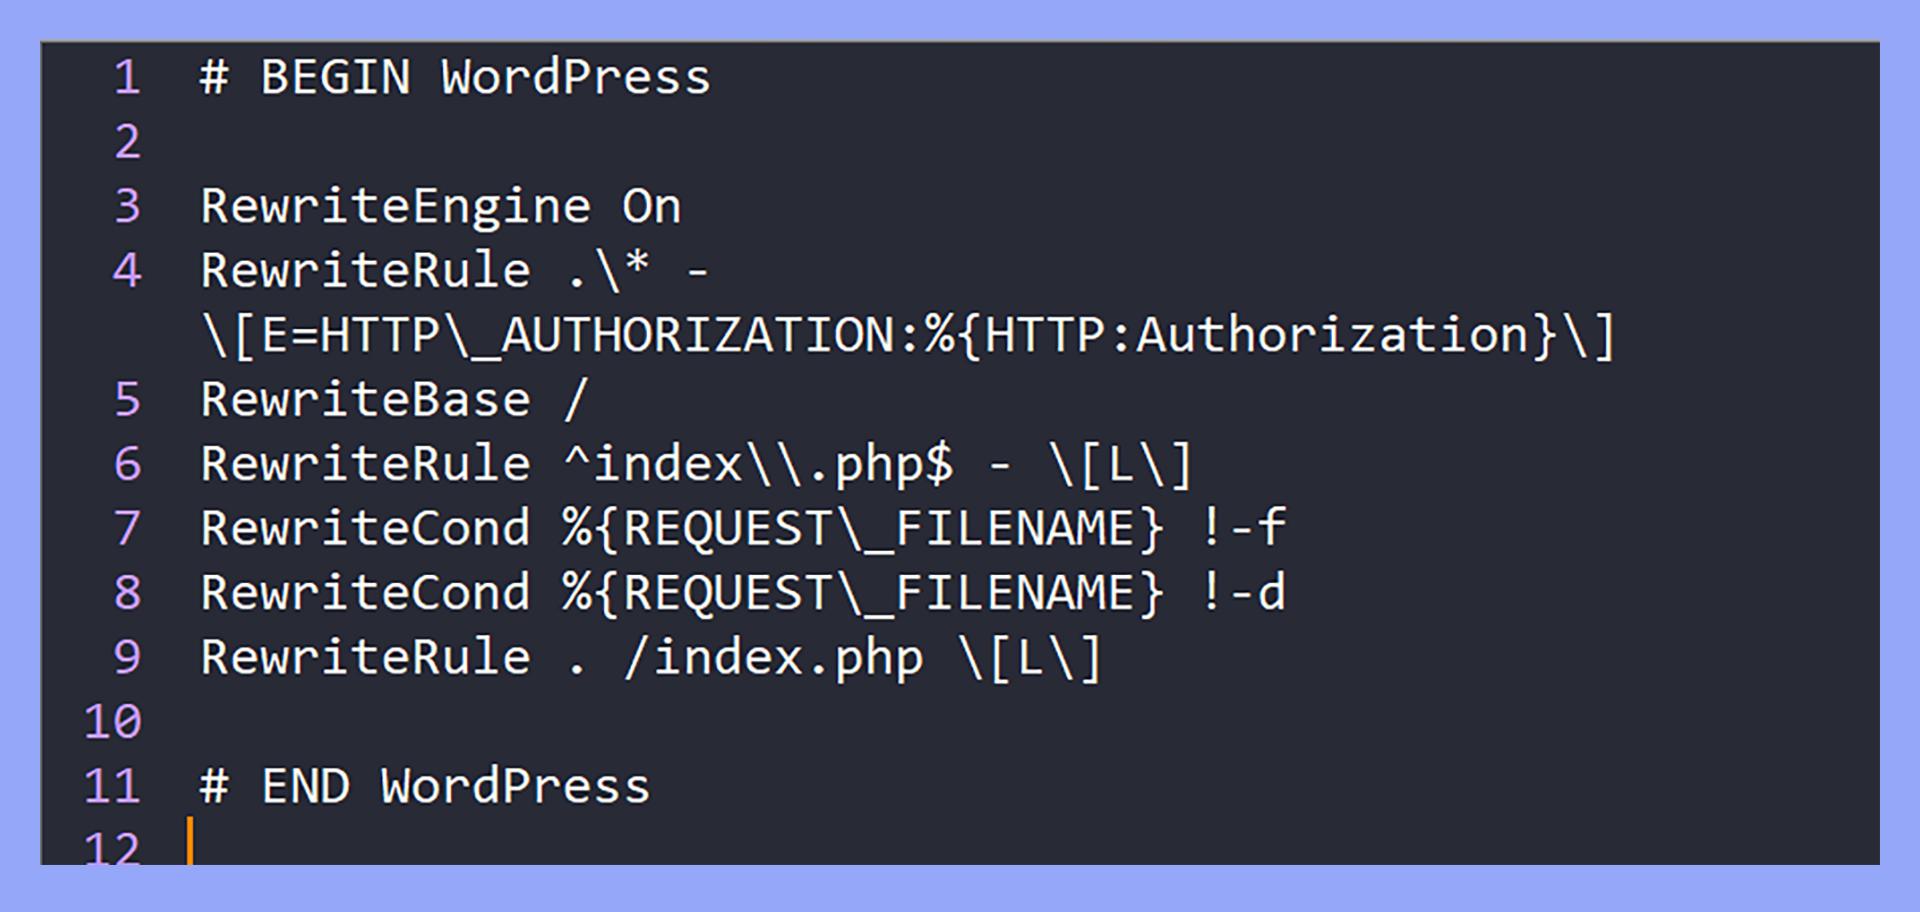
Method Three: Using the .htaccess File for Additional Control
If you’re looking for a robust method to increase your WordPress memory limit, tweaking your .htaccess file could be the right approach for you. This powerful file, located in the root directory of your WordPress installation, allows you to configure additional server settings that can optimize your site’s performance.
Editing the .htaccess file is a straightforward process, but it’s crucial to proceed with caution. Before making any changes, consider backing up your current .htaccess file. Here’s how you can easily increase the memory limit:
# Open your .htaccess file and add the following line:

php_value memory_limit 256M
This simple line of code instructs the server to allocate 256 megabytes of memory to your WordPress installation. You can adjust this value to suit your specific needs, but we recommend not going below 128M for optimal performance.
Here are a few things to keep in mind when modifying your .htaccess file:
- Server Compatibility: Not all servers support changes via the .htaccess file. If you notice any errors after making the modification, it may be time to consult with your hosting provider.
- Potential Conflicts: Be cautious if you have other directives in your .htaccess file. Conflicting code can lead to unexpected site behavior.
- Testing Changes: After saving your changes, test your website thoroughly to ensure everything functions as expected.
If you’re uncertain about directly editing the file, some hosting providers offer a user-friendly interface for managing your site’s settings. Check your hosting dashboard for options that might allow you to adjust the memory limit without diving into code.
To give you an overview of how memory limits can impact your site, consider the following table:
| Memory Limit | Performance Impact |
|---|---|
| 64M | Basic operations may function, but complex plugins could cause errors. |
| 128M | Suitable for most small to medium-sized sites. |
| 256M | Recommended for sites with heavy traffic or resource-intensive plugins. |
By utilizing the .htaccess file to increase your WordPress memory limit, you take a significant step towards enhancing your site’s performance. Just remember to proceed carefully, and you’ll soon enjoy a smoother, faster web experience.
Method Four: Contacting Your Hosting Provider for Support
When you’ve tried adjusting the memory limit through your WordPress dashboard or configuration files and still find yourself facing limitations, it may be time to reach out to your hosting provider for assistance. They often have the tools and access necessary to make adjustments that can help your site run smoothly.
Before you make contact, it’s helpful to prepare a few things:
- Your Hosting Account Details: Have your account information handy, including your username and any associated email addresses.
- Current Memory Limit: Know the current PHP memory limit set for your WordPress installation. You can find this in your site’s health information or by checking the
phpinfo()file. - Specific Requirements: Be clear about why you need an increase in memory. Whether it’s to accommodate a new plugin, improve performance, or handle increased traffic, stating your case can help.
Once you’re ready, it’s time to reach out. Here are some tips for effectively communicating with your hosting provider:
- Be Polite and Professional: Remember, the support team is there to help you. A friendly approach can go a long way in ensuring you get the assistance you need.
- Use the Right Channels: Most providers offer multiple ways to contact them: via live chat, ticket system, or phone. Choose the method that you feel most comfortable with.
- Explain Your Situation: Provide context. Let them know what you’re experiencing and why an increase is necessary. Mention any error messages or slow load times you’ve encountered.
In many cases, hosting providers can adjust the memory limit for you on the server side. They may also inform you about the maximum limits allowed on your specific hosting plan. If your current plan doesn’t support higher memory limits, they might suggest an upgrade to a more robust plan that can handle your needs.
Here’s a simple table to visualize potential memory limits based on common hosting plans:
| Hosting Plan | Typical Memory Limit | Upgrade Options |
|---|---|---|
| Shared Hosting | 128 MB | Consider VPS or Dedicated Hosting |
| VPS Hosting | 256 MB – 512 MB | Check for higher tiers |
| Managed WordPress Hosting | 512 MB - 1 GB | Upgrade to Premium Plans |
By involving your hosting provider, you not only solve your immediate memory limit issue but also establish a relationship that can benefit you in the long run. Their insights and support can be invaluable as you scale your WordPress site and encounter new challenges in the future.
Troubleshooting Common Issues After Increasing Memory Limit
After increasing your WordPress memory limit, it’s not uncommon to encounter a few hiccups. Here are some common issues and how to diagnose and fix them effectively.
Plugin Conflicts: Sometimes, plugins may not play well together after a memory increase. If you notice unexpected behavior, try disabling all plugins and reactivating them one by one. This process can help you identify the culprit. To do this:
- Go to your WordPress dashboard.
- Navigate to the Plugins section.
- Deactivate all plugins, then reactivate them one at a time.
Theme Issues: Just like plugins, your theme can also cause problems when the memory limit is adjusted. If your site behaves erratically or throws errors, consider switching to a default WordPress theme (like Twenty Twenty-One) temporarily to see if the issue persists.
Database Errors: Increasing memory limits can sometimes uncover underlying database issues. Pay attention to any error messages related to database connectivity. To troubleshoot:
- Check your wp-config.php file for database connection settings.
- Optimize your database using a plugin like WP-Optimize.
Server Configuration: If you’ve increased the memory limit but still encounter issues, your server configuration might be the problem. Some hosting providers have hard limits on memory usage. To check this:
- Contact your hosting provider to confirm your current memory limits.
- Ask if there are additional configurations they recommend for your specific hosting environment.
Debugging: Enabling WordPress debugging can provide insights into any issues stemming from the memory increase. You can do this by adding the following line to your wp-config.php file:
define( 'WP_DEBUG', true );Once debugging is enabled, revisit your site to capture any error messages that appear, which can guide you toward resolving the problem.
If you follow these steps and still experience issues, checking WordPress support forums can be helpful. Often, you’ll find others who have faced similar challenges and may have solutions that worked for them.
Best Practices to Maintain Optimal Site Performance
Maintaining optimal site performance is crucial for ensuring a seamless user experience and boosting search engine rankings. Here are some best practices that can help you keep your WordPress site running smoothly:
- Regularly Update WordPress: Keeping your WordPress core, themes, and plugins updated is vital. Updates often contain performance improvements and security patches that can enhance your site’s efficiency.
- Optimize Images: Large images can slow down your site significantly. Use tools like Smush or Imagify to compress images without sacrificing quality, ensuring faster load times.
- Leverage Caching: Implement caching solutions such as WP Super Cache or W3 Total Cache. These tools store static versions of your pages, reducing server load and improving speed for returning visitors.
- Minimize HTTP Requests: Each element on your page, from images to scripts, creates HTTP requests. Reduce these by consolidating CSS and JavaScript files, and consider using asynchronous loading for scripts.
Another essential component of site performance is database optimization. Over time, your WordPress database can accumulate unnecessary data, which can slow it down:
| Action | Description |
|---|---|
| Clean Up Post Revisions | Limit the number of post revisions saved for each article to save database space. |
| Remove Spam Comments | Regularly delete spam comments to keep your database clean and efficient. |
| Optimize Database Tables | Use plugins like WP-Optimize to clean and optimize your database tables regularly. |
Don’t overlook the importance of choosing a reliable hosting provider. A quality host can significantly influence your site’s performance and uptime:
- Scalable Hosting Solutions: As your site grows, your hosting needs may change. Look for providers that offer scalable options.
- Content Delivery Network (CDN): Utilize a CDN to distribute your site’s content across multiple servers globally, thus reducing load times for users regardless of their location.
- Monitor Performance Regularly: Use tools like Google PageSpeed Insights or GTmetrix to monitor site performance and identify areas for improvement.
By implementing these strategies, you can ensure that your WordPress site remains performant, engaging, and capable of meeting user demands. Regular maintenance and optimization are key to enjoying the full benefits of your online presence.
Frequently Asked Questions About WordPress Memory Limit
If you’re experiencing slow loading times or encountering errors while using plugins, you might be wondering what memory limit means in WordPress and how it affects your site. Here are some common questions to help clarify things.
What is WordPress Memory Limit?
The memory limit is essentially the maximum amount of RAM that your WordPress installation is allowed to use. Every time a page loads or a plugin runs, it consumes a portion of this memory. A higher limit can lead to better performance and fewer errors.
Why Do I Need to Increase the Memory Limit?
While the default memory limit set by WordPress is generally sufficient for small sites, larger sites with multiple plugins or themes can encounter performance issues. Increasing the memory limit can help:
- Prevent memory exhaustion errors
- Improve loading times
- Enhance plugin functionality
- Handle traffic spikes more effectively
How Can I Check My Current Memory Limit?
You can easily check your current memory limit by creating a simple PHP file in your WordPress root directory. Just add the following code:
Access this file through your browser, and look for the memory_limit directive. Be cautious to delete this file after use for security reasons.
What Happens if I Exceed the Memory Limit?
If your site exceeds the memory limit, you may encounter a memory exhausted error. This can cause your site to crash or display incomplete pages, frustrating both you and your visitors. Increasing the memory limit is a proactive step to prevent this from happening.
Is There a Maximum Memory Limit I Can Set?
While you can increase the memory limit up to a certain point, hosting providers often set a maximum limit. It’s essential to check with your hosting provider for their recommendations. Here’s a quick reference table:
| Hosting Provider | Recommended Memory Limit |
|---|---|
| Bluehost | 256 MB |
| SiteGround | 512 MB |
| WP Engine | 256 MB |
Always start by consulting your host’s documentation or support team before making any changes to ensure compatibility and optimal performance for your site.

Final Thoughts on Ensuring Your WordPress Site Runs Smoothly
Maintaining a smooth and efficient WordPress site is crucial for both user experience and search engine optimization. As you work through the various methods to increase your memory limit, remember that these changes aren’t just technical tweaks; they are essential investments in your site’s performance and reliability. A well-optimized site not only enhances visitor engagement but also improves your chances of ranking higher on search engines.
Here are some key points to consider:
- Regular Monitoring: Keep an eye on your site’s performance and memory usage. Tools like Query Monitor can help track these metrics effectively.
- Utilize Caching: Implement caching solutions to minimize memory usage and improve loading times. Plugins like W3 Total Cache are excellent for this purpose.
- Choose Quality Hosting: Invest in a reliable hosting provider that understands the needs of WordPress sites. Good hosting can dramatically affect performance and memory allocation.
- Regular Updates: Keep WordPress, themes, and plugins updated. This not only helps with security but ensures that you’re benefiting from performance improvements and optimizations.
When adjusting your memory limit, consider your site’s specific needs. A blog may require less memory compared to an e-commerce platform loaded with products and plugins. Understanding these differences can guide you in selecting the right memory limit:
| Site Type | Recommended Memory Limit |
|---|---|
| Personal Blog | 64 MB |
| Business Website | 128 MB |
| E-commerce Store | 256 MB |
| Multisite Network | 512 MB |
Ultimately, the goal is to create a seamless experience for your visitors. A well-performing site translates to lower bounce rates, higher conversion rates, and improved overall satisfaction. Take time to implement the strategies discussed and continually optimize your settings as your site grows.
Don’t underestimate the importance of community support. Engage with forums, read up on user experiences, and learn from experts. The WordPress community is vast and filled with resources that can help you overcome challenges and refine your site further.
Frequently Asked Questions (FAQ)
Q&A: How to Increase WordPress Memory Limit: 4 Easy Methods (Expert-Tested for 2025)
Q1: Why should I increase the WordPress memory limit?
A: Great question! Increasing the WordPress memory limit can significantly enhance your website’s performance. If you’re running into issues like slow loading times or errors like the “Allowed memory size exhausted,” it’s a clear sign that your current memory limit isn’t cutting it. By increasing this limit, you’re ensuring that your website runs smoothly, especially if you’re using resource-heavy themes or plugins. Trust me, a little boost in memory can make a big difference!
Q2: What are the four methods to increase the memory limit?
A: Absolutely! Here are the four expert-tested methods you can use in 2025:
- Edit the wp-config.php file: This is a straightforward method. You can add a simple line of code to this file, which allows you to set a higher memory limit.
- Modify the .htaccess file: If you’re familiar with your site’s structure, updating the .htaccess file can also do the trick. This method is particularly useful for Apache servers.
- PHP.ini file adjustments: If you have access to your server’s PHP.ini file, you can change the memory limit directly there. It’s a bit advanced, but very effective!
- Contact your hosting provider: Sometimes, the easiest solution is to reach out to your hosting provider. They can increase the memory limit for you, especially if you’re on a managed WordPress hosting plan.
Q3: Are these methods safe to use?
A: Yes, they are! Each of these methods is widely used and recommended by WordPress experts. However, it’s always a good practice to back up your site before making changes. This way, if anything goes awry, you can easily restore your site to its previous state. Safety first, right?
Q4: What if I try these methods and still face issues?
A: If you’ve tried increasing the memory limit and are still experiencing issues, it might be time to delve deeper. Look for poorly coded plugins or themes that could be hogging resources. You might also consider upgrading your hosting plan if your site is growing. Sometimes, it’s just about ensuring your hosting can handle your traffic and resource needs!
Q5: How will I know if my memory limit increase worked?
A: After you implement one of the methods, you can check if the memory limit has been successfully increased by installing a plugin like “Site Health” or “WP Info.” These tools will display your current memory limit right in your WordPress dashboard. If you see the number go up, congratulations! You’ve successfully boosted your site’s performance.
Q6: Can I really do this myself?
A: Absolutely! All four methods are user-friendly, and with a little guidance, even beginners can tackle them. We’ve designed this article to be straightforward and easy to follow. Plus, there are plenty of resources and tutorials out there if you need extra help. So roll up your sleeves, and let’s get to optimizing your WordPress site!
Q7: Why should I trust your expert-tested methods?
A: We’ve gathered insights from seasoned WordPress developers and conducted tests to ensure these methods work effectively in 2025. Our goal is to empower you with reliable, up-to-date techniques that can elevate your website’s performance. You’re in good hands!
Feel free to reach out if you have any more questions or need further assistance. Your WordPress journey is about to get a whole lot smoother!
In Conclusion
As we wrap up our journey through the four expert-tested methods to increase your WordPress memory limit, remember that optimizing your site’s performance is essential for both user experience and search engine rankings. Whether you opted for tweaking your wp-config.php file, adjusting your .htaccess, or calling on your hosting provider for assistance, each method has its benefits that can help eliminate sluggishness and those frustrating “memory exhausted” errors.
By taking the time to implement these strategies, you’re not just boosting your website’s efficiency but also enhancing the overall experience for your visitors. A faster, more reliable site can lead to increased engagement, improved SEO, and ultimately, higher conversion rates.
So, don’t let memory limits hold you back! Embrace these changes and watch your WordPress site thrive. If you found this article helpful, feel free to share it with fellow WordPress users or check out our other resources for more tips and tricks. Here’s to a faster, more powerful WordPress site in 2025 and beyond! Happy blogging!
New Providers
Enjoy The Speed Of Downloading & Uploading With 1GBPS Port
Affordable Dedicated Servers & Colocation Services. Services: Dedicated Servers Colocation Private Cabinet Colocation DDoS Protection
Up to 85% off hosting + website builder

We specialize in providing Web hosting reviews. Where you can search for potential hosts.