Are you tired of managing unwanted comments on your WordPress site? Disabling comments can streamline your experience and keep distractions at bay. Follow our simple, step-by-step guide to regain control over your content and enhance your site’s professionalism!
How to Disable Comments in WordPress (Step by Step)
Are you tired of spammy comments cluttering your WordPress site? Or maybe you’re just looking for a way to create a more focused reading experience for your visitors? Whatever the reason, disabling comments in WordPress is a straightforward process that can significantly enhance your blog or website. In this article, we’ll walk you through the steps to turn off comments, whether you want to mute them site-wide or target specific posts and pages. With just a few clicks, you can regain control over your content and ensure that your readers are engaged with your material, not distracted by unwanted chatter. So, let’s dive in and explore how to take the hassle out of comment management in WordPress!
Understanding the Need to Disable Comments in WordPress
When managing a WordPress site, understanding the dynamics of user engagement is crucial. One of the features that can significantly impact this is the comment section. While comments can foster community interaction, there are several valid reasons you might consider disabling them.
Control Over Content
By disabling comments, you maintain better control over the content displayed on your site. This can be particularly important for:
- Spam Prevention: Unwanted spam comments can clutter your site and divert attention from valuable content.
- Reputation Management: Negative or inappropriate comments can harm your brand’s image. Disabling comments can help maintain a positive online presence.
- Quality Over Quantity: Prioritizing high-quality interactions can lead to a more focused and professional atmosphere.
Resource Management
Comments can strain resources, especially for high-traffic websites. Disabling them can alleviate some of the following burdens:
- Server Load: Each comment requires processing power and storage. Reducing the number of comments can improve site performance.
- Maintenance Time: Moderating comments takes time. By disabling them, you free up valuable hours that can be redirected toward creating new content.
Content Focus
Another compelling reason to disable comments is to direct attention solely to your content. When users engage with your posts without the distraction of comments, it enhances their experience.
- Encouraging Direct Engagement: You can encourage users to reach out through social media or contact forms, creating a more structured way to engage.
- Highlighting Your Voice: Without comments, your posts stand as the primary source of information, allowing your perspective to shine.
Legal Considerations
In some instances, comments can introduce legal complexities, especially when users post content that could be deemed offensive or defamatory. Disabling comments can help mitigate potential legal issues and maintain a safer environment for both you and your audience.
Ultimately, whether to disable comments depends on your specific goals and audience. By understanding the various reasons behind this decision, you can create a more tailored and effective engagement strategy for your WordPress site.
Exploring the Different Methods to Disable Comments
Disabling comments on your WordPress website can streamline your engagement and improve user experience, whether you’re looking to reduce spam or create a more focused conversation. Fortunately, there are several methods to achieve this, each suited to different needs and situations.
Method 1: Using the Discussion Settings
The simplest way to disable comments is through the WordPress settings. Here’s how:
- Navigate to Settings > Discussion.
- Uncheck the box that says Allow people to submit comments on new posts.
- To apply this to existing posts, you’ll need to edit each post individually or use bulk editing.
This method is straightforward and effective for new content, but remember that you might still have to go back and adjust settings for older posts if you want uniformity.
Method 2: Disabling Comments on Individual Posts or Pages
If you want to keep comments enabled for most of your site but disable them on specific posts, you can do so easily:
- Edit the post or page.
- In the Discussion meta box, uncheck Allow comments.
- If you don’t see the Discussion meta box, click on Screen Options at the top and check it to display.
This targeted approach can be particularly useful for sensitive topics or posts where you anticipate a lot of unproductive feedback.
Method 3: Using a Plugin
For those who prefer a more hands-off approach or need additional functionalities, plugins can be a lifesaver. Popular options include:
| Plugin Name | Features |
|---|---|
| Disable Comments | Completely disable comments across your site or on specific post types. |
| WPDiscuz | Advanced commenting system with options to enable/disable comments per post. |
These plugins not only allow you to disable comments easily but also provide various customization options to further enhance your blog’s functionality.
Method 4: Custom Code
If you’re comfortable with coding, you can disable comments using custom functions in your theme’s functions.php file:
This method allows for a more permanent solution, but always ensure you back up your site before making any changes to the core files.
By using these various methods, you can easily manage the comment settings on your WordPress site. Whether you opt for a simple settings adjustment or delve into custom coding, you have the flexibility to create the user experience you desire.

Step-by-Step Guide to Disable Comments on New Posts
Disabling comments on new posts in WordPress is a straightforward process that can help you manage your website’s interaction levels effectively. Here’s how you can do it step-by-step:
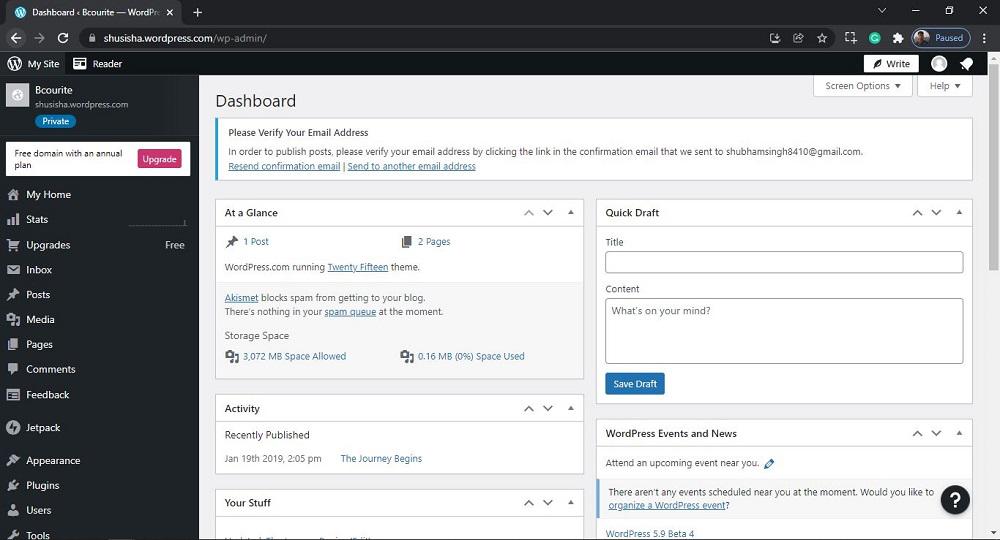
1. Log into your WordPress dashboard. This is the control center for all your site’s settings and features. Once you’re in, you’ll find a variety of options on the left sidebar.
2. Navigate to Settings. Look for the “Settings” option in the sidebar menu, and click on it. This section contains crucial configurations that affect how your site operates.
3. Select Discussion. Within the Settings menu, find and select “Discussion.” This is where you’ll find all the options related to comments and discussions on your site.
4. Uncheck the comments option. In the “Default article settings” section, you’ll see the option that says, “Allow people to submit comments on new posts.” Simply uncheck this box to disable comments on all new posts going forward.
5. Save Changes. Don’t forget to scroll down and click the “Save Changes” button. This ensures that your preferences are updated and applied to all future posts.
6. Consider your existing posts. If you want to remove comments from already published posts, you can do this individually or in bulk. To do this:
- Go to “Posts” from your dashboard.
- Select the posts you wish to edit.
- Choose “Edit” from the bulk actions dropdown and click “Apply.”
- In the options that appear, you can uncheck the “Allow comments” box and then update the posts.
And that’s it! You’ve successfully disabled comments on new posts and can also manage existing content effortlessly. This can help maintain the quality of engagement on your site, ensuring that the conversations that do take place are meaningful and relevant.
How to Disable Comments on Existing Posts Efficiently
If you’re looking to streamline your WordPress site and create a more focused experience for your visitors, disabling comments on your existing posts is a great step. Here’s a simple and effective method to do it without breaking a sweat.
First, navigate to your WordPress dashboard. From there, head over to the Posts section. This is where you’ll find all your existing content. Instead of editing each post individually, you can bulk edit to save time. Here’s how:
- Click on All Posts.
- Select the posts for which you want to disable comments. You can do this by checking the box next to each post.
- Once you’ve selected the desired posts, look for the Bulk Actions dropdown menu.
- Choose Edit and click Apply.
After applying the bulk edit, you’ll see a new section that allows you to make changes to all selected posts at once. Here, you can find the option to change the Comments settings:
- Set Comments to Do not allow.
- Once done, ensure you click the Update button to save these changes across all selected posts.
Another efficient method involves using plugins. If you prefer automation or plan to manage comments more frequently, consider installing a plugin like Disable Comments. Here’s a quick overview of how it works:
| Plugin Name | Functionality | Ease of Use |
|---|---|---|
| Disable Comments | Completely turns off comments site-wide or on specific post types. | Very user-friendly; requires minimal setup. |
| Comment Control | Allows selective enabling/disabling for individual posts. | Requires some manual adjustments. |
Using a plugin can simplify the process significantly, especially if you have a large archive of posts. Regardless of the method you choose, disabling comments can enhance engagement by directing focus to your content rather than discussions. Remember, maintaining the quality of interaction on your site is as crucial as the content itself!

Utilizing Plugins to Manage Comments in WordPress
Managing comments in WordPress can be a breeze with the right plugins. These tools not only help you disable comments but also provide enhanced moderation features that can elevate your site’s engagement while keeping spam at bay. Here are some fantastic plugins to consider:
- Disable Comments: This straightforward plugin allows you to turn off comments across your entire site or on specific post types, all with just a few clicks.
- WPDiscuz: If you still want to encourage discussion but need more control, WPDiscuz offers a robust commenting system with moderation tools, allowing you to manage comments effectively.
- Akismet: While primarily a spam filter, Akismet works wonders to keep your comments section clean, even if you decide to allow comments on certain posts.
- Comment Moderation Role: This plugin lets you assign specific user roles for comment moderation, ensuring that trusted users can help manage comments without giving them full administrative rights.
To get started with these plugins, follow these simple steps:
- Navigate to the Plugins section in your WordPress dashboard.
- Click on Add New and search for the plugin you wish to install.
- Once found, click on Install Now and then activate the plugin.
- Follow the plugin’s configuration settings to tailor it to your site’s needs.
Here’s a quick comparison table to help you choose the right plugin for your needs:
| Plugin Name | Features | Best For |
|---|---|---|
| Disable Comments | Turn off comments site-wide | Simple site management |
| WPDiscuz | Enhanced comment system | Engaging user interactions |
| Akismet | Spam protection | Keeping your comments clean |
| Comment Moderation Role | User role assignments | Collaborative moderation |
By utilizing these plugins, you can effectively manage your comment section, whether you wish to disable them entirely or keep a close eye on discussions. Choose the ones that fit your needs best, and watch how they transform the way you interact with your audience.
Tweaking Discussion Settings for Comment Control
Managing comments on your WordPress site is essential for maintaining a healthy and engaging environment. Depending on your content and audience, you might want to adjust various discussion settings to control how comments are handled. Here’s a quick guide on how to fine-tune these settings to suit your needs.
First, navigate to your WordPress dashboard and head to Settings > Discussion. Here, you’ll find a range of options that allow you to regulate comment activity. You can choose to enable or disable comments site-wide or on specific posts and pages, which is useful for controlling discussions on your terms.
Consider the following settings:
- Default article settings: Decide if you want to allow or disallow comments by default on new posts.
- Comment Moderation: You can set up a moderation queue for comments that require approval before being published. This adds a layer of control and helps filter out spam.
- Email notifications: Choose whether you’d like to receive email notifications for new comments or if you prefer to manage them at your convenience.
Moreover, the option to close comments on posts older than a specified number of days can be beneficial if you wish to keep discussions relevant and fresh. You can easily set this up by checking the corresponding box in the discussion settings.
| Setting | Description |
|---|---|
| Default Comments | Allows or disallows comments by default on new posts. |
| Comment Moderation | Enables you to review comments before they go live. |
| Close Comments | Automatically closes comments on older posts. |
Lastly, consider using a plugin for even more control. Tools like Disable Comments or WP Bruiser can help you manage comments more effectively, offering features like complete comment disabling on a per-post basis or enhanced spam protection.

Best Practices for Managing User Engagement Without Comments
Engaging with users is crucial for any website, but managing that engagement without comments requires a strategic approach. Here are some effective ways to foster interaction:
- Utilize Polls and Surveys: Integrate polls or surveys into your posts to gather opinions and feedback. This not only encourages participation but also provides valuable insights directly from your audience.
- Leverage Social Media: Share your content on social media platforms and invite users to discuss and share their thoughts there. This expands your reach and keeps conversations lively.
- Email Newsletters: Send out regular newsletters that include questions or topics for discussion. Encourage readers to reply directly to you, creating a more personal connection.
- Host Webinars or Live Q&A Sessions: Offering live sessions can significantly boost engagement. Users can ask questions and interact in real-time, making them feel valued.
- Create Interactive Content: Incorporate quizzes, infographics, or even interactive videos. This type of content invites users to engage actively rather than passively consuming information.
Moreover, it’s essential to maintain a consistent brand voice across all channels. When users see a unified approach, they’re more likely to engage with your content. Here’s how to ensure that coherence:
| Channel | Tone | Purpose |
|---|---|---|
| Blog | Informative | Educate users |
| Social Media | Casual | Engage and entertain |
| Personal | Build relationships |
Lastly, keep an eye on your analytics. Monitoring user behavior will help you identify what resonates most with your audience. Adjusting your strategy based on these insights can lead to more effective engagement over time. Remember, fostering a community is a continuous process, and adapting to your audience’s needs will keep them coming back for more.
What to Do if You Change Your Mind: Re-enabling Comments
If you’ve decided to switch back to enabling comments on your WordPress posts after disabling them, you’re in luck! Transforming your blog into a more interactive space can invigorate community engagement and encourage discussions. Here’s how to easily re-enable those comments.
First, you can reactivate comments on a single post or page. Here’s how:
- Navigate to the Posts or Pages section in your WordPress dashboard.
- Find the specific post or page you want to modify and click on Edit.
- Scroll down to the Discussion meta box, and check the box that says Allow comments.
- Don’t forget to click Update to save your changes!
If you’re looking to enable comments across multiple posts, you can do this in bulk:
- Go to Posts in your dashboard.
- Select the posts you want to modify by checking the boxes next to them.
- Choose Edit from the Bulk Actions dropdown menu, then click Apply.
- In the bulk edit options, find the Comments dropdown and select Allow.
- Click Update to apply the changes to all selected posts.
For those who want to enable comments site-wide, simply adjust your settings:
- Go to Settings and then Discussion in your WordPress dashboard.
- Look for the option that says Default Article Settings and check Allow people to post comments on new articles.
- Remember to save your changes at the bottom of the page!
After re-enabling comments, it’s beneficial to monitor them regularly. Consider using moderation tools and plugins to help manage spam and maintain a positive community atmosphere. If you’re not sure where to start, here’s a quick table of some useful plugins:
| Plugin Name | Features |
|---|---|
| Akismet | Spam filtering and automated moderation. |
| WPDiscuz | Enhanced comment system with user engagement features. |
| Disqus | Advanced comment management with social integration. |
Re-enabling comments can breathe new life into your content, fostering conversations and building a community around your blog. With a few simple steps, you can create an interactive environment that welcomes feedback, questions, and ideas from your readers! So go ahead, invite your audience to share their thoughts and engage with your content once again.
Troubleshooting Common Issues When Disabling Comments
Disabling comments in WordPress is often a straightforward process, but it can sometimes lead to unexpected challenges. If you encounter issues, don’t worry—you’re not alone. Let’s explore some common problems and their solutions.
Comments Still Showing After Disabling
If you find that comments are still visible after you’ve disabled them, it’s likely due to caching. Caching plugins can serve up older versions of your pages. To fix this, try the following:
- Clear your site’s cache using your caching plugin settings.
- Clear your browser cache or try a different browser to see updated changes.
Disabling Comments on Existing Posts
Sometimes, users disable comments in the settings but notice that comments are still active on previously published posts. To ensure comments are disabled site-wide:
- Navigate to Posts > All Posts.
- Select the posts you want to edit, then choose Edit from the bulk actions dropdown.
- In the comments section, select Do not allow, then click Update.
Issues with Theme or Plugins
Sometimes, themes or plugins can interfere with the comments settings. If you’ve disabled comments but they persist, consider:
- Switching to a default theme (like Twenty Twenty-One) to see if the issue resolves.
- Deactivating your plugins one by one to identify the culprit.
Using Custom Code
If you’ve added custom code to your theme’s functions.php file to disable comments, ensure there are no syntax errors. A small mistake can cause issues across your site. Double-check your code:
| Possible Code Snippet | Explanation |
|---|---|
remove_post_type_support('post', 'comments'); | Disables comments for posts. |
remove_post_type_support('page', 'comments'); | Disables comments for pages. |
For more advanced users, ensuring that your WordPress installation is up-to-date is also crucial. Outdated versions can lead to glitches, including issues in comment settings. Regularly check for updates in Dashboard > Updates to keep everything running smoothly.

Final Thoughts on Creating a Comment-Free Environment in WordPress
Creating a comment-free environment in WordPress can significantly streamline your website’s user experience. By following the steps outlined in this post, you pave the way for a more focused interaction with your content. Here are a few essential considerations to keep in mind:
- Enhance Content Focus: By disabling comments, your visitors can concentrate solely on the content without distractions. This can lead to a more engaged audience, as they won’t be sidetracked by comment sections.
- Reduce Spam: One of the primary reasons many opt for a comment-free setup is to minimize spam. A comment section can often become a playground for spammers, detracting from the quality of your site.
- Simplify Management: Without comments, you eliminate the need to monitor and manage discussions. This saves time and allows you to focus on creating high-quality content.
- Improve Site Speed: Fewer plugins and backend processes related to comments can lead to improved site performance. A faster site is always more appealing to users.
It’s important to communicate your choice effectively to your audience. Consider placing a brief notice on your pages explaining why comments are disabled. This transparency can help mitigate any potential frustration visitors might feel.
For those who may miss the interaction that comments provide, consider alternative engagement methods. You could integrate social sharing options or create forums on external platforms to foster community discussion without the clutter of comments on your posts. This way, you can still maintain a connection with your audience while keeping your site streamlined.
Lastly, remember that creating a comment-free environment doesn’t mean you are closing the door on feedback. Encourage users to reach out through contact forms or social media channels. This approach allows for valuable visitor input while maintaining the clean aesthetic of your website.
Frequently Asked Questions (FAQ)
Q: Why would I want to disable comments on my WordPress site?
A: Great question! Disabling comments can help you maintain control over your content and prevent spam. If you’re running a business or a personal blog where you want to keep the focus on the content itself without distractions, turning off comments can streamline your site’s experience. Plus, it saves you time on moderation!
Q: Is it complicated to disable comments in WordPress?
A: Not at all! It’s a straightforward process that anyone can do, even if you’re not a tech whiz. With just a few clicks, you can manage your comments settings and take back control of your site. So, let’s get into it!
Q: Can I disable comments for specific posts or pages instead of the whole site?
A: Absolutely! WordPress gives you the flexibility to choose. If you only want to disable comments on certain posts or pages, you can do that during the editing process. This way, you can keep comments enabled where they add value and turn them off where they don’t.
Q: What if I change my mind later and want to enable comments again?
A: No worries! You can easily toggle comments back on whenever you want. WordPress allows you to adjust your settings at any time, so you’re never stuck with a decision. Just remember, it’s all about what works best for you and your content!
Q: Will disabling comments affect my site’s SEO?
A: Not really. While comments can engage users, they are not a significant factor in search engine rankings. Disabling comments won’t hurt your SEO; in fact, it can improve page loading speeds and overall user experience, which are more critical to SEO success.
Q: How do I disable comments in WordPress? Can you walk me through it?
A: Of course! Here’s a quick step-by-step guide:
- Log in to your WordPress dashboard.
- Go to Settings > Discussion. Here, you’ll see various options.
- Uncheck the box next to “Allow people to post comments on new articles.” This will disable comments for any new posts by default.
- For existing posts, head to Posts > All Posts. Select the posts you want to edit, choose “Edit” from the bulk actions dropdown, and click “Apply.”
- In the bulk edit area, you’ll find a comments option to change the status to “Do not allow.”
- Click Update. Voilà! Comments are now disabled on your chosen posts.
Q: Are there any plugins that can help me manage comments better?
A: Yes, there are several plugins designed for comment management! Plugins like “Disable Comments” let you easily turn off comments site-wide or selectively. They can be super handy if you want more control over your settings without diving into the code.
Q: What if I still want to hear from my audience without comments?
A: That’s a valid concern! Consider creating a contact form or linking to your social media channels. This way, visitors can still reach out or provide feedback without cluttering your posts with comments. It keeps the conversation going while maintaining a cleaner site!
Q: Any final tips for someone looking to disable comments?
A: Just remember: it’s your site, and you get to choose how you want it to function. Don’t be afraid to experiment with different settings and see what works for you. Disabling comments can be a smart move if it aligns with your goals. Happy blogging!
The Way Forward
And there you have it! Disabling comments in WordPress is a simple yet effective way to take control of your website’s interaction and keep the focus on your content. Whether you’re looking to reduce spam, streamline your site’s discussions, or just prefer a more curated experience for your readers, following the steps we’ve outlined will get you there in no time.
Remember, it’s all about creating the right environment for your audience. By managing comments, you can foster a space where your content shines without distractions. So, why not give it a try? Take a few minutes to adjust your settings today and enjoy the peace of mind that comes with a comment-free zone!
If you have any questions or run into any hiccups along the way, feel free to drop a comment (yes, pun intended!) below. We’re here to help. Happy blogging!


New Providers
Enjoy The Speed Of Downloading & Uploading With 1GBPS Port
Affordable Dedicated Servers & Colocation Services. Services: Dedicated Servers Colocation Private Cabinet Colocation DDoS Protection
Up to 85% off hosting + website builder

Latest News
- 8+ Free Construction Templates and Page DesignsJuly 11, 2026 17
- How to Create a Graphic Design Portfolio That Gets HiresJuly 11, 2026 18
- Otter Blocks 3.2.0: AI Page Building and a New Design LibraryJuly 11, 2026 18
- 11 Best Web Hosting Services for Developers 2026July 11, 2026 21
- How to Create a Webshop: A Step-by-Step GuideJuly 10, 2026 23

We specialize in providing Web hosting reviews. Where you can search for potential hosts.