Looking to give your WordPress site a unique flair? Custom fonts can transform your design! In this article, we’ll explore four easy methods to add custom fonts, helping your site stand out and reflect your brand’s personality. Let’s dive in!
How to Add Custom Fonts to Your WordPress Site (4 Methods)
Are you tired of the same old fonts that everyone else is using on their WordPress site? Well, you’re in luck! Adding custom fonts can be a game-changer for your website’s aesthetics, helping you stand out in the crowded online space. Whether you want to enhance your brand identity, improve readability, or simply express your unique style, custom fonts can elevate your site to the next level. In this article, we’ll explore four easy methods to add custom fonts to your WordPress site, ensuring that your text not only looks good but also aligns perfectly with your vision. So, grab a cup of coffee, and let’s dive into the world of typography that will transform your site from ordinary to extraordinary!
Choosing the Right Custom Fonts for Your WordPress Site
When it comes to enhancing the visual appeal of your WordPress site, custom fonts are a powerful tool. They not only improve readability but also convey your brand’s personality. Here are some key considerations to keep in mind while selecting the perfect fonts:
- Brand Identity: Choose fonts that reflect your brand’s voice. For example, a playful font may suit a children’s website, while a sleek, modern typeface might be more appropriate for a tech company.
- Readability: Ensure that your chosen fonts are easy to read across various devices. Test the font size and weight on both desktop and mobile views to maintain clarity.
- Compatibility: Check if the fonts you like work well with WordPress themes and plugins. Some fonts may not render properly, causing layout issues.
- Web Safety: Opt for web-safe fonts or those hosted on reliable platforms like Google Fonts or Adobe Fonts. This ensures consistent display across all browsers.
Another important aspect is the combination of fonts. Pairing can elevate your design, but it can also clash if not done correctly. Here are a few combinations to consider:
| Font Pairing | Best For |
|---|---|
| Montserrat & Merriweather | Modern business websites |
| Raleway & Lora | Creative portfolios |
| Open Sans & Roboto Slab | Blogs and online magazines |
Additionally, consider the emotional impact of fonts. Different typefaces evoke distinct feelings. For instance, serif fonts can convey tradition and reliability, while sans-serif fonts often feel more approachable and modern. Think about the message you want to send to your visitors.
don’t forget about the technical aspects. Too many custom fonts can slow down your site, affecting user experience and SEO. Aim for a minimal number of fonts and weights per project. The ideal is to use a maximum of two or three different fonts, ensuring they complement each other while keeping load times low.
is a blend of art and science. By carefully considering your brand identity, readability, compatibility, and emotional impact, you can significantly enhance your site’s overall look and feel. Remember, the goal is not just to choose fonts that look good, but also to enhance the user experience throughout the site.

Understanding the Benefits of Custom Fonts for Branding
When it comes to establishing a strong brand identity, the choice of typography plays a crucial role. Custom fonts are not just about aesthetics; they convey your brand’s personality and values in a way that standard fonts cannot. By selecting a unique font, you can create a visual representation that resonates with your target audience.
Here are some key benefits of using custom fonts in your branding:
- Distinctiveness: Custom fonts help set your brand apart from competitors, making it easier for customers to recognize and remember your brand.
- Brand Recognition: A well-chosen font can become synonymous with your brand, similar to how logos function, enhancing overall brand recall.
- Emotional Connection: Fonts can evoke feelings and convey messages. For instance, a playful font might appeal to a younger audience, while a sophisticated font could attract a more upscale clientele.
- Consistency: Custom fonts allow for consistent use across all marketing materials, from your website to social media, ensuring a cohesive brand image.
- Versatility: Whether you need a font for headlines, body text, or promotional graphics, custom fonts can be tailored to suit various applications.
Moreover, the potential for increased engagement should not be overlooked. A unique font can catch the eye, inviting visitors into your content and encouraging them to explore further. When users find your site visually appealing, they are more likely to stay, interact, and convert.
To illustrate the impact of different fonts, consider the following table that compares common font styles and their associations:
| Font Style | Common Associations |
|---|---|
| Serif | Tradition, Reliability |
| Sans Serif | Modern, Clean |
| Script | Elegance, Creativity |
| Display | Playfulness, Boldness |
Using custom fonts not only enhances the visual appeal of your website but also reinforces your branding efforts through strategic design choices. Whether you are a startup or an established business, investing in a custom font can yield significant returns in brand loyalty and customer engagement.
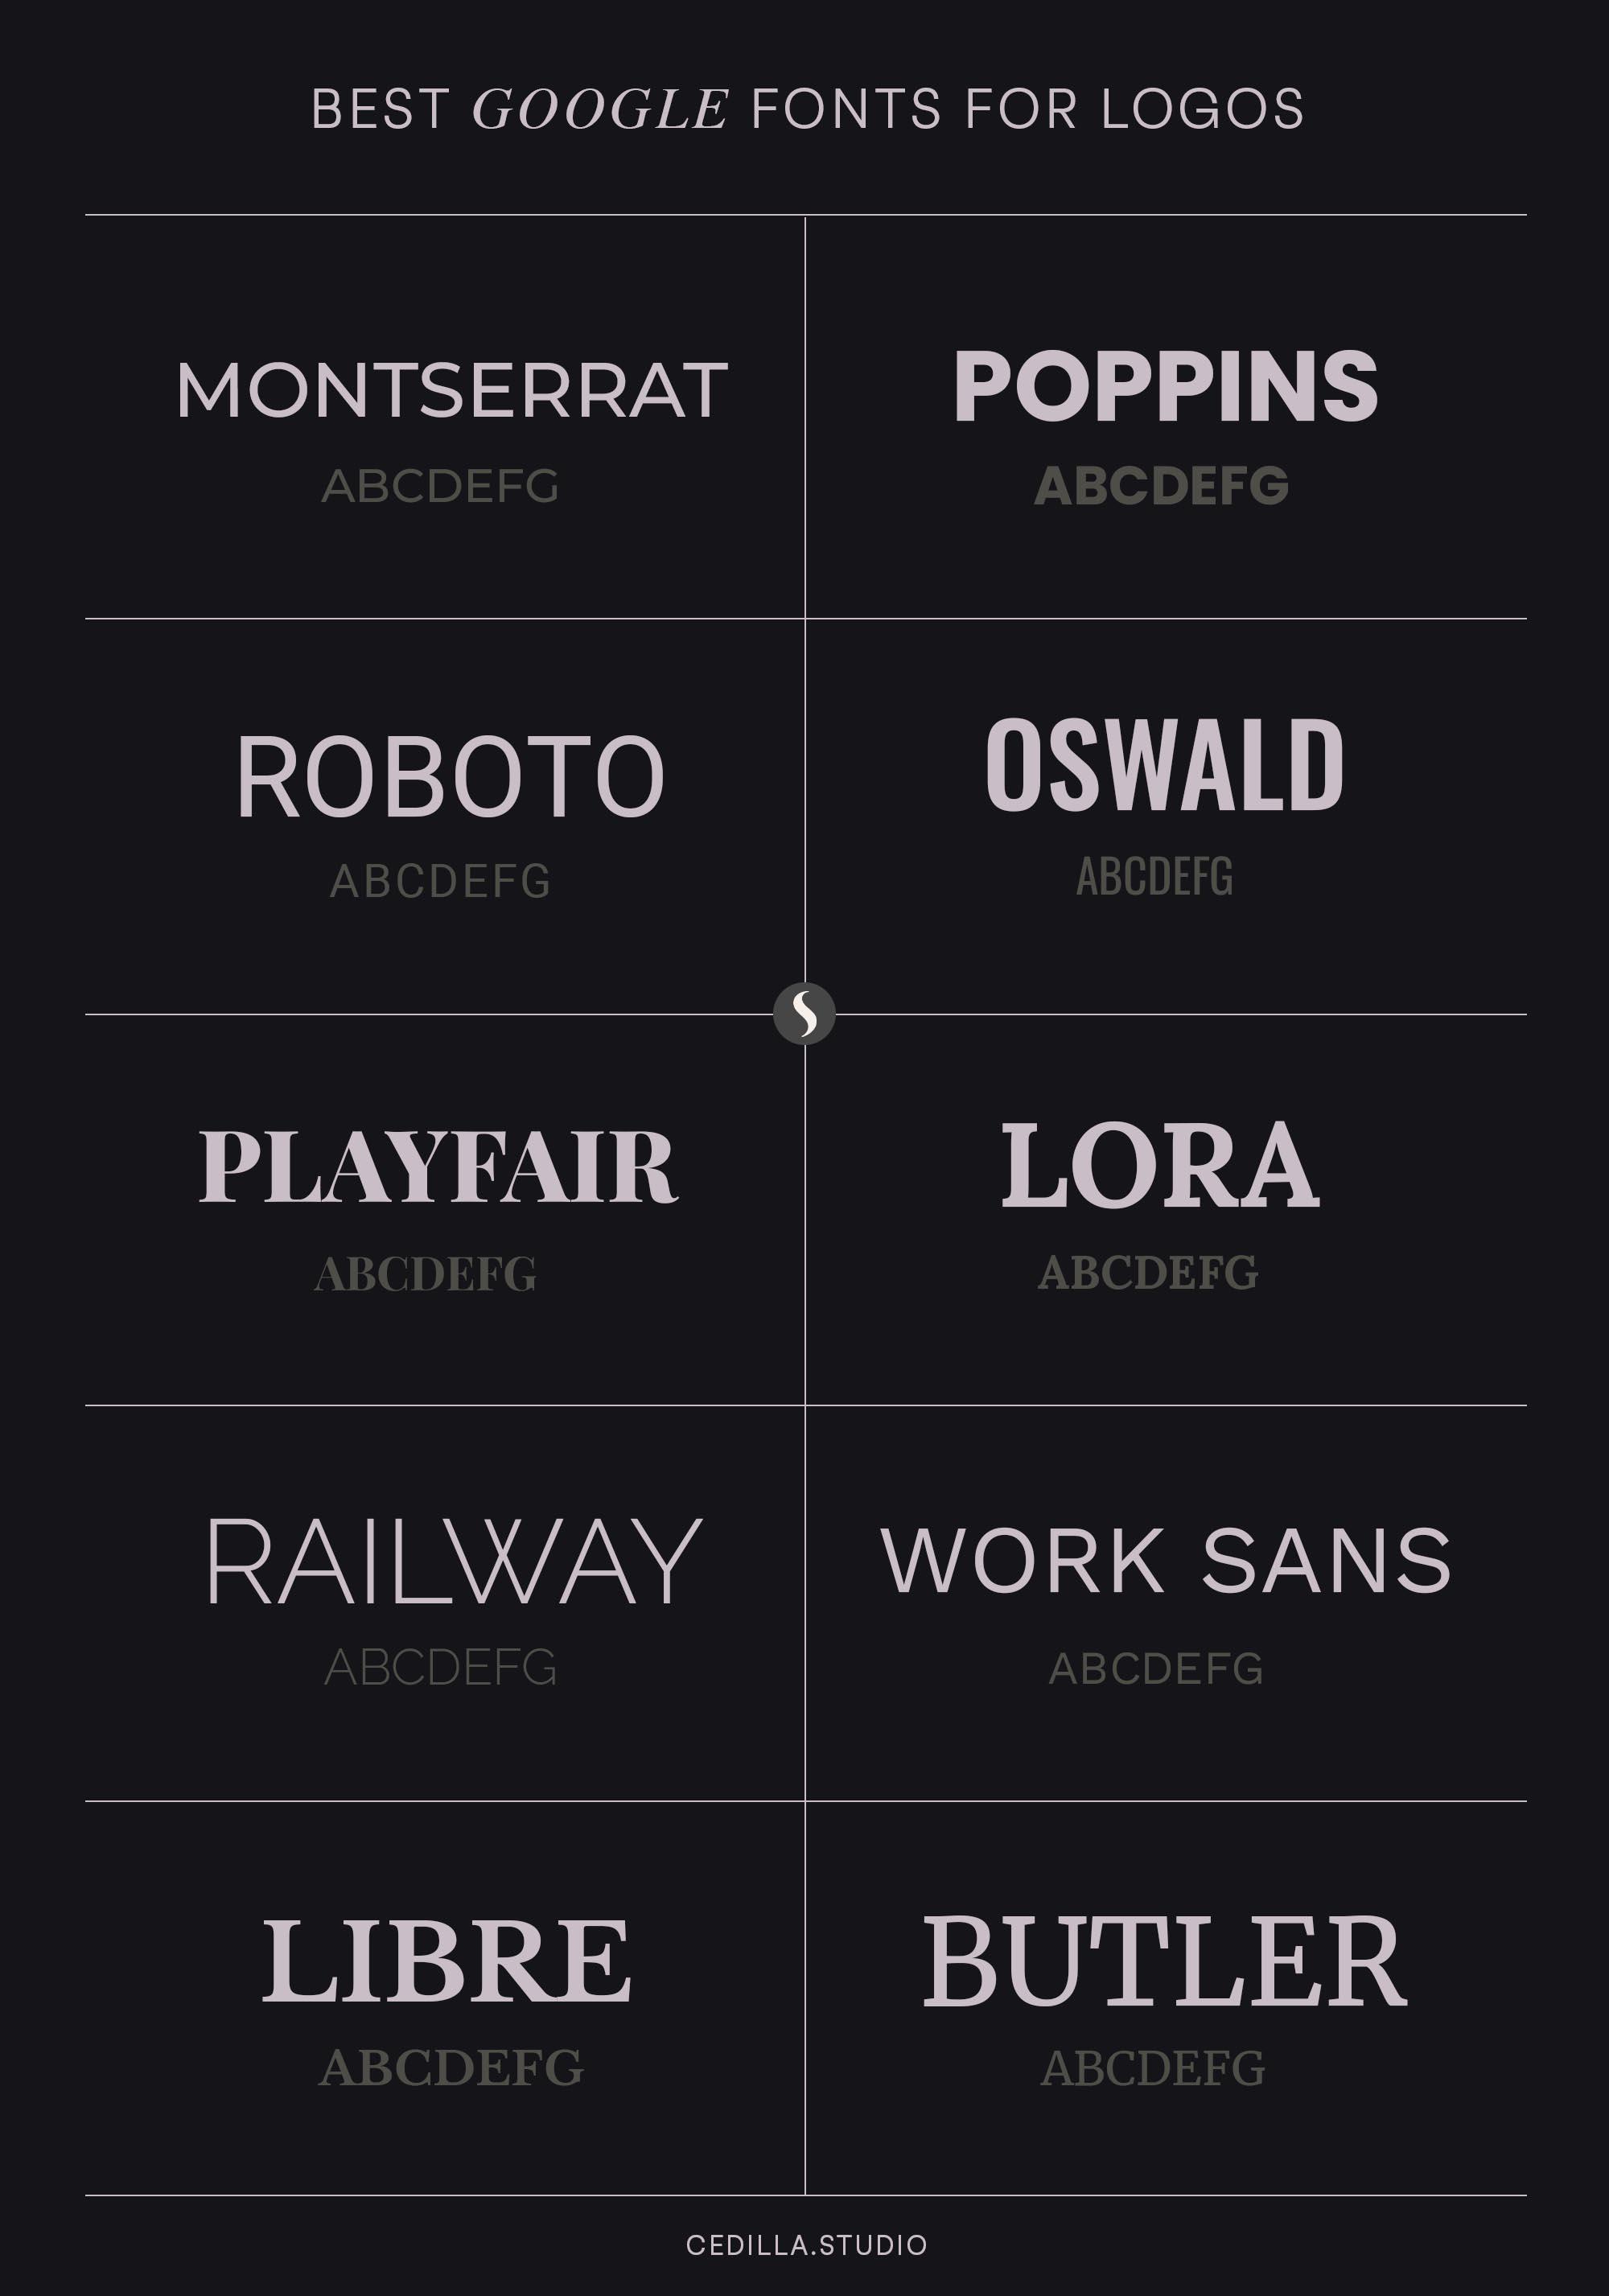
Exploring Google Fonts: The Easiest Option for Everyone
When it comes to enhancing the visual appeal of your WordPress site, Google Fonts stands out as an incredibly user-friendly option. With a vast library of over 1,000 font families, it’s not just about aesthetics; it’s about creating a unique identity for your site that resonates with your audience. Whether you’re a seasoned designer or a complete beginner, integrating these fonts is straightforward and rewarding.
One of the major advantages of Google Fonts is its compatibility across different browsers and devices. This means you can ensure that your typography looks consistent, no matter where your visitors are accessing your content from. To get started, simply visit the Google Fonts website, where you can browse, preview, and select the fonts that suit your style.
To incorporate Google Fonts into your WordPress site, you can follow a few simple steps:
- Choose Your Font: Find the perfect font that matches your theme and message.
- Embed the Font: Each font provides a link that you can copy and paste into your theme’s header.
- Apply CSS: Use custom CSS to apply the font to specific elements throughout your site.
For those who prefer visual assistance, here’s a quick reference table summarizing how to implement Google Fonts:
| Step | Action |
|---|---|
| 1 | Visit Google Fonts |
| 2 | Select and customize your font |
| 3 | Copy the embed code |
| 4 | Paste into WordPress header |
| 5 | Use CSS to style your texts |
Remember, the beauty of Google Fonts lies not just in its wide selection but also in its ease of use. You can explore various styles, weights, and combinations to create a typography hierarchy that enhances readability and user engagement. Don’t hesitate to experiment and see what resonates best with your audience.
In a digital landscape where first impressions matter, the right font can make all the difference. Google Fonts allows you to elevate your website’s design effortlessly, proving that anyone, regardless of their technical skill level, can achieve a professional look.
Uploading Fonts Directly to WordPress: A Step-by-Step Guide
Uploading custom fonts directly to your WordPress site can significantly enhance your site’s aesthetics and branding. Let’s walk through an easy step-by-step process to get those fonts up and running.
Step 1: Prepare Your Fonts
Before diving into WordPress, ensure your custom fonts are web-friendly. The most common formats are:
- WOFF (Web Open Font Format)
- TTF (TrueType Font)
- EOT (Embedded OpenType)
- SVG (Scalable Vector Graphics)
Having your fonts in these formats will ensure they load correctly across various browsers.
Step 2: Upload Fonts to Your WordPress Media Library
Now that your fonts are ready, log into your WordPress dashboard:
- Navigate to Media > Add New.
- Click on Select Files and choose your font files from your computer.
- Once uploaded, click on each file to get the URL. You’ll need this for the next steps.
Step 3: Add Custom CSS for Your Fonts
You’ll need to apply some CSS to tell WordPress how to use these fonts. Go to Appearance > Customize > Additional CSS. Here’s a quick template to help you get started:
@font-face {
    font-family: 'YourCustomFontName';
    src: url('URL_TO_YOUR_FONT_FILE') format('woff');
}
Replace YourCustomFontName with the name you want to use, and URL_TO_YOUR_FONT_FILE with the actual URL of your uploaded font.
Step 4: Apply Your Custom Font
To apply your newly added font, you can target specific elements or the entire body. Here’s an example to change the body font:
body {
    font-family: 'YourCustomFontName', sans-serif;
}
Modify the CSS selector based on what you want to target, be it headings, paragraphs, or specific classes.
Final Touches
make sure to test your site on different devices and browsers to ensure your custom fonts are rendering correctly. Sometimes, caching plugins can interfere, so clear your cache if you notice any issues.

Using a Plugin to Simplify Your Font Management
Managing fonts on your WordPress site can often feel like a daunting task, especially if you’re not well-versed in coding or web design. Fortunately, using a plugin can streamline this process and make adding custom fonts a breeze. With just a few clicks, you can elevate your site’s design without the technical headaches.
There are several user-friendly plugins available that simplify font management. These tools allow you to easily choose, upload, and implement custom fonts across your site. Here are some of the top options:
- Easy Google Fonts: This plugin offers a comprehensive selection of Google Fonts and lets you customize them directly from the WordPress Customizer.
- Font Awesome: Ideal for adding icons alongside text, this plugin helps you enhance your typography with scalable vector graphics.
- Use Any Font: If you have specific font files, this plugin makes it straightforward to upload and apply them anywhere on your site.
| Plugin Name | Key Feature | Best For |
|---|---|---|
| Easy Google Fonts | Customizable live preview | Quick font changes |
| Font Awesome | Icon integration | Enhanced design aesthetics |
| Use Any Font | Direct file uploads | Specific font needs |
Once you have selected a plugin, installation is as easy as navigating to the plugins section in your dashboard, searching for your chosen tool, and clicking “Install.” After activation, you’ll usually find a new menu option added to your dashboard, guiding you through the process of selecting or uploading fonts.
Customization options vary by plugin, but most will allow you to apply fonts to specific elements such as headings, body text, and buttons. The ability to tweak font sizes, colors, and line heights gives you the flexibility to create a visually appealing site that aligns with your brand identity.
Using a plugin not only saves you time but also reduces the risk of conflicts with your theme or other plugins. Plus, many of these tools are regularly updated to ensure compatibility with the latest versions of WordPress, providing you peace of mind as you enhance your site’s typography.

Editing Your Theme’s CSS to Add Custom Fonts Effectively
Adding custom fonts to your WordPress theme can dramatically enhance the overall look of your site. To effectively incorporate these fonts, you can edit your theme’s CSS directly. Here’s how you can do it while ensuring your design remains cohesive and appealing.
First, you’ll need to choose a font that aligns with your brand’s identity. Websites like Google Fonts provide a wide array of free options. Once you’ve selected your desired font, you can embed it into your site by following these steps:
- Go to the Google Fonts website and select your font.
- Copy the provided link tag.
- Navigate to your WordPress dashboard, then go to Appearance > Theme Editor.
- Locate the header.php file and paste the link tag within the section.
With the font now embedded, it’s time to style your text. Open your theme’s style.css file and add the following CSS code:
body {
    font-family: 'Your Custom Font', sans-serif;
}
h1, h2, h3, h4, h5, h6 {
    font-family: 'Your Custom Font', serif;
}
Make sure to replace ‘Your Custom Font’ with the actual name of the font you have chosen. This ensures that the font is applied to the body text and headings throughout your site.
If you want to target specific elements, you can extend your CSS like this:
| Element | Font Style |
|---|---|
| Paragraphs | font-family: ‘Your Custom Font’; |
| Buttons | font-family: ‘Your Custom Font’; |
| Quotes | font-family: ‘Your Custom Font’; |
By customizing the font styles for various elements, you can achieve a more personalized look while maintaining readability. Remember to use fallback fonts in your CSS, ensuring that if the custom font fails to load, a similar font will be displayed instead. This can be done as follows:
font-family: 'Your Custom Font', Arial, sans-serif;
always check how your site renders across different browsers and devices. Testing ensures that your custom fonts are not only visually appealing but also functional and accessible to all users.

Testing and Optimizing Font Performance for Better User Experience
When it comes to enhancing the user experience on your WordPress site, the performance of your fonts plays a pivotal role. Slow-loading fonts can lead to higher bounce rates and diminished engagement. Therefore, it’s essential to test and optimize your custom fonts to ensure they contribute positively to your site’s overall performance.
Here are some strategies to consider:
- Use Font Subsetting: By only loading the character sets that your site actually uses, you can significantly reduce font file sizes. This is especially beneficial for sites using custom or less common fonts.
- Leverage Font Display Options: Utilize the CSS property
font-displayto control how your fonts are displayed while loading. Options likeswapensure text remains visible until the custom font is fully loaded. - Limit the Number of Fonts: Each additional font increases load times. Try to use a maximum of two to three fonts across your site to keep it lightweight and fast.
To analyze your font performance, consider using tools like Google PageSpeed Insights or GTmetrix. They provide valuable insights into how your fonts affect loading times and overall site speed. You can also look for render-blocking CSS, which can delay the display of your fonts, impacting user experience.
| Tool | Purpose | Key Feature |
|---|---|---|
| Google PageSpeed Insights | Analyze site speed | Detailed font loading metrics |
| GTmetrix | Performance testing | Waterfall view of font loading |
| WebPageTest | Advanced speed analysis | Custom font loading reports |
Don’t forget to monitor your site’s performance regularly. After implementing changes, run your site through the performance tools again to see if your optimizations are working. Regular testing ensures that your fonts are always contributing to a fast, smooth user experience.
keep an eye on updates and optimizations from your font providers. Many font services are continuously improving their delivery methods, which can enhance performance. By staying informed, you can adapt your strategies accordingly and ensure your site remains both visually appealing and user-friendly.
Troubleshooting Common Font Issues on Your WordPress Site
If you’ve added custom fonts to your WordPress site and they aren’t displaying as expected, don’t worry—you’re not alone! Here are some common issues you might encounter and how to fix them quickly:
- Font Not Loading: Ensure that the font files are correctly uploaded to your server. Check your CSS for any typos in the font URL.
- Cache Problems: Sometimes, changes may not appear due to caching. Clear your browser cache and any caching plugins you might be using.
- CSS Conflicts: Inspect your CSS and look for conflicts that might prevent your custom font from loading. Use the browser’s developer tools to explore which styles are being applied.
Another common issue is compatibility across different browsers. Different browsers may render fonts differently, so it’s essential to test your site on multiple platforms. Here are a few tips to ensure cross-browser compatibility:
- Use Web-Safe Fonts: When possible, include fallback fonts in your CSS.
- Check Font Formats: Ensure that you’re using multiple formats (e.g., WOFF, TTF, EOT) to cover various browser needs.
- Test on Mobile: Don’t forget to check how your custom fonts look on mobile devices. Use responsive design tools to see real-time changes.
In some cases, plugins can interfere with font rendering. If you started experiencing issues after installing a new plugin, try disabling it temporarily to see if that resolves the problem. If you find the culprit, consider alternatives or reach out to the plugin developer for support.
| Issue | Solution |
|---|---|
| Font Not Displaying | Check URL and file uploads |
| Formatting Issues | Inspect CSS for conflicts |
| Browser Compatibility | Use multiple font formats |
Lastly, ensure that your theme supports custom fonts. Some themes may have specific settings or limitations regarding font usage. Consult your theme documentation for guidance on custom fonts and any particular settings you might need to adjust.
Best Practices for Using Custom Fonts Without Slowing Down Your Site
Incorporating custom fonts into your WordPress site can greatly enhance the visual appeal, but it’s essential to strike a balance between aesthetics and performance. To ensure a seamless user experience, consider these best practices:
- Choose the Right Format: Use formats like WOFF and WOFF2 for better compression and faster loading times. These formats are specifically designed for web usage and are supported by all modern browsers.
- Limit Font Weights and Styles: Instead of importing multiple weights or styles, stick to one or two that suit your design. This reduces the number of HTTP requests and speeds up loading time.
- Use System Fonts as Fallbacks: Always define system fonts as fallbacks in your CSS. This ensures that if your custom font fails to load, the website still looks coherent with a similar system font.
- Implement Font Loading Strategies: Utilize strategies like
font-display: swap;in your CSS to enhance perceived performance. This allows text to remain visible while loading the font, improving user experience.
Another effective approach is to host your fonts locally. By doing this, you eliminate additional DNS lookups that come with loading fonts from third-party services. Here’s a quick table showcasing the benefits of local vs. external font hosting:
| Feature | Local Hosting | External Hosting |
|---|---|---|
| Loading Speed | Faster | Slower due to external requests |
| Control | Full control over font files | Limited control, reliant on third-party |
| Privacy | More secure, no data shared | Potential tracking by third parties |
Furthermore, leveraging a Content Delivery Network (CDN) can significantly enhance how quickly your fonts load. A CDN can cache your font files in various locations across the globe, ensuring that users access them from the nearest server, thus reducing latency.
Lastly, always conduct performance testing after implementing custom fonts. Tools like Google PageSpeed Insights or GTmetrix can provide valuable insights into how your fonts affect loading times. Monitoring performance regularly helps you make necessary adjustments and keep your site running smoothly.
Frequently Asked Questions (FAQ)
Q&A: How to Add Custom Fonts to Your WordPress Site (4 Methods)
Q1: Why should I consider adding custom fonts to my WordPress site?
A1: Great question! Custom fonts can elevate your website’s design and make it stand out from the crowd. They help convey your brand’s personality and improve user experience. A unique font can enhance readability and overall aesthetics, making your site more engaging for visitors. Plus, it’s a fun way to show off your creativity!
Q2: What are the four methods to add custom fonts to my WordPress site?
A2: You’ve got options! Here are the four popular methods:
- Using a Plugin: This is the easiest way, especially for beginners. Plugins like “Easy Google Fonts” or “Custom Fonts” let you easily add and manage fonts without any coding.
- Using Google Fonts: You can directly integrate Google Fonts into your site with a simple code snippet in your theme’s header. It’s straightforward and gives you access to a vast library of fonts.
- Uploading Custom Fonts: If you have a specific font in mind, you can upload it directly to your WordPress theme. This involves using @font-face in CSS but allows for complete customization.
- Using Theme Customizer: Many modern themes come with built-in options for font customization. You can change fonts directly from the WordPress Customizer without any extra hassle.
Q3: Which method is the easiest for a WordPress newbie?
A3: If you’re just starting out, I’d recommend using a plugin. It’s super user-friendly and doesn’t require any coding knowledge. Plugins provide a visual interface where you can select your fonts and see changes in real-time. It’s perfect for creating a polished look without the tech stress!
Q4: Are there any downsides to using custom fonts?
A4: While custom fonts can enhance your site’s design, there are a few things to consider. Some fonts can slow down your site if not optimized properly. It’s also essential to ensure that your chosen fonts are legible and not overly decorative, which could impact user experience. Lastly, always check for licensing to avoid any legal issues with font usage!
Q5: Can I mix and match different font styles on my site?
A5: Absolutely! Mixing fonts can add personality to your site, but be mindful of the overall design. A good rule of thumb is to pair a decorative font with a more readable one for body text. This creates a nice balance and ensures that your content remains accessible. Just keep it to two or three fonts to avoid a cluttered look!
Q6: How do I ensure my custom fonts are optimized for SEO?
A6: Great point! While fonts aren’t a direct SEO factor, site speed is. To optimize your custom fonts, you can:
- Use only the font weights and styles you need.
- Host the fonts locally rather than relying on external servers.
- Minimize the number of font requests by combining styles when possible.
This way, you keep your site’s loading time speedy while enjoying the beauty of custom typography!
Q7: Where can I find great custom fonts for my website?
A7: There are tons of resources! Google Fonts is a popular free option, with a vast library to choose from. Other great sites include Adobe Fonts, Font Squirrel, and DaFont. Just make sure to check the licensing to ensure you can use the fonts for your intended purpose, especially for commercial projects!
Feel free to dive into these methods and transform your WordPress site with stunning custom fonts. Your visitors will appreciate the fresh look, and you’ll enjoy the boost in creativity! Happy font hunting!
In Retrospect
And there you have it! Custom fonts can truly elevate your WordPress site, giving it that unique flair and ensuring it stands out in the crowded digital landscape. Whether you choose to go the plugin route, add them manually via CSS, utilize Google Fonts, or integrate Adobe Fonts, each method has its perks and can cater to various skill levels and design preferences.
So, why not take a moment to experiment with different fonts and see how they transform the look and feel of your website? After all, your site is a reflection of your brand, and the right typeface can convey the professionalism, creativity, or warmth you aim to project.
If you have any questions or need further guidance as you embark on this font adventure, feel free to reach out. Happy customizing, and may your WordPress site be as unique as your vision!


New Providers
Enjoy The Speed Of Downloading & Uploading With 1GBPS Port
Affordable Dedicated Servers & Colocation Services. Services: Dedicated Servers Colocation Private Cabinet Colocation DDoS Protection
Up to 85% off hosting + website builder

Latest News
- 8+ Free Construction Templates and Page DesignsJuly 11, 2026 16
- How to Create a Graphic Design Portfolio That Gets HiresJuly 11, 2026 16
- Otter Blocks 3.2.0: AI Page Building and a New Design LibraryJuly 11, 2026 15
- 11 Best Web Hosting Services for Developers 2026July 11, 2026 19
- How to Create a Webshop: A Step-by-Step GuideJuly 10, 2026 21

We specialize in providing Web hosting reviews. Where you can search for potential hosts.