Ready to take your WordPress site to the next level? Our new course on creating custom forms with Ninja Forms is just what you need! Learn how to design user-friendly, interactive forms that boost engagement and streamline communication. Sign up today and transform your site!
New Course: How to Create Custom Forms in WordPress with Ninja Forms
Are you looking to enhance your WordPress site with dynamic, user-friendly forms that cater to your specific needs? Whether you want to gather feedback, capture leads, or streamline bookings, creating custom forms can significantly elevate your online presence. Introducing our new course: “How to Create Custom Forms in WordPress with Ninja Forms!” This engaging and easy-to-follow course will empower you to design forms that not only meet your requirements but also provide a seamless experience for your users. With the intuitive Ninja Forms plugin, you’ll learn step-by-step how to craft everything from simple contact forms to complex multi-step forms—no coding skills required! Join us on this exciting journey, and discover how you can transform your WordPress site, boost user engagement, and turn visitors into loyal customers. Ready to dive in? Let’s get started!
Unleash Your Creativity with Custom Forms in WordPress
Are you ready to elevate your website’s functionality and engage your audience like never before? With custom forms, you can transform the way you collect information, feedback, and even payments. Imagine the possibilities—surveys, contact forms, event registrations, and more, all tailored specifically to your needs!
Using Ninja Forms, crafting these forms is easier than ever. This powerful plugin offers a user-friendly interface that allows you to drag and drop elements into place. You don’t need to be a coding expert to create stunning forms that match your website’s design and functionality. Here’s what you can expect to learn in the course:
- Form Creation Basics: Understand the fundamental components of a form and how to structure them effectively.
- Advanced Fields: Discover how to use conditional logic, multi-part forms, and custom field types to enhance user experience.
- Email Notifications: Set up automatic responses to keep your visitors informed and engaged.
- Integrations: Learn how to connect your forms with popular services like Mailchimp, PayPal, and more.
One of the standout features of Ninja Forms is its flexibility. Whether you need a simple contact form or a complex registration form, the plugin’s extensive options allow you to customize every detail. Plus, with the ability to style your forms using CSS, you can ensure they fit seamlessly into your site’s aesthetic.
| Feature | Benefit |
|---|---|
| Drag and Drop Interface | Easy to use for beginners and pros alike |
| Responsive Design | Forms look great on any device |
| Data Collection | Effortlessly gather and manage submissions |
| Customizable Templates | Save time with pre-designed options |
But that’s not all! With our new course, you’ll also dive into best practices for form optimization. A well-crafted form not only encourages submissions but also enhances user experience. We’ll cover strategies such as:
- Minimizing Fields: Keep it short and sweet to maximize completion rates.
- Clear Call-to-Action: Guide users on what to do next with compelling CTAs.
- Testing and Analytics: Use A/B testing to find what works best for your audience.
Ready to get started? With our comprehensive course, you’ll be equipped with the skills and knowledge to create custom forms that not only look great but also drive results. Unleash your creativity and watch your website flourish with the power of Ninja Forms!
Discover the Power of Ninja Forms for Your Website
Ninja Forms is a powerful tool that empowers you to create stunning, custom forms for your WordPress website without any coding knowledge. Whether you’re looking to capture leads, gather feedback, or simplify your event registrations, this plugin provides an intuitive interface that makes form creation a breeze.
One of the standout features of Ninja Forms is its drag-and-drop builder. This allows you to effortlessly arrange fields to fit your design needs. You’ll have the freedom to:
- Add various field types: Text fields, dropdowns, checkboxes, and more.
- Customize field labels: Make them resonate with your audience.
- Set conditional logic: Show or hide fields based on user selections.
Moreover, Ninja Forms doesn’t just stop at creation. It integrates seamlessly with your favorite email marketing services and CRM platforms, making it simpler than ever to manage your leads. Here are some popular integrations:
| Integration | Benefit |
|---|---|
| Mailchimp | Automatically add subscribers to your mailing list. |
| Salesforce | Streamline lead management and follow-ups. |
| Zapier | Connect with thousands of apps for more automation. |
Additionally, Ninja Forms is built with responsiveness in mind. Your forms will look great on any device, ensuring a smooth experience for your visitors. You can also enhance the user experience further with features like:
- Multi-part forms: Perfect for longer surveys or applications.
- File uploads: Allow users to submit documents easily.
- User registration: Create forms that let visitors sign up on your site.
With robust support and a plethora of documentation available, you won’t need to navigate this journey alone. Join the community of WordPress users who are transforming their websites with Ninja Forms and discover how easy it can be to engage your audience effectively.
Step-by-Step Guide to Setting Up Your First Custom Form
Creating your first custom form in WordPress using Ninja Forms is a straightforward process that opens up a world of possibilities for engaging with your audience. Let’s dive into the essential steps to get you up and running in no time!
1. Install Ninja Forms
Start by installing the Ninja Forms plugin from the WordPress dashboard. Here’s how:
- Navigate to Plugins > Add New.
- Search for “Ninja Forms” in the search bar.
- Click Install Now and then Activate.
2. Create Your First Form
Once Ninja Forms is activated, you can create your custom form:
- Go to Ninja Forms in your WordPress dashboard.
- Click on Add New.
- Select a template or start from scratch – the choice is yours!
3. Customize Your Form Fields
Now it’s time to customize your form to suit your needs:
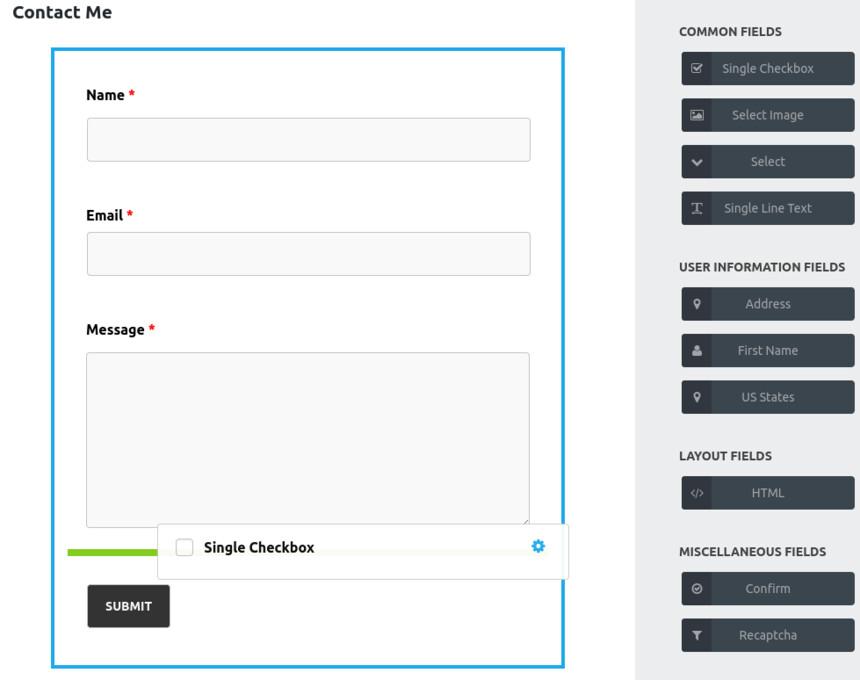
- Drag and drop fields from the left panel into your form.
- Click on each field to edit its properties, such as labels, placeholders, and validations.
- Make sure to include essential fields like Name, Email, and Message.
4. Configure Form Settings
After setting up the fields, you’ll want to configure the form settings:
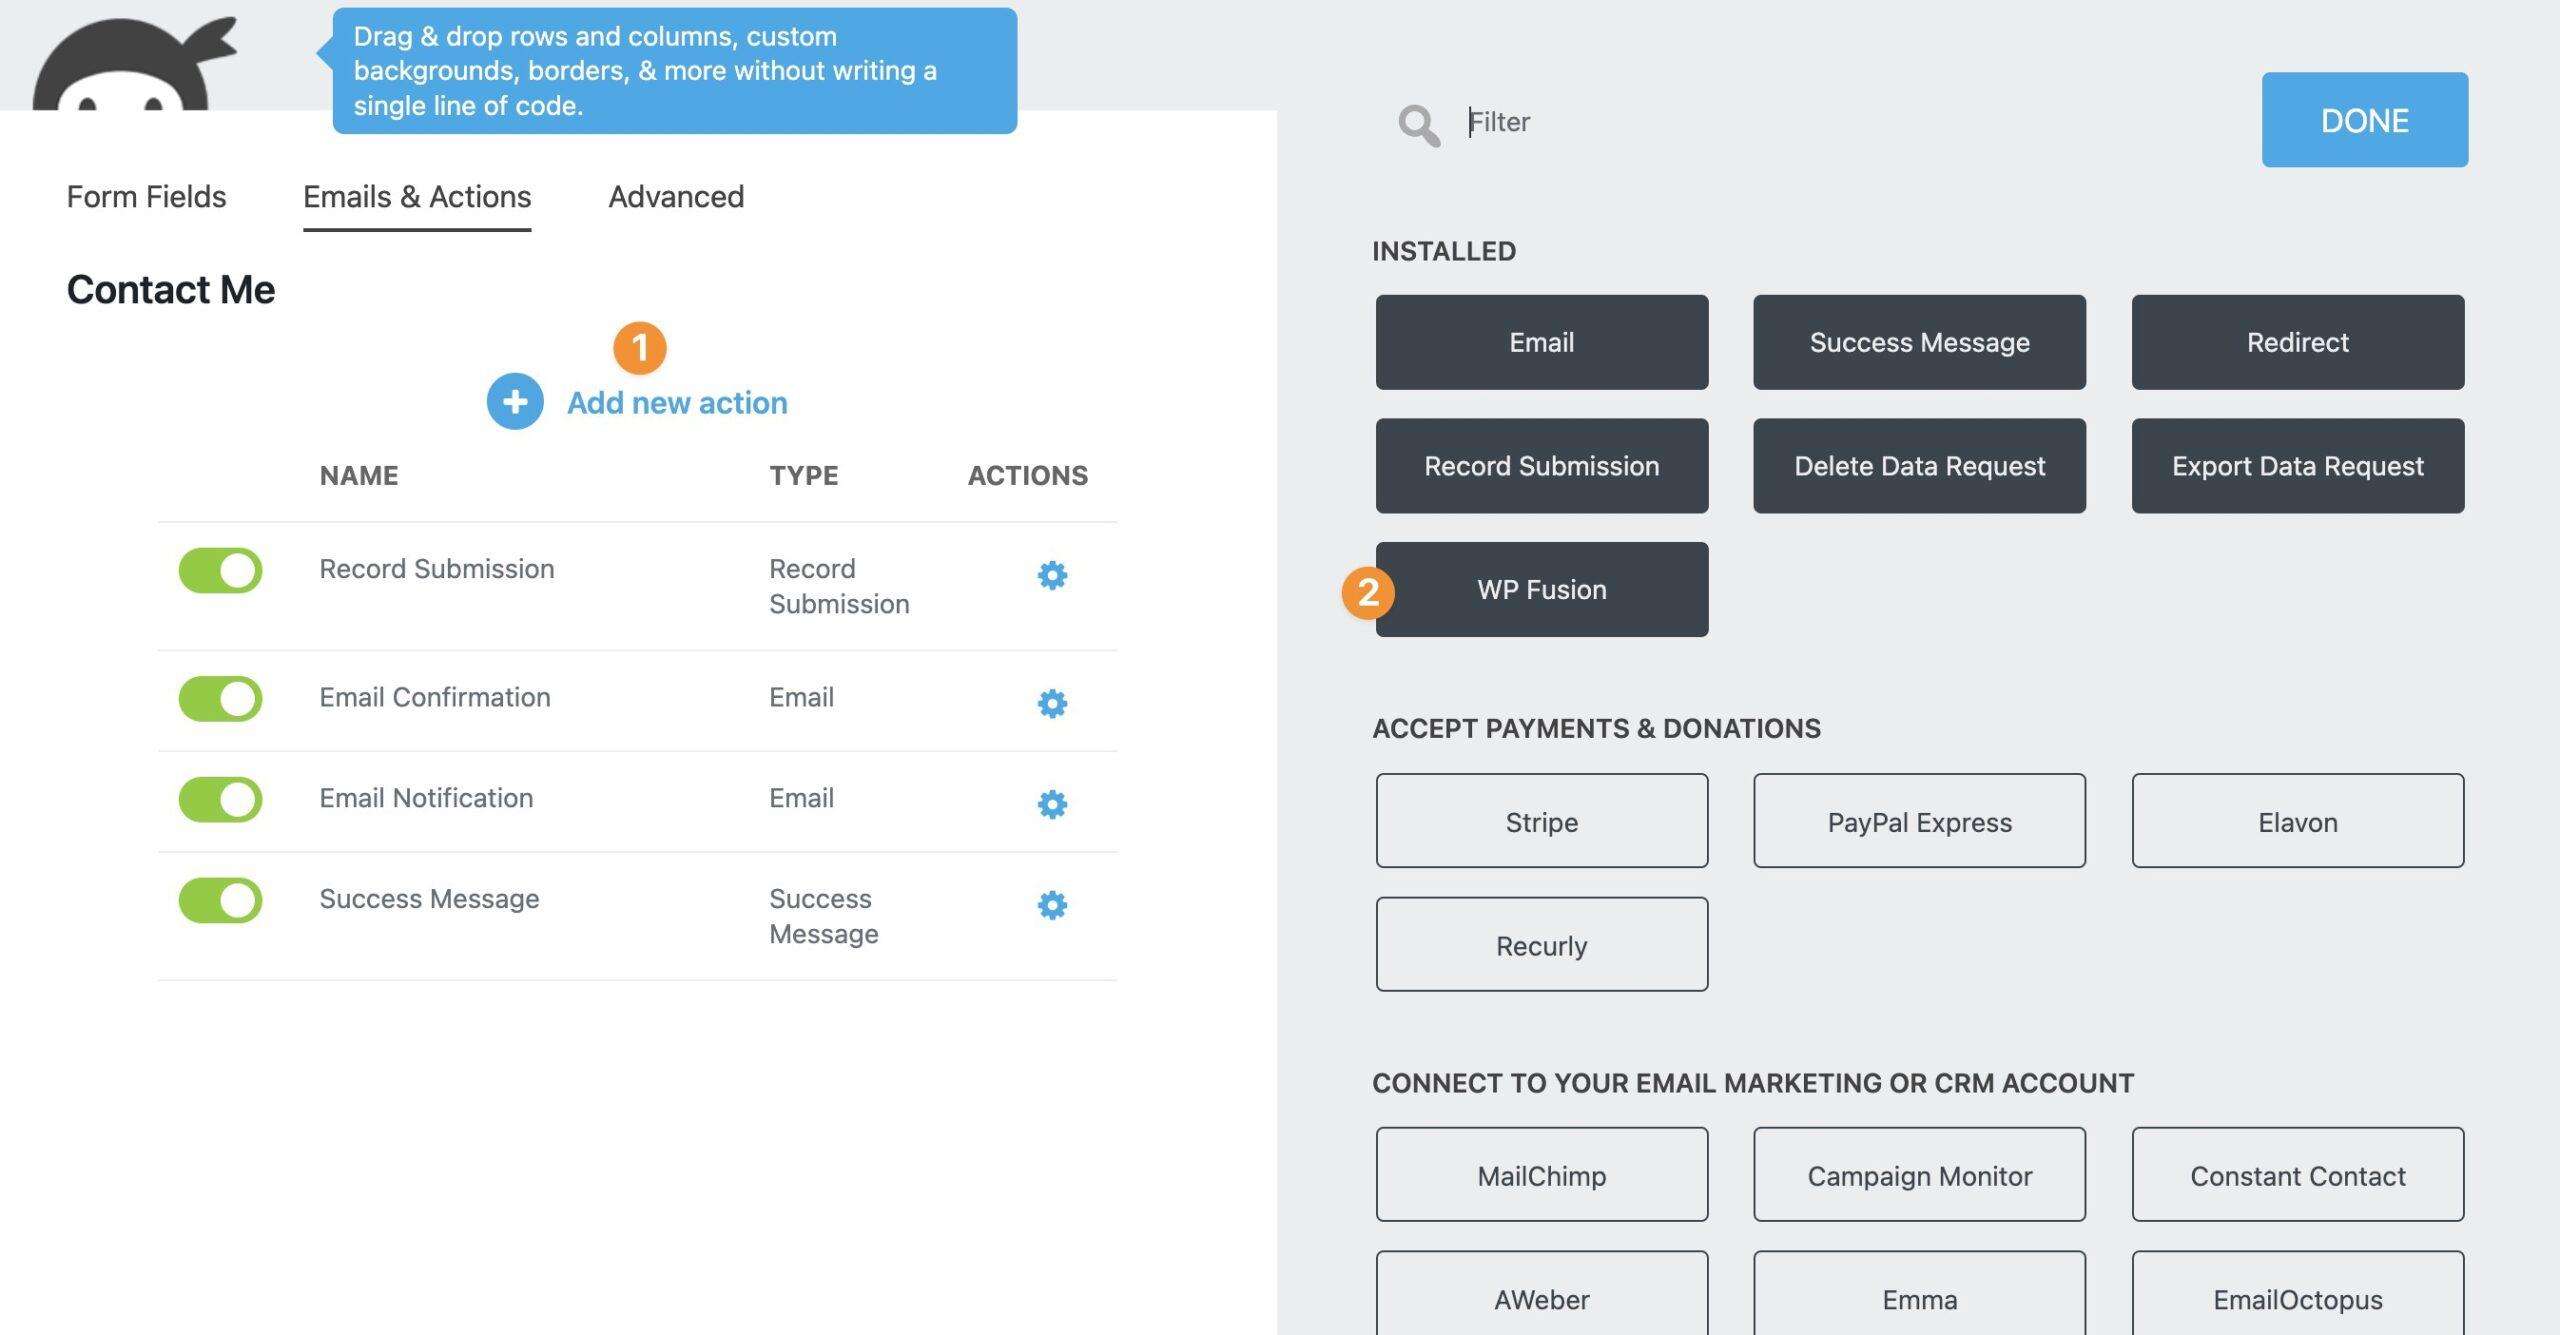
- Click on the Emails & Actions tab to set up notifications.
- Decide where you want the form submissions to be sent – typically to your email.
- Customize the confirmation message that users see after submitting the form.
5. Publish Your Form
You’re almost there! To publish your form:
- Save your form and click on the Publish button.
- Copy the shortcode provided by Ninja Forms.
- Paste the shortcode into any page or post where you want the form to appear.
6. Test Your Form
Before you launch your form to the public, testing is crucial:
- Visit the page or post where you’ve added the form.
- Fill out the form and submit it.
- Check your email for the submission notification to ensure everything is functioning correctly.
7. Analyze Submissions
Once your form is live, keep track of the submissions:
| Submission ID | Name | Date Submitted | |
|---|---|---|---|
| 001 | Jane Doe | [email protected] | 2023-10-03 |
| 002 | John Smith | [email protected] | 2023-10-04 |
Regularly check the submissions to refine your approach and enhance engagement.
Essential Features of Ninja Forms You Should Know
Ninja Forms is an incredibly versatile plugin that empowers you to create stunning forms effortlessly. Here are some essential features that will enhance your form-building experience:
- Drag-and-Drop Builder: The intuitive interface allows you to build forms simply by dragging and dropping elements, which makes the process both fun and efficient.
- Customizable Templates: Choose from a variety of pre-built templates tailored to different needs, or design your own from scratch to fit your brand perfectly.
- Conditional Logic: Create dynamic forms that respond to user input. Show or hide fields based on selections, ensuring users only see relevant questions.
- Multi-Part Forms: Break lengthy forms into manageable sections to enhance user experience and improve submission rates.
- Email Notifications: Set up automated notifications to keep you and your users informed whenever a form is submitted.
Another noteworthy aspect is the integrations that Ninja Forms offers. It connects seamlessly with various popular services and plugins, which can significantly extend the functionality of your forms. Whether you need to integrate with Mailchimp for email marketing, PayPal for payments, or Zapier for automation, Ninja Forms has got you covered.
Moreover, don’t overlook the powerful spam protection features included in Ninja Forms. Implementing honeypot techniques and Google reCAPTCHA can safeguard your site from unwanted submissions, ensuring that the data you collect is genuine and valuable.
| Feature | Description |
|---|---|
| Drag-and-Drop Builder | Easily create forms without coding. |
| Conditional Logic | Show/hide fields based on user input. |
| Email Notifications | Automated alerts for form submissions. |
| Spam Protection | Built-in tools to prevent spam entries. |
Lastly, the user-friendly interface ensures that even those with minimal technical skills can navigate and create forms effortlessly. Comprehensive documentation and community support are also readily available, making troubleshooting easy for everyone.
Maximize User Engagement with Smart Form Design
Engaging users through forms is all about striking a balance between functionality and aesthetics. When designed thoughtfully, forms can become powerful tools that not only capture data but also enhance the overall user experience. With Ninja Forms in WordPress, you can create forms that are not just utilitarian but also visually appealing and user-friendly.
To ensure your forms maximize user engagement, consider the following tips:
- Keep it Simple: Avoid overwhelming users with too many fields. Focus on what really matters and ask only for essential information.
- Utilize Conditional Logic: Show or hide fields based on user inputs to customize the experience. This keeps the form relevant and encourages completion.
- Incorporate Visual Elements: Use images, icons, and color schemes that align with your brand. A visually appealing form can capture attention and reduce abandonment rates.
- Provide Clear Instructions: Use tooltips or placeholders to guide users. Clear instructions can help alleviate confusion and ensure higher submission rates.
Another effective strategy is to implement real-time validation. This allows users to see if they’ve filled out fields correctly as they go, reducing frustration. Feedback should be instant and encouraging, reinforcing positive actions while gently correcting mistakes.
Consider adding engaging elements like progress bars for multi-step forms. This gives users a sense of accomplishment as they navigate through the process. It’s a small touch that can significantly impact user perception and satisfaction.
| Element | Benefit |
|---|---|
| Conditional Logic | Increases relevance and reduces completion time |
| Visual Design | Enhances appeal and user trust |
| Real-time Validation | Reduces errors and improves user confidence |
| Progress Indicators | Encourages completion with a sense of achievement |
always test your forms on various devices and platforms. A seamless experience across different screens ensures that all users, regardless of their device, can engage without frustration. With these strategies in place, your forms will not only capture data but also engage users effectively, leading to higher conversion rates and satisfaction.
Integrating Payment Options for a Seamless Experience
When designing custom forms in WordPress using Ninja Forms, one crucial aspect to consider is the integration of various payment options. A seamless payment experience not only enhances user satisfaction but also increases conversion rates. With the right setup, you can transform your forms into powerful tools that facilitate smooth transactions.
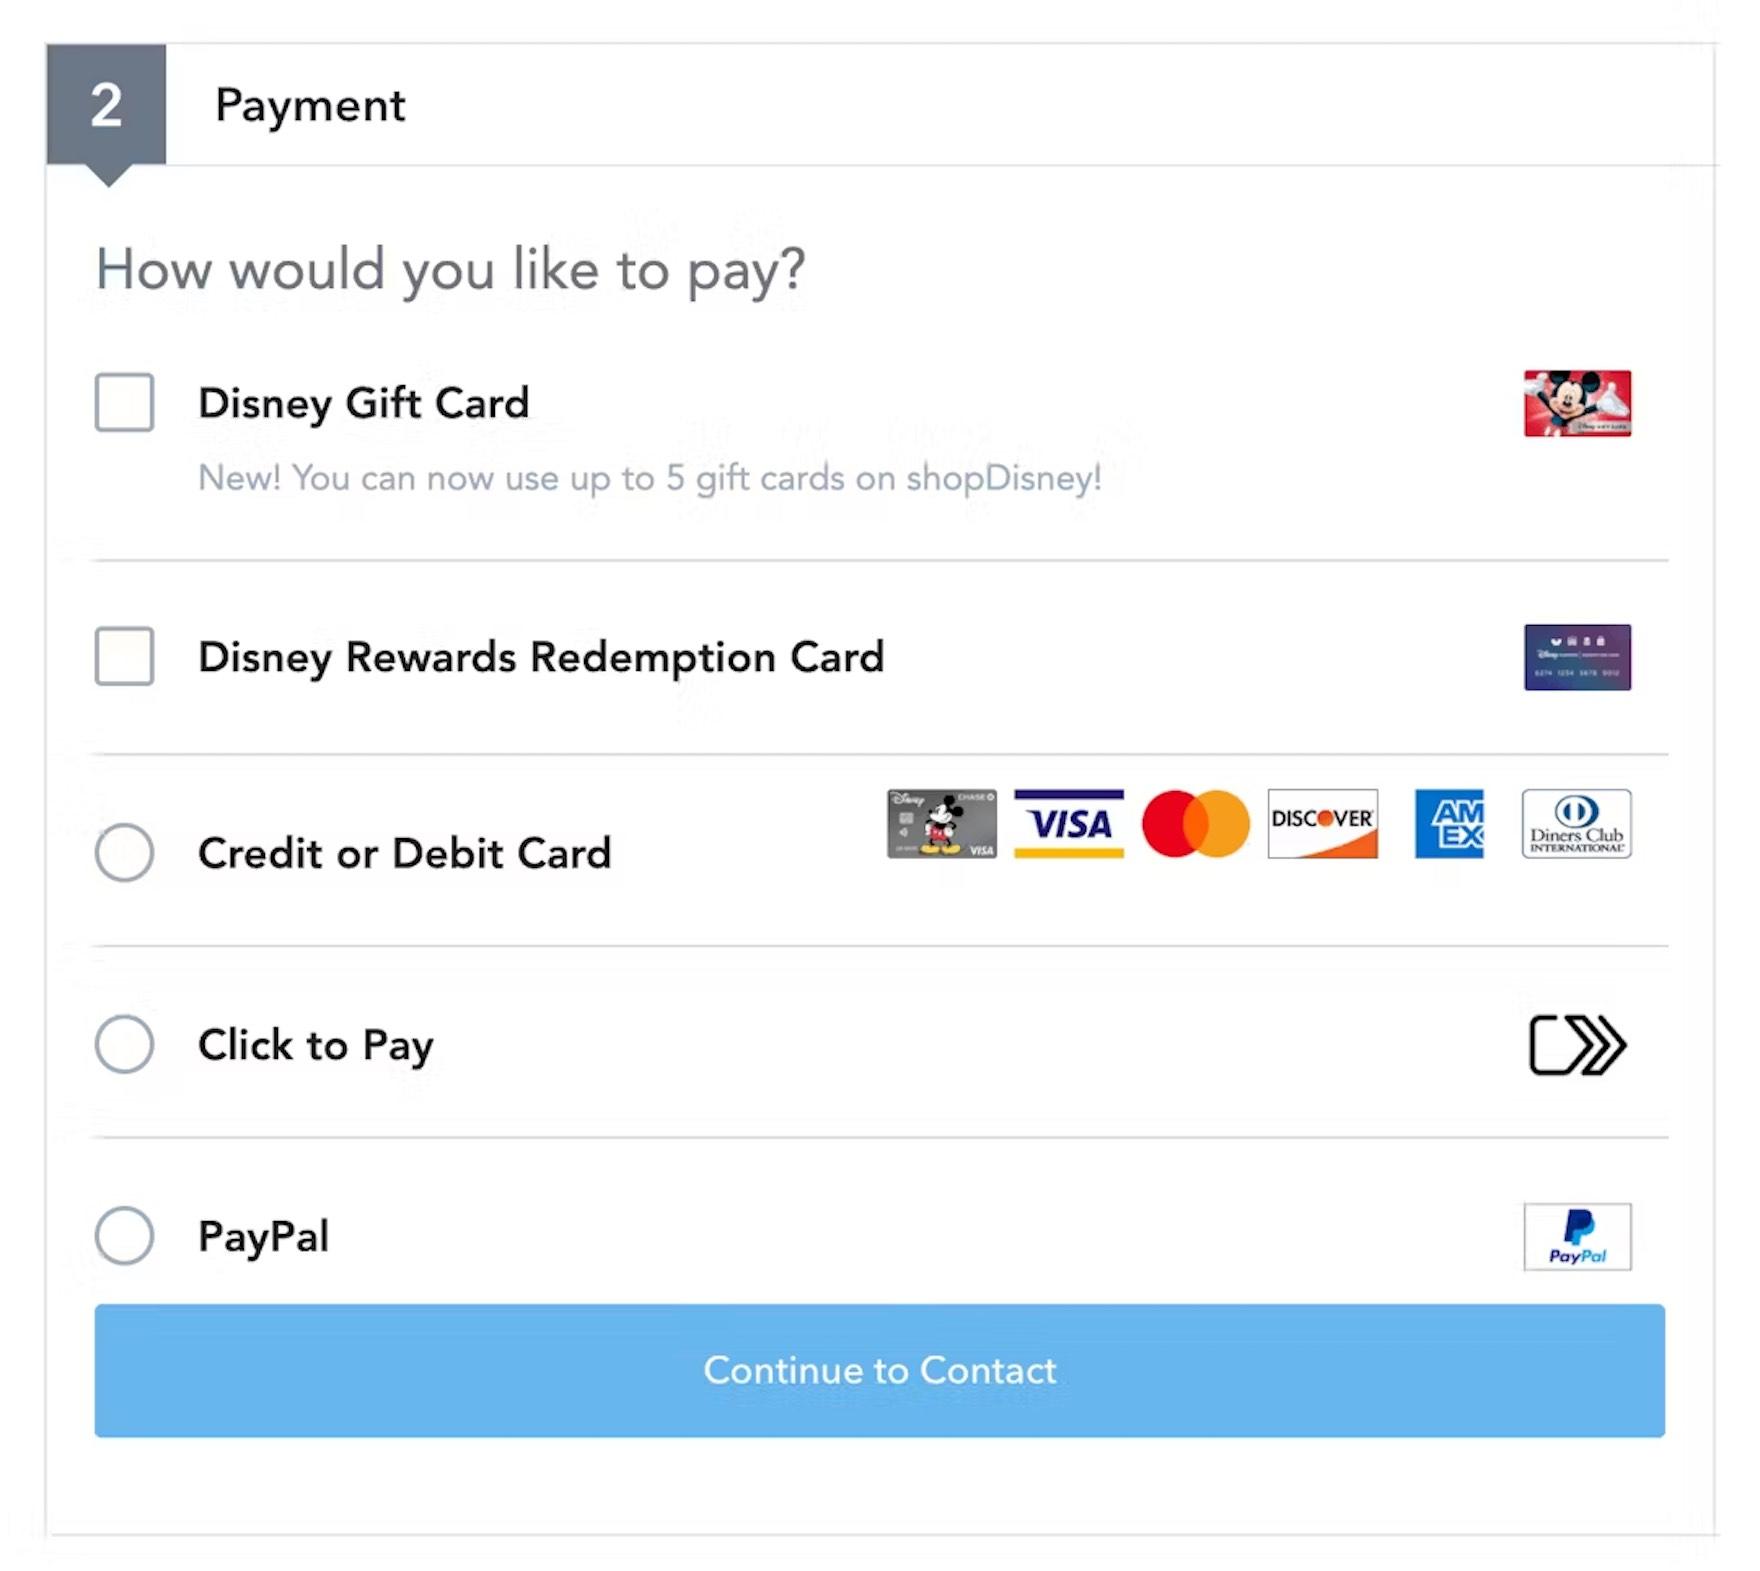
Integrating payment gateways with your forms can be straightforward and rewarding. Here are some key payment options you might consider:
- PayPal: A widely recognized platform that offers ease of use and instant transactions.
- Stripe: Known for its developer-friendly API and support for multiple currencies.
- Square: Great for businesses looking to manage both online and in-person transactions.
- Authorize.Net: A reliable choice for those needing advanced fraud protection.
To set up these options within Ninja Forms, you can follow a few simple steps. Start by installing the necessary add-ons for your chosen payment gateway. Once activated, you can access the settings directly from your form builder interface. Here’s a quick breakdown of how to do it:
| Step | Description |
|---|---|
| 1 | Install the payment gateway add-on from the Ninja Forms marketplace. |
| 2 | Configure your API keys or credentials. |
| 3 | Add a payment field to your form and customize it according to your needs. |
| 4 | Test the form in sandbox mode to ensure everything works smoothly. |
Don’t forget the importance of security during transactions. Utilize SSL certificates and ensure that your payment gateways comply with industry standards. This not only protects your users’ data but also builds trust in your brand.
Providing multiple payment options can significantly lower cart abandonment rates. Users appreciate having choices, whether they prefer credit cards, digital wallets, or other payment methods. By tailoring your forms to accommodate these preferences, you make it easier for customers to complete their transactions, leading to higher satisfaction and repeat business.
integrating payment options within Ninja Forms is a critical step towards creating a user-friendly experience. By following best practices and focusing on secure, efficient payment solutions, you can enhance your forms and drive more successful transactions.
Troubleshooting Common Issues When Creating Forms
Creating forms with Ninja Forms in WordPress is generally straightforward, but sometimes you might encounter a few hiccups along the way. Here are some common issues and their solutions to help you navigate through the process smoothly.
Form Submission Not Working
If users are having trouble submitting your form, it could be due to several reasons:
- JavaScript Errors: Check your browser’s console for any JavaScript errors that might be preventing the form from functioning correctly.
- Theme Compatibility: Some themes may conflict with Ninja Forms. Temporarily switching to a default theme can help you troubleshoot.
- Plugin Conflicts: Deactivate other plugins to see if one of them is causing the issue, particularly caching or security plugins.
Emails Not Being Received
Another common issue is not receiving emails from form submissions. Here are a few suggestions:
- Check Spam Folder: Sometimes, emails can end up in the spam folder. Make sure to check there first.
- SMTP Configuration: Consider using an SMTP plugin to configure your email settings properly. This can improve email deliverability.
- Email Settings in Ninja Forms: Double-check the email settings in Ninja Forms to ensure they are set up correctly.
Styling Issues
If your forms don’t look quite right, or if they’re not displaying as intended, take these steps:
- Custom CSS: Add custom CSS in the WordPress Customizer or the Ninja Forms settings to adjust the appearance of your forms.
- Inspect Elements: Use the browser’s inspect tool to identify any conflicting styles that may be affecting your form’s layout.
- Check Responsiveness: Ensure that your form is responsive. Test it on various devices to see how it looks.
| Issue | Solution |
|---|---|
| Form Submission Not Working | Check for JavaScript errors, theme conflicts, or plugin issues. |
| Emails Not Received | Verify spam folder, configure SMTP, and check Ninja Forms settings. |
| Styling Issues | Add custom CSS and inspect elements for conflicts. |
By addressing these common issues, you can enhance your experience with Ninja Forms and ensure that your forms work seamlessly. Keep experimenting, and don’t hesitate to reach out to the community forums for additional support!
Tips for Optimizing Your Forms for Better Conversion Rates
Optimizing your forms is key to boosting conversion rates, and with Ninja Forms in WordPress, you have the tools to do just that. Here are some actionable tips to enhance your forms and make them more appealing to your audience.
Simplify Your Forms: The fewer fields a user has to fill out, the more likely they are to complete the form. Consider reducing the number of fields to only what’s necessary. Aim for:
- First name
- Email address
- Any specific information relevant to your goal
Use Clear Labels and Instructions: Make sure each field is clearly labeled, and provide concise instructions if needed. This reduces confusion and helps users understand exactly what information you’re looking for. A well-structured form looks more professional and trustworthy.
Incorporate Visual Cues: Utilize colors and icons to draw attention to important fields. For instance:
- Use a different background color for required fields.
- Add icons next to fields to indicate the type of input expected.
Leverage the Power of CTAs: Your call-to-action button is crucial. Make it stand out with contrasting colors and persuasive text. Instead of “Submit,” try phrases like:
- “Get Your Free Guide”
- “Join Our Community”
| Action | Impact on Conversion |
|---|---|
| Simplifying form fields | High |
| Using clear labels | Medium |
| Visual enhancements | Medium |
| Strong CTAs | Very High |
Test and Iterate: Don’t settle on your first draft! A/B testing different versions of your form can provide valuable insights into what works best. Experiment with:
- Field placements
- Colors
- Text variations
By applying these strategies, you’ll not only enhance user experience but also see a significant improvement in your form completion rates. Remember, the goal is to create a seamless experience that encourages users to engage with your content.
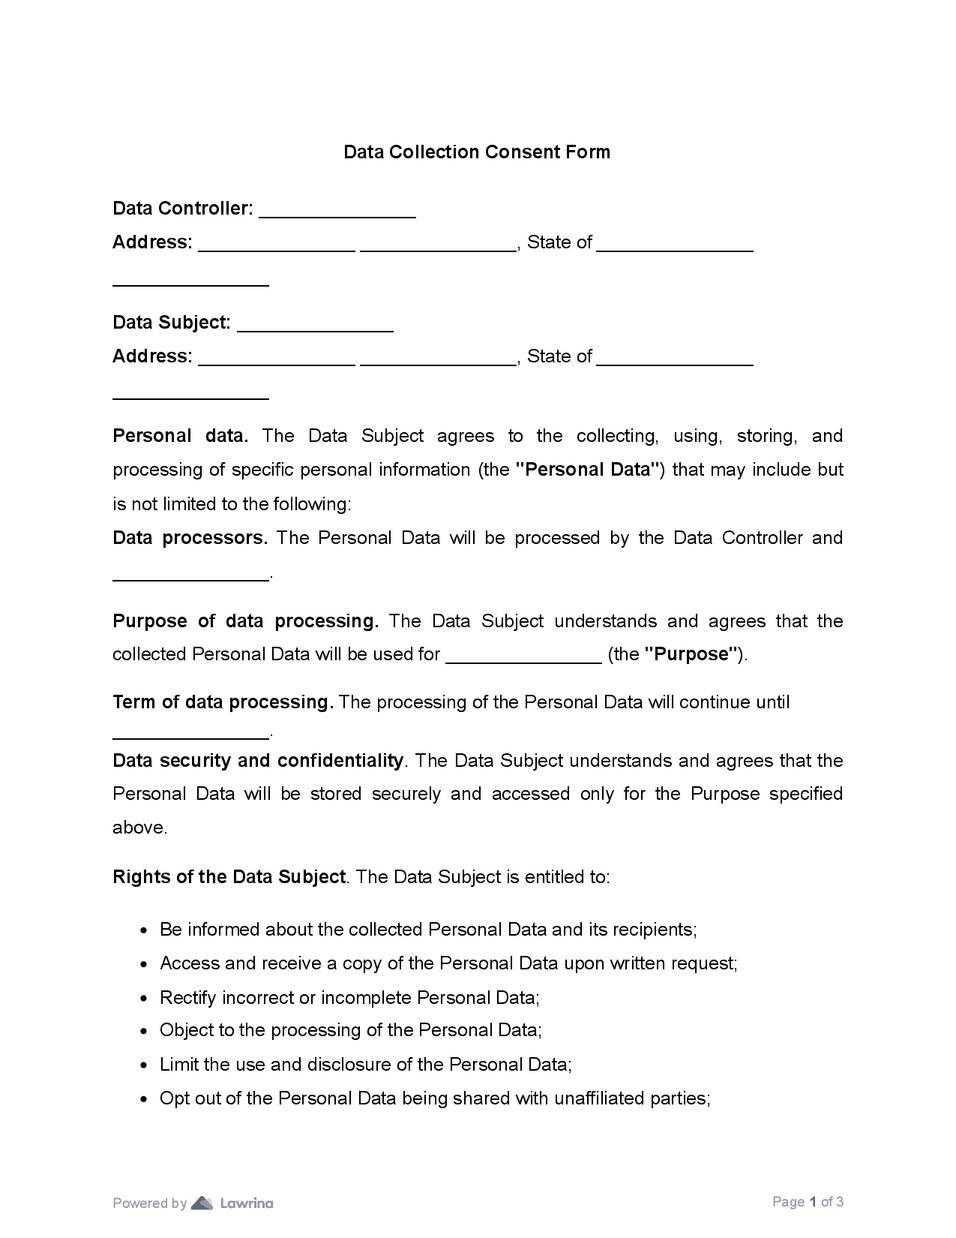
Collecting and Analyzing Form Data Like a Pro
Once you’ve created your custom forms using Ninja Forms in WordPress, the real magic begins when you start collecting and analyzing the data. This process is essential for understanding user behavior, improving your offerings, and enhancing customer satisfaction. Let’s dive into some pro tips for mastering this crucial aspect of form management.
First and foremost, you need to ensure that your forms are capturing all the relevant data. Here’s what you should focus on:
- Essential Fields: Always include required fields that provide key insights, such as name, email, and any specific information relevant to your business.
- User-Friendly Interface: Make sure your forms are easy to navigate to avoid user frustration and incomplete submissions.
- Conditional Logic: Utilize Ninja Forms’ conditional logic feature to tailor the fields shown based on user responses, which can help in gathering precise data.
Once your forms are live and collecting responses, the next step is effective data analysis. This can be broken down into several actionable steps:
- Exporting Data: Ninja Forms allows you to export submissions in various formats, including CSV, which is perfect for analysis in Excel or Google Sheets.
- Utilizing Analytics Tools: Consider integrating tools like Google Analytics to track user interaction with your forms. This will help you understand where users drop off or engage most.
- Setting Up Goals: Use your form data to set measurable goals that can be tracked over time, providing valuable insights into your form performance.
Additionally, consider creating a simple dashboard to visualize your data using tables and charts. Here’s a quick example of a table you could create to track form submissions:
| Date | Form Name | Submissions | Conversion Rate (%) |
|---|---|---|---|
| 01/01/2023 | Newsletter Signup | 120 | 15 |
| 01/01/2023 | Contact Us | 45 | 20 |
| 01/01/2023 | Feedback Form | 60 | 30 |
remember that constant iteration is key. Regularly analyze the performance of your forms and make necessary adjustments based on user feedback and data insights. This approach not only improves your understanding of customer needs but also enhances your overall marketing strategy.
With these tips and techniques, you’ll be equipped to collect and analyze form data like a seasoned professional. Embrace the insights that your new forms can provide, and watch as your WordPress site transforms into a data-driven powerhouse!
Elevate Your Website’s Functionality with Advanced Ninja Forms Techniques
If you’re looking to take your WordPress site to the next level, mastering Ninja Forms is a game-changer. With its user-friendly interface and powerful features, you can create forms that are not only functional but also visually appealing. By leveraging advanced techniques, you can transform standard forms into dynamic tools that enhance user engagement and streamline processes.
Here are some key techniques you can implement to elevate your forms:
- Conditional Logic: Customize the user experience by displaying fields based on previous answers, making your forms intuitive and user-friendly.
- Multi-Part Forms: Break lengthy forms into manageable sections to prevent user fatigue and increase completion rates.
- Custom Emails: Set up personalized confirmation emails to keep your users informed and engaged post-submission.
- File Uploads: Allow users to submit files directly through your forms, making it easier to collect necessary documents or images.
- Payment Integrations: Incorporate payment gateways to collect payments directly through your forms, offering users a seamless transaction experience.
To illustrate the impact of these techniques, consider the following table showcasing potential enhancements to your forms:
| Technique | Benefit |
|---|---|
| Conditional Logic | Improved user experience |
| Multi-Part Forms | Higher completion rates |
| Custom Emails | Enhanced user engagement |
| File Uploads | Streamlined document collection |
| Payment Integrations | Convenient transactions |
Furthermore, diving into Ninja Forms allows you to explore integrations with other popular WordPress plugins. By connecting Ninja Forms with tools like WooCommerce, Mailchimp, or Zapier, you can automate follow-up processes, expand your marketing efforts, and capture valuable data that can inform your business strategies.
Ultimately, the potential of Ninja Forms is limitless when you incorporate these advanced techniques. It’s not just about collecting information; it’s about creating interactive experiences that resonate with your audience and drive conversions. Embrace the power of custom forms, and watch your website’s functionality soar!
Frequently Asked Questions (FAQ)
Sure! Here’s a conversational Q&A for the article on “New Course: How to Create Custom Forms in WordPress with Ninja Forms.”
Q&A: New Course: How to Create Custom Forms in WordPress with Ninja Forms
Q: Why should I consider taking this course on creating custom forms with Ninja Forms?
A: Great question! If you’re looking to enhance your WordPress site’s functionality, this course is a must. Ninja Forms is user-friendly and powerful, making it easy for anyone—regardless of technical skill—to create customized forms. Whether you want to capture leads, gather feedback, or facilitate registrations, this course will equip you with the skills to do it all effortlessly!
Q: What can I expect to learn from the course?
A: You can expect to dive deep into creating various types of forms—from simple contact forms to complex registration forms. The course covers everything from installation and setup to advanced features like conditional logic and payment integrations. By the end, you’ll be creating forms that not only look great but also function seamlessly.
Q: I’ve never used Ninja Forms before. Will I be able to keep up?
A: Absolutely! This course is designed for beginners and includes step-by-step instructions. We start with the basics, and as you progress, each lesson builds on the last. Plus, you’ll have access to resources and support, ensuring you never feel lost.
Q: Is there any coding involved?
A: Not at all! One of the best things about Ninja Forms is that you can create powerful forms without writing a single line of code. The intuitive drag-and-drop interface allows you to customize your forms visually, making the process both fun and straightforward.
Q: How will this course benefit my website?
A: Custom forms can significantly improve user engagement and streamline communication with your audience. By learning to create tailored forms, you can increase conversions, gather valuable data, and provide a better user experience. Ultimately, this can lead to more satisfied visitors and a stronger online presence!
Q: What if I have questions after completing the course?
A: We’ve got you covered! Upon completion, you’ll still have access to a dedicated community forum where you can ask questions, share insights, and connect with fellow learners. It’s a great way to continue your journey even after the course ends!
Q: How do I sign up?
A: Signing up is easy! Just visit our website, and you’ll find all the information you need to enroll. Don’t miss out on this opportunity to elevate your WordPress skills—join us today and start creating custom forms that impress!
This Q&A should help convey the value of the course in a friendly and persuasive manner!
Concluding Remarks
As we wrap up our exploration of creating custom forms in WordPress using Ninja Forms, we hope you’re feeling inspired and ready to dive in! The world of online forms is filled with endless possibilities, and with the skills you’ll acquire in this new course, you’ll be well-equipped to enhance your website’s functionality and user experience.
Whether you’re looking to gather feedback, generate leads, or streamline your contact process, Ninja Forms makes it easy and intuitive. Remember, the ability to customize forms to fit your specific needs is not just a convenience—it’s a game-changer for your online presence.
So, why wait? Join us in this exciting journey and unlock the full potential of your WordPress site. Sign up for the course today and start creating forms that not only meet your expectations but exceed them! Happy form building!


