Looking to elevate your WooCommerce store in 2025? Check out our top 7 product zoom plugins! These mostly free options are game-changers, letting customers see every detail up close, boosting engagement and sales. Don’t miss out—your products deserve the spotlight!
7 WooCommerce Product Zoom Plugins for 2025 (Mostly Free)
Are you ready to take your online store to the next level? If you’re running a WooCommerce shop, you know that showcasing your products in the best light is essential for capturing customer interest and driving sales. Enter product zoom plugins—an absolute game-changer for eCommerce websites! With the right zoom functionality, buyers can examine every detail of your products, making them feel more confident in their purchases.
In this article, we’re diving into the top 7 WooCommerce product zoom plugins for 2025, with a special focus on those that won’t break the bank. Whether you’re a seasoned store owner or just starting out, these plugins can help enhance the shopping experience, boost engagement, and ultimately lead to more conversions. So, let’s explore these fantastic tools and find the perfect fit for your WooCommerce store!
Exploring the Need for WooCommerce Product Zoom in 2025
As we step into 2025, the eCommerce landscape is evolving rapidly, and so are the expectations of online shoppers. One feature that increasingly stands out in enhancing user experience is the ability to zoom in on product images. This functionality not only enriches the visual interaction but also plays a crucial role in decision-making for buyers. In a digital marketplace flooded with options, presenting products in the best light can make all the difference.
Why is product zooming important? Imagine browsing through a clothing store’s website. The ability to see intricate details, textures, and colors up close can lead to more informed purchases. Customers are no longer satisfied with just a single image; they want to inspect every angle and detail before committing to a purchase. This is where WooCommerce product zoom plugins come into play, giving users the confidence to buy by showcasing products in high definition.
Moreover, with the rise of mobile shopping, having a responsive and intuitive zoom feature is vital. Many consumers now browse on their smartphones, and a zoom plugin can optimize their experience by ensuring that they can view products clearly and interactively. This responsive design not only enhances user engagement but can also lead to lower return rates since customers are more informed about what they are buying.
In addition to enhancing customer experience, product zoom features can significantly impact conversion rates. Studies show that websites with effective visual strategies experience higher sales and lower cart abandonment rates. By allowing customers to get a closer look at products, you’re effectively reducing uncertainty and building trust. It’s a simple yet powerful way to make your WooCommerce store stand out in a competitive market.
To further illustrate the significance of these plugins, let’s take a look at how various features can influence shopping behavior:
| Feature | Benefit |
|---|---|
| High-Resolution Zoom | Shows fine details, increasing buyer confidence |
| Multiple Viewing Angles | Gives a comprehensive view of the product |
| Touch and Pinch Zoom for Mobile | Enhances usability for mobile shoppers |
| Quick View Options | Reduces the need for page reloads, improving the browsing experience |
As you explore the various WooCommerce product zoom plugins available, consider how these functionalities align with your brand’s goals and your customers’ needs. Investing in a robust zoom solution could be the key to unlocking higher sales and customer satisfaction in 2025. With a plethora of mostly free options available, this is an opportunity you can’t afford to miss!
Top Features to Look for in a Product Zoom Plugin
- Image Quality: Ensure the plugin supports high-resolution images. Customers should be able to zoom in on details without losing clarity.
- Multiple Zoom Types: Look for plugins that offer various zoom options, such as hover zoom and click-to-zoom. This flexibility allows customers to choose their preferred viewing method.
- Mobile Responsiveness: With an increasing number of shoppers using mobile devices, a good zoom plugin should work seamlessly across all screens. Check for touch-friendly features that enhance usability on smartphones and tablets.
- Easy Integration: The plugin should integrate smoothly with your existing WooCommerce setup without requiring extensive technical knowledge. A simple installation process is a must.
- Customization Options: Look for plugins that allow you to customize the zoom effect, such as the zoom area size and magnification level. Tailoring these settings can improve the overall shopping experience.
- Compatibility with Other Plugins: Ensure the zoom plugin plays well with other tools you’re using, such as lightbox galleries or product sliders, to maintain site functionality and aesthetics.
To better visualize the differences between some popular plugins, consider the following table that highlights their unique offerings:
| Plugin Name | Image Quality | Zoom Types | Mobile Friendly | Customization |
|---|---|---|---|---|
| Zoom Magnifier Pro | High | Hover, Click | Yes | Advanced |
| WP Image Zoom | Medium | Hover | Yes | Basic |
| Product Zoomer | High | Hover, Click, Lightbox | Yes | Moderate |
| WooCommerce Zoom Effect | High | Click | Yes | Advanced |
Lastly, don’t overlook the importance of customer reviews and support. A plugin with a solid support system and positive user feedback can save you time and frustration down the line. Look for plugins with active development and a community of users who can provide tips and assistance. Investing in the right product zoom plugin can create an engaging shopping experience that keeps customers coming back for more.
Discover the Best Free WooCommerce Product Zoom Plugins
- WP Zoom Magnifier – This plugin offers a clean, responsive interface that allows users to zoom in on images with ease. Its simple setup and customization options make it a favorite among store owners.
- WooCommerce Product Image Zoom - With this plugin, you can add a smooth zoom effect to your product images. It’s easy to configure and integrates seamlessly with your existing WooCommerce layout.
- Magic Zoom Plus - Perfect for stores with high-quality images, Magic Zoom Plus allows for a smooth zoom effect and even supports video. The free version offers ample features to get started.
- YITH WooCommerce Zoom Magnifier – This plugin is a great choice for those who want to provide an elegant zoom effect. It’s user-friendly and enhances the way customers interact with product images.
Each of these plugins has its own unique strengths that can cater to different store needs. Aside from just zooming in on images, consider how they affect your overall site performance and user engagement. A zoom feature can lead to higher conversion rates as potential buyers are given a closer look at the product they are interested in.
Here’s a quick comparison table to help you choose the right one:
| Plugin | Key Feature | Ease of Use |
|---|---|---|
| WP Zoom Magnifier | Responsive Design | Very Easy |
| WooCommerce Product Image Zoom | Smooth Zoom Effect | Simple Setup |
| Magic Zoom Plus | Video Support | Moderate |
| YITH WooCommerce Zoom Magnifier | Elegant Interface | Very Easy |
Don’t hesitate to experiment with different plugins to find the one that best fits your brand’s identity. The right product zoom feature will not only enhance visual appeal but also build trust with your customers, making them more likely to make a purchase.
Enhance User Experience with Advanced Zoom Capabilities
In today’s competitive online marketplace, enhancing user experience is paramount, especially for eCommerce platforms like WooCommerce. One of the most effective ways to elevate this experience is by integrating advanced zoom capabilities into your product displays. With customers increasingly demanding high-quality visuals to make informed purchasing decisions, investing in a robust zoom plugin can significantly impact your sales and customer satisfaction.
Imagine a customer browsing your online store, intrigued by a product but hesitant to commit. By offering a seamless zoom feature, you invite them to examine the finer details of your products. High-resolution images allow users to see textures, colors, and intricate designs up close, creating a more engaging shopping experience. This not only builds trust but also reduces the likelihood of returns, as buyers can make better-informed decisions.
When considering a zoom plugin for your WooCommerce store, it’s essential to look for features that not only enhance functionality but also complement your website’s design. Here are some key features to consider:
- High-Resolution Support: Ensure the plugin supports high-quality images for the best zoom results.
- Customizable Zoom Areas: Allow users to control what part of the image they want to zoom into.
- User-Friendly Interface: A straightforward setup means you can get your store up and running quickly.
- Mobile Compatibility: With a growing number of shoppers using mobile devices, responsive design is crucial.
Moreover, some plugins come with additional features that can further enhance the user experience. For example, options like lightbox integration, which allows users to view images in a larger format, or mouse hover zoom, which enables instant viewing without additional clicks, can be game-changers. These functionalities can help keep users engaged and promote more spontaneous purchases.
| Plugin Name | Key Features | Price |
|---|---|---|
| WooThumbs | Multiple Images, Video Support | Free/Premium |
| YITH WooCommerce Zoom Magnifier | Mouse Hover Zoom, Lightbox | Free |
| Magic Zoom Plus | Responsive Design, Touch Screen Support | Premium |
| WP Image Zoom | Custom Zoom Areas, Shortcode Support | Free |
Incorporating advanced zoom capabilities not only enriches the user experience but can also set your store apart from competitors. By providing customers with tools to explore your products in-depth, you cultivate an environment where they feel confident to make purchases. As 2025 approaches, ensuring your WooCommerce store utilizes these innovative features could be the key to increased sales and customer loyalty.
A Closer Look at the Most Popular Paid Options
1. WooThumbs for WooCommerce
This plugin is a powerhouse for anyone looking to provide an immersive product viewing experience. With its advanced zoom capabilities, you can showcase high-resolution images in a way that captures every detail. Some key features include:
- Multiple image galleries
- 360-degree product views
- Lightbox support for enlarged images
WooThumbs not only boosts user engagement but also aids in reducing cart abandonment by allowing customers to examine products closely before making a purchase.
2. YITH WooCommerce Zoom Magnifier
YITH is known for its user-friendly interfaces and this plugin is no exception. It enhances the default product images by adding a zoom feature that is both sleek and functional. Here’s what makes it a popular choice:
- Customizable zoom area
- Touch-friendly for mobile devices
- Compatibility with other YITH plugins
The plugin’s ability to integrate seamlessly into your existing setup makes it a favorite among store owners looking for a hassle-free solution.
3. Magic Zoom Plus
This plugin offers a dynamic way to provide customers with an enhanced view of products. It’s not just about zooming in; Magic Zoom Plus allows for smooth transitions and a polished look. Some noteworthy attributes are:
- Zoom on hover and click options
- Fullscreen capability
- Auto-resizing for different screen sizes
Its versatility makes it suitable for both small boutiques and large e-commerce platforms, ensuring your products shine in the spotlight.
| Plugin Name | Key Features | Price |
|---|---|---|
| WooThumbs | Multiple galleries, 360-degree view | $49 |
| YITH Zoom Magnifier | Customizable area, touch-friendly | $49 |
| Magic Zoom Plus | Fullscreen, auto-resizing | $39 |
The investment in these plugins can lead to increased customer satisfaction and ultimately drive sales. A well-implemented zoom feature not only enhances product visibility but also builds trust with customers by allowing them to see what they are buying in great detail. For store owners looking to elevate their online presence, exploring these premium options is definitely a step in the right direction.
How to Integrate Product Zoom Plugins Seamlessly
Integrating product zoom plugins into your WooCommerce store can significantly enhance the user experience and boost conversions. To ensure a seamless implementation, follow these strategic steps:
- Choose the Right Plugin: Start by selecting a product zoom plugin that aligns with your store’s aesthetic and functionality needs. Look for features such as responsiveness, ease of use, and compatibility with your existing themes.
- Check Compatibility: Before installation, confirm that the plugin is compatible with your current WooCommerce version and theme. This can prevent potential conflicts and operational hiccups.
- Installation Process: Most plugins can be installed directly from the WordPress dashboard. Navigate to the ’Plugins’ section, select ‘Add New,’ and search for your chosen plugin. Click ‘Install Now’ and then ‘Activate’ to get started.
- Configuration Settings: After activation, dive into the plugin settings. Customize zoom features such as zoom level, area, and effects to enhance visual appeal. Don’t forget to check the preview to see how these changes look in real-time.
Next, it’s essential to test the user experience. Ensure that the zoom functionality works seamlessly across different devices. A responsive design is crucial, as many users shop on mobile. Check the zoom feature on various screen sizes to confirm that it remains user-friendly.
Incorporate high-quality images to maximize the effectiveness of your zoom feature. Low-resolution images can diminish the user experience and result in lost sales. Aim for clear, professional-quality images that showcase product details beautifully when zoomed in.
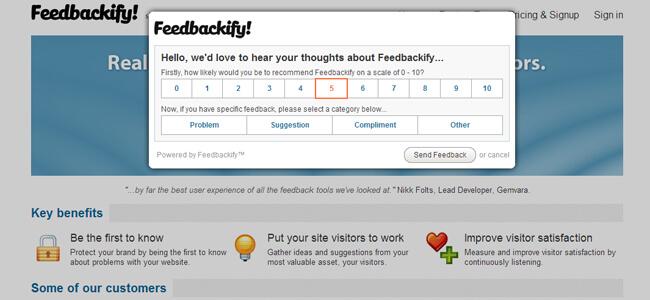
consider gathering user feedback. After implementing your product zoom plugin, ask customers for their thoughts on the new feature. This feedback can provide insights for future enhancements and help in refining the overall shopping experience.

Boosting Sales with Effective Product Zoom Strategies
Here are some compelling reasons why implementing product zoom features is crucial for your e-commerce site:
- Enhanced Visual Experience: Customers can see products up close, which helps showcase quality and craftsmanship.
- Reduced Returns: By offering a clearer view, customers are less likely to be surprised by product details post-purchase.
- Increased Engagement: Zoom features can lead to longer time spent on product pages, increasing the likelihood of conversion.
To maximize the effectiveness of these strategies, consider the following tips when selecting a product zoom plugin:
- Responsiveness: Ensure the zoom function works smoothly on both desktop and mobile devices, as mobile shopping continues to rise.
- Customization Options: Look for plugins that allow you to customize the zoom area and appearance to match your site’s theme.
- User-Friendly Interface: A straightforward interface can enhance usability, making it easier for customers to interact with your products.
| Plugin Name | Features | Price |
|---|---|---|
| Product Image Zoom | Simple zoom effect, mobile-friendly | Free |
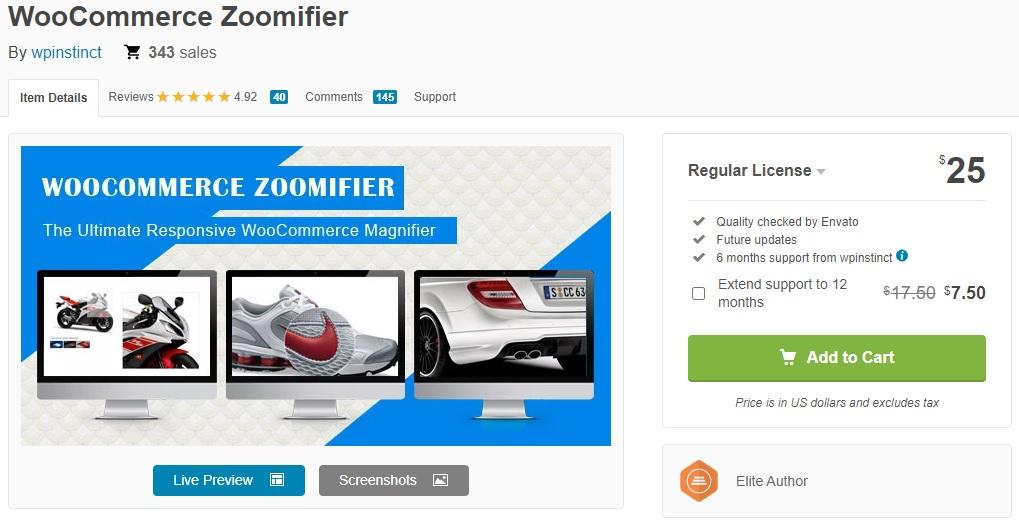
| WooCommerce Zoomifier | Dynamic zoom, customizable | Free |
| YITH WooCommerce Zoom Magnifier | Touch support, tooltips | Premium |
Incorporating these features not only elevates the visual appeal of your products but also fosters trust and confidence among potential buyers. With a plethora of options available, choosing the right plugin can set your store apart in an increasingly competitive market.
Real User Feedback: What Customers Are Saying
What Customers Are Saying
When it comes to enhancing the online shopping experience, customers have been vocal about their preferences and experiences with various WooCommerce product zoom plugins. Many users have shared their thoughts, highlighting the features they love and the improvements they desire.
Ease of Use: A common theme among feedback is the importance of user-friendly interfaces. Shoppers appreciate plugins that are easy to install and configure. One user mentioned, “I loved how quick it was to set up the zoom feature on my site. I had it running in minutes!” This simplicity has proven crucial for small businesses looking to enhance their product displays without a steep learning curve.
Image Quality: The quality of zoomed images can make or break a sale. Many customers have praised plugins that maintain high-resolution images during zoom. As one satisfied customer put it, “The clarity while zooming is incredible! It gives my customers a real feel for the product, and my sales have definitely reflected that.” Maintaining image quality has emerged as a top priority for e-commerce success.
Customization Options: Tailoring the zoom experience to fit a store’s unique branding is another favorite feature among users. Responses indicate that customers enjoy being able to adjust settings like zoom level, lens style, and more. A frequent comment was, “I love how I can tweak it to match my site’s aesthetics. It feels seamless!” Providing customization has been a key factor in customer satisfaction.
| Plugin Name | User Rating | Notable Feature |
|---|---|---|
| WooCommerce Product Zoom | 4.8/5 | High-resolution zoom |
| Magic Zoom Plus | 4.6/5 | Customizable lens |
| WP Image Zoom | 4.5/5 | Responsive design |
Support and Updates: Customers have also been keen to discuss the level of support they receive post-installation. Those who have opted for plugins with excellent customer service have voiced their appreciation. “Whenever I had a question, the support team was quick to respond. It’s reassuring,” said one user. A dependable support system can significantly enhance user experience and loyalty.
Performance: Lastly, users are acutely aware of how these plugins impact their website’s speed. Feedback highlights that performance optimization is essential for retaining customers. One comment encapsulated this sentiment: “I was worried about slowing my site down, but this zoom plugin is lightning fast!” Ensuring that the zoom functionality does not compromise overall performance is critical for customer satisfaction.
Comparing Performance: Which Plugin Reigns Supreme
| Plugin Name | Speed | Usability | Customization |
|---|---|---|---|
| Zoom Magnifier | Fast | Easy | Moderate |
| Product Image Zoom | Very Fast | Simple | High |
| WP Image Zoom | Moderate | Intuitive | Low |
| Magic Zoom Plus | Fast | Moderate | High |
Speed is a crucial factor, especially for eCommerce sites where a few seconds can mean the difference between a sale and a bounce. The plugins that topped our speed test, like Product Image Zoom, not only load quickly but also maintain performance during high traffic periods. If your audience expects seamless browsing, these options are a must-consider.
When evaluating usability, it’s essential to think about the user experience. Plugins that offer straightforward integration and user-friendly interfaces like Zoom Magnifier significantly enhance customer satisfaction. A plugin that is difficult to set up or navigate can frustrate potential buyers, so prioritize those that provide a hassle-free experience.
Lastly, let’s talk about customization. Some plugins allow extensive modifications, letting you tailor the zoom experience to match your store’s aesthetic or functionality. For instance, Magic Zoom Plus stands out with its extensive options for video integration and animation effects, making it ideal for brands wanting to create a more engaging visual narrative.
determining which plugin reigns supreme ultimately comes down to your specific needs. Whether your priority is speed, ease of use, or customization, there’s a plugin on our list that can elevate your WooCommerce product pages to the next level. Choose wisely, and watch your conversions soar!
Final Thoughts on Choosing the Right Product Zoom Solution
When it comes to enhancing the shopping experience on your WooCommerce site, choosing the right product zoom solution can make a significant difference. With numerous plugins available, each offering unique features, it’s essential to consider what aligns best with your store’s needs. A well-integrated zoom tool not only improves the visual appeal of your product pages but also boosts customer confidence in making a purchase.
Here are a few key factors to keep in mind:
- User Experience: Opt for plugins that provide a smooth and intuitive interface. Customers should easily zoom in on product details without confusion or delay.
- Mobile Responsiveness: With a growing number of shoppers using mobile devices, ensure the zoom functionality works seamlessly on smartphones and tablets.
- Customization Options: Look for solutions that allow you to customize zoom levels, shapes, and effects, helping you maintain your brand’s aesthetic.
- Compatibility: Check the compatibility of the plugin with your existing theme and other WooCommerce extensions to avoid any conflicts.
- Support and Updates: Choose plugins backed by reliable support and regular updates to ensure long-term usability.
Additionally, consider the potential impact on your website’s performance. Many zoom plugins can be resource-intensive, which might slow down your site. Look for lightweight options that won’t compromise page speed. This balance between functionality and performance is crucial for retaining customer interest and preventing drop-offs during the shopping process.
It’s also wise to read user reviews and ratings before making a decision. Feedback from other store owners can provide invaluable insights into the plugin’s performance, features, and customer support, helping you make a more informed choice.
Ultimately, your choice of product zoom plugin should align with your business goals. Whether you prioritize increasing conversion rates, enhancing user engagement, or simply improving the overall aesthetic of your product pages, ensuring that the tool you select meets your needs will set the stage for success in 2025 and beyond.
Frequently Asked Questions (FAQ)
Q&A: 7 WooCommerce Product Zoom Plugins for 2025 (Mostly Free)
Q1: Why should I consider using a product zoom plugin for my WooCommerce store?
A1: Great question! Product zoom plugins enhance the shopping experience by allowing customers to see detailed images of your products. This feature can significantly reduce uncertainty and returns, leading to higher conversion rates. Imagine your customers being able to see intricate details of a beautiful dress or the fine craftsmanship of a gadget—they’ll be more likely to click that “buy” button!
Q2: What are some of the best free WooCommerce product zoom plugins available in 2025?
A2: You’re in for a treat! Here are some of the top contenders:
- WooThumbs – Offers a smooth zoom and gallery feature and is known for its user-friendly interface.
- Image Zoom for WooCommerce – A simple, effective zoom tool that works seamlessly with your existing product images.
- WP WooCommerce Product Zoom – Known for its customizability and responsive design, it’s perfect for mobile shoppers.
- YITH WooCommerce Zoom Magnifier – While the premium version shines, the free version still provides excellent zoom functionality.
- Product Image Zoom for WooCommerce – Offers a simple installation process and basic zoom features.
- Magic Zoom Plus - Combines zoom with a lightbox effect, making it visually appealing.
- WP Easy Zoom – A straightforward option that provides essential zoom features without overwhelming complexity.
Q3: Are these plugins easy to install and use?
A3: Absolutely! Most of these plugins can be installed directly from your WordPress dashboard in just a few clicks. Once activated, they typically come with straightforward settings that allow you to customize how the zoom looks and feels. Even if you’re not a tech whiz, you’ll find it easy to get started!
Q4: Will using these plugins slow down my website?
A4: Not if you choose wisely! Most of the plugins mentioned are optimized for speed and performance. That said, it’s always a good idea to check reviews and ensure compatibility with your theme. A well-optimized plugin can enhance user experience without sacrificing your site’s speed.
Q5: What if I need additional features beyond what the free versions offer?
A5: That’s a great point! Many of these plugins offer premium versions with advanced features like custom zoom effects, better integration with galleries, and even analytics to track how users interact with your images. If you find that you love the free version and want more functionality, upgrading could be a worthwhile investment.
Q6: Can these plugins work on mobile devices?
A6: Yes! Most modern WooCommerce product zoom plugins are designed to be responsive, meaning they’ll look and function beautifully on both desktop and mobile devices. This is crucial since a significant portion of online shopping is done through mobile—ensuring your customers have a seamless experience everywhere.
Q7: How can I determine which plugin is the best fit for my store?
A7: Start by identifying your specific needs. Do you want something simple, or are you looking for advanced features? Check the usability, customization options, and reviews from other users. Many of these plugins offer demos or free versions, so you can test them out before making a decision. It’s all about finding what enhances your store’s look and feel while providing your customers with the best experience.
Q8: Any final tips for selecting a product zoom plugin?
A8: Definitely! Look for plugins that are regularly updated and have good support. User feedback is invaluable, so check reviews on the WordPress plugin repository or forums. Lastly, don’t hesitate to experiment—sometimes, trying out a couple of options can help you find the perfect fit for your store. Happy zooming!
By leveraging these plugins, you’ll not only enhance your product display but also create a more engaging shopping experience for your customers. With so many mostly free options available, there’s no reason not to give your WooCommerce store the upgrade it deserves in 2025!
Closing Remarks
As we wrap up our exploration of the top 7 WooCommerce product zoom plugins for 2025, it’s clear that enhancing your online store’s user experience is more crucial than ever. Whether you’re a seasoned eCommerce pro or just starting, these mostly free plugins can significantly boost your customers’ shopping experience, giving them the detailed view they crave when browsing your products.
Remember, in the competitive world of online retail, every little detail counts. A simple zoom feature can turn a casual visitor into a loyal customer, so don’t underestimate its impact! Take the time to experiment with these plugins and find the ones that best fit your store’s style and your customers’ needs.
So, why wait? Dive in, give your products the spotlight they deserve, and watch your sales soar. If you found this article helpful, share it with fellow store owners, and let’s elevate the eCommerce experience together! Happy selling!


New Providers
Enjoy The Speed Of Downloading & Uploading With 1GBPS Port
Affordable Dedicated Servers & Colocation Services. Services: Dedicated Servers Colocation Private Cabinet Colocation DDoS Protection
Up to 85% off hosting + website builder
Latest News
- Selling Digital Products Online: 5 Steps That WorkJuly 27, 2026 10
- How to Create an Art Portfolio That Gets You HiredJuly 27, 2026 12
- Best WordPress Calendar Plugin: Top 8 Picks for Events and BookingsJuly 27, 2026 13
- How to Create an Online Survey in WordPress? (Easy Guide)July 27, 2026 12
- Elementor Cloud Review 2023 – Is It Worth it? (Complete Review)July 27, 2026 12


We specialize in providing Web hosting reviews. Where you can search for potential hosts.