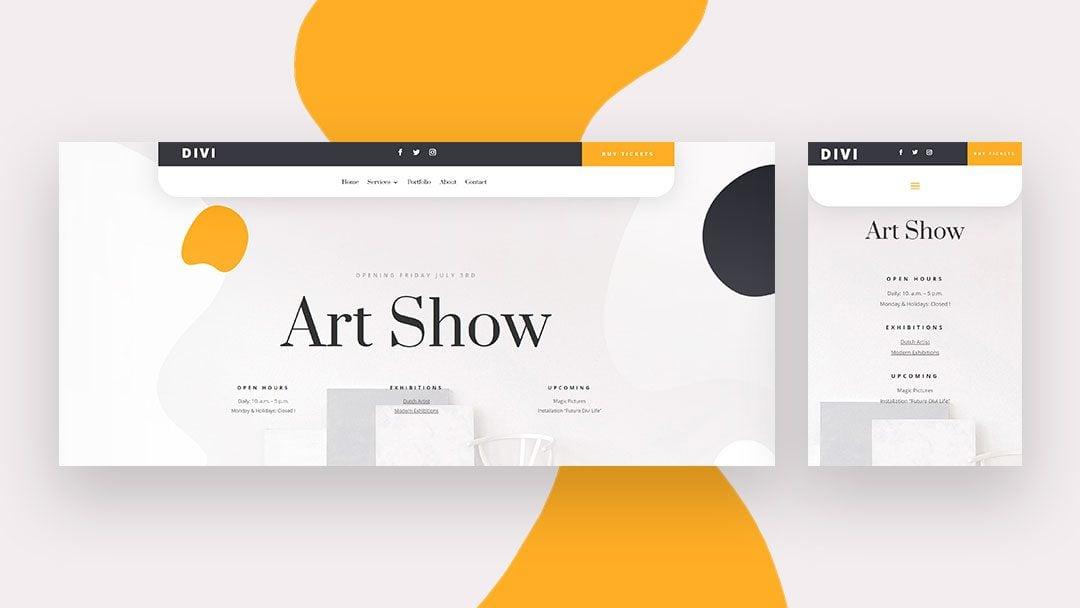
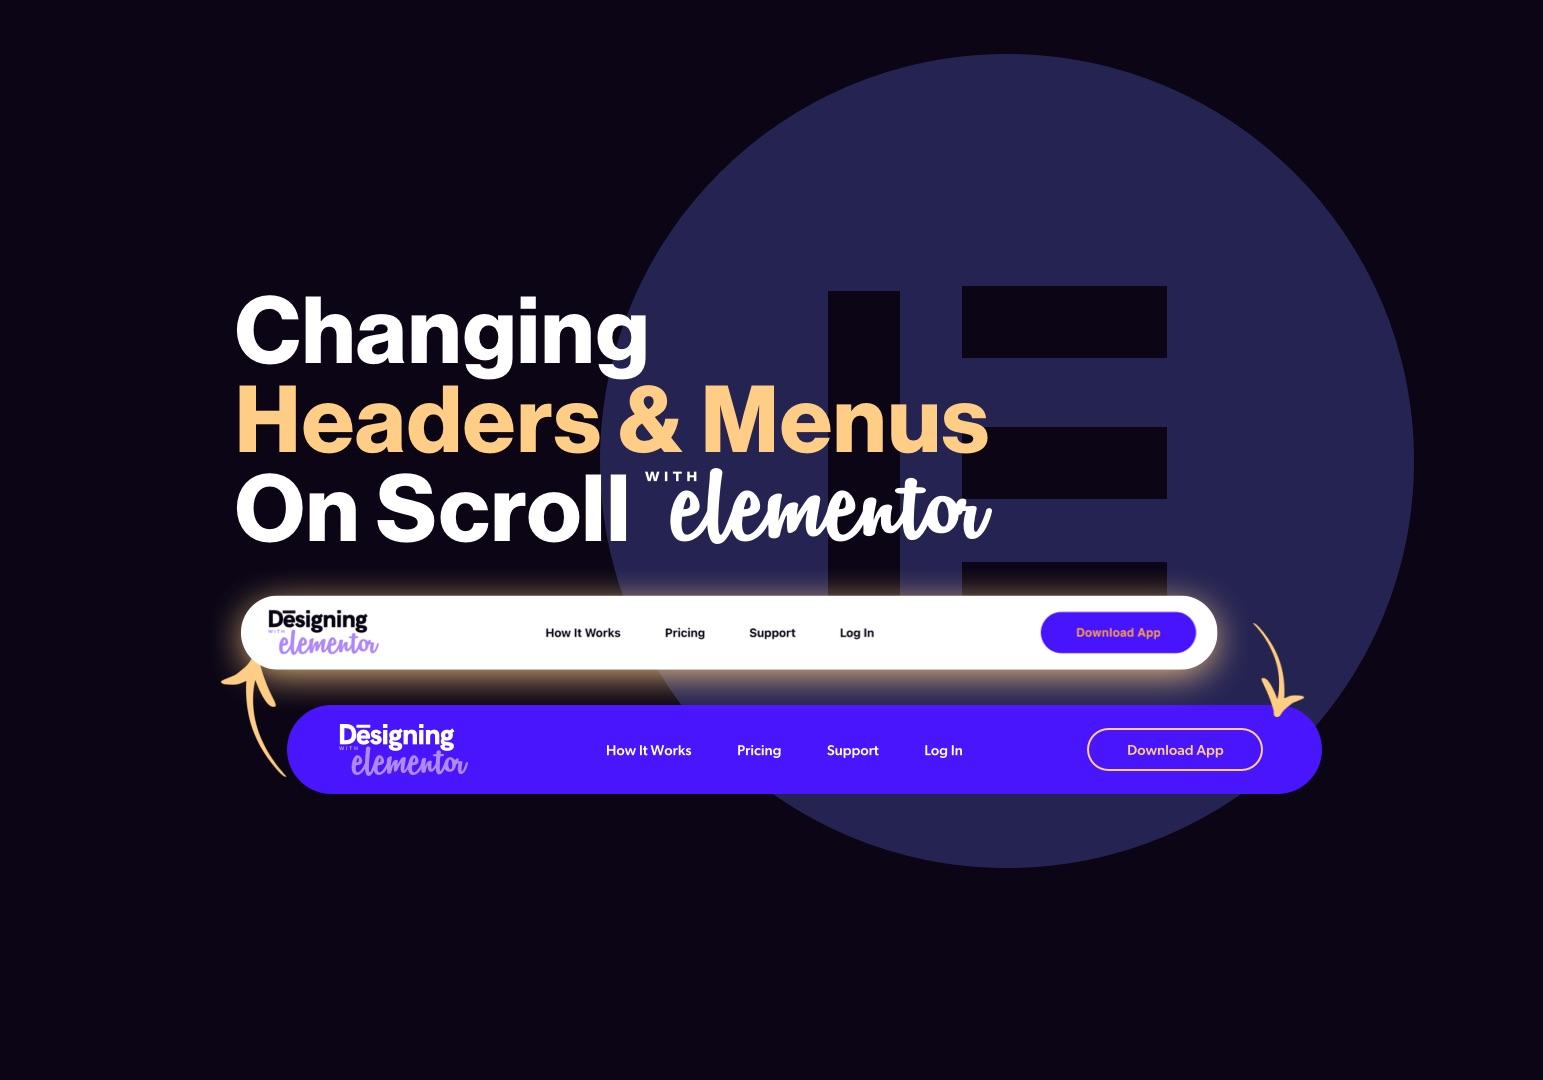
Transform your Eduma WordPress theme’s header into a stunning visual statement! Editing the header section is your gateway to creating an engaging first impression. Unleash your creativity and captivate your audience with personalized touches that reflect your unique brand!
How To Edit Header Section In Eduma WordPress Theme?
Are you ready to transform your online learning platform into a visually captivating hub that engages your audience and reflects your unique brand? The header section of your Eduma WordPress theme is the first thing visitors see, and it sets the tone for their entire experience on your site. Crafting an impressive header is not just about aesthetics; it’s your opportunity to make a powerful first impression, showcase your institution’s identity, and communicate your mission effectively. In this article, we’ll guide you through the process of editing the header section in the Eduma theme, empowering you to unlock its full potential. Whether you’re a seasoned developer or a complete beginner, we’ll provide you with easy-to-follow steps and creative tips that will inspire you to create a header that captivates your audience and elevates your educational offerings. Let’s embark on this journey to enhance your website’s appeal and functionality together!
Understanding the Importance of a Captivating Header
A captivating header is more than just an aesthetic choice; it serves as the first impression of your website, inviting visitors to explore further. In the digital landscape where attention spans are fleeting, a well-crafted header can significantly influence user engagement and retention. Here’s why investing time in your header design is crucial:
- First Impressions Matter: The header is typically the first element visitors encounter. A striking header can create an immediate sense of professionalism and credibility.
- Brand Identity: Your header is an opportunity to showcase your brand’s personality. Using colors, fonts, and imagery that reflect your brand can help in establishing a memorable identity.
- Navigation Ease: A well-structured header facilitates easier navigation, guiding users to important sections of your site without frustration.
- Call to Action: Including a compelling call to action in your header can effectively direct users toward desired actions, be it signing up, contacting, or purchasing.
When using the Eduma WordPress theme, you have access to various customizable options that enable you to tailor your header to align with your vision. With its user-friendly interface, you can seamlessly adjust elements such as:
- Logo Placement: Position your logo strategically to maximize visibility and brand recognition.
- Menu Design: Choose among different menu layouts that enhance usability while reflecting your site’s aesthetic.
- Color Schemes: Customize colors to match your branding, creating a cohesive look that resonates with your audience.
- Typography: Select fonts that convey your brand’s voice, ensuring legibility and appeal.
Consider the following table that illustrates effective header elements and their corresponding benefits:
| Header Element | Benefit |
|---|---|
| Logo | Enhances brand recognition |
| Navigation Menu | Improves user experience |
| Call to Action | Increases conversions |
| Search Bar | Facilitates content discovery |
Ultimately, a captivating header not only attracts visitors but also retains them, guiding them to explore the rich content of your website. As you embark on editing your header in the Eduma theme, remember that every element you choose contributes to the story your site tells. It’s not just about aesthetics; it’s about creating an engaging journey for your audience, ensuring they feel welcomed and inspired from the moment they land on your page.

Exploring the Eduma WordPress Theme Features
The Eduma WordPress theme is a powerhouse for educators and institutions looking to create a captivating online presence. Among its many standout features, the header section offers unmatched flexibility and customization options, making it an essential area for branding and navigation.
One of the first aspects to appreciate is the built-in header layouts that allow you to choose from several designs. Whether you prefer a classic style with a logo and menu or a more modern look featuring dynamic elements, Eduma provides options to suit every need. You can easily select a layout that resonates with your institution’s identity, ensuring your website stands out.
In addition to layout choices, the theme supports customizable header elements, which can include:
- Logo Uploads: Personalize your site with your school’s logo to establish brand recognition.
- Navigation Menus: Easily configure menus to guide users to important sections like courses, events, and contact information.
- Call-to-Action Buttons: Encourage user engagement with strategically placed buttons for enrollments or inquiries.
Moreover, Eduma empowers users with advanced typography and color settings. You can adjust font styles and colors directly in the customizer, helping to maintain brand consistency and enhance the visual appeal of your site. The intuitive interface makes it easy to see changes in real-time, allowing for quick adjustments until you achieve the perfect look.
To further enrich the user experience, the theme also includes support for header widgets. This feature allows you to add useful items such as social media links, search bars, or even an email subscription form. These widgets can be tailored to meet your audience’s needs, ensuring they have all the information they require at their fingertips.
Here’s a simple comparison table summarizing the header features:
| Feature | Description |
|---|---|
| Header Layouts | Multiple designs to choose from for flexibility. |
| Custom Elements | Logo, menus, and call-to-action buttons customization. |
| Typography & Colors | Extensive customization for fonts and color schemes. |
| Widgets | Add social links, search bars, and more for user convenience. |
By leveraging these unique features, you can transform the header section of your Eduma-powered site into a vibrant and functional space that leaves a lasting impression on visitors. With a few simple edits, your header can effectively communicate your institution’s mission and values, inviting users to explore further.
Navigating the Header Settings in Eduma
Editing the header section in the Eduma WordPress theme is a powerful way to personalize your website and enhance the user experience. With a few simple clicks, you can transform the appearance of your site’s header, making it not only visually appealing but also functional. Here’s a guide to help you navigate these settings effectively.
To begin, log in to your WordPress dashboard and navigate to Appearance > Customize. This will open the WordPress Customizer, where you can find various options to modify your site’s appearance, including the header settings. Here, you will encounter several sections dedicated to the header, allowing you to adjust the layout, add your logo, and customize the menu.
One of the first things you’ll want to do is upload your site logo. In the Site Identity section, you can easily upload an image file of your logo. Ensure that the logo is of high quality and appropriately sized for optimal display. After uploading, you have the option to adjust its position within the header, providing a cohesive look that aligns with your brand identity.
Next, consider customizing your navigation menu. Navigate to the Menus section in the Customizer. Here you can create a new menu or edit existing ones. Add key pages, categories, or custom links that are crucial for your users. Remember, a well-structured menu makes it easier for visitors to find what they need, enhancing their overall experience on your site.
For a more dynamic look, explore the Header Layout options. Eduma provides different layout styles, from centered logos to stacked arrangements, allowing you to choose what best suits your website’s theme. Make sure to preview the changes in real-time, as this will help you make informed decisions about the layout that works best for your content.
Don’t overlook the importance of typography in your header. In the Typography section, you can adjust the font style, size, and color of your header text. Choosing the right typography can significantly affect readability and brand perception. Aim for a balance between aesthetics and functionality to create an inviting header that draws attention.
it’s crucial to optimize the header for mobile devices. Ensure that your header is responsive and that all elements, including logos and menus, are easily navigable on smaller screens. You can use the responsive preview options within the Customizer to see how your header responds across different devices, making necessary adjustments for a seamless experience.
Once you’re satisfied with your changes, don’t forget to click the Publish button to make your modifications live. With these simple yet effective customizations, your header can become a standout feature of your Eduma WordPress site, making a lasting impression on your visitors.
Choosing the Right Logo for Your Brand Identity
Creating a logo that embodies your brand identity is a crucial step in establishing a memorable presence in the marketplace. A well-designed logo not only communicates your brand’s values but also resonates with your target audience. To achieve this, consider the following essential elements:
- Clarity: Your logo should be simple and easily recognizable. Complicated designs can confuse potential customers and dilute your brand’s message.
- Relevance: Ensure that your logo reflects the nature of your business. A logo for a tech company should evoke modernity, while a logo for a bakery might suggest warmth and comfort.
- Versatility: Your logo should look great across various platforms—from social media to print materials. Test your design in both color and black-and-white formats to ensure it maintains impact.
- Timelessness: Aim for a design that withstands the test of time. While trends come and go, a classic logo will keep your brand looking fresh and relevant for years to come.
When designing your logo, color choice plays a pivotal role in shaping perceptions. Different colors evoke different emotions and can significantly influence consumer behavior. For example:
| Color | Emotion | Industry Example |
|---|---|---|
| Red | Passion, Excitement | Food & Beverage |
| Blue | Trust, Professionalism | Finance, Technology |
| Green | Growth, Health | Environment, Wellness |
| Yellow | Optimism, Happiness | Retail, Entertainment |
Typography is another critical element to consider. The font you select should not only be legible but also reflect your brand’s character. Here are a few tips:
- Choose Wisely: Select a font that aligns with your brand’s voice—serif fonts convey tradition, while sans-serif fonts communicate modernity.
- Limit Your Choices: Stick to one or two fonts to keep your design cohesive and professional.
- Test for Scalability: Your typography should be easily readable in various sizes and formats.
remember that feedback is invaluable. Share your logo designs with trusted friends, colleagues, or even your target audience. Their insights can help you refine your logo and ensure it effectively represents your brand identity. By carefully considering all of these aspects, you can create a logo that not only stands out but also connects deeply with your audience, reinforcing your brand’s identity and mission.
Customizing the Header Layout for Enhanced Usability
Transforming the header section of your Eduma WordPress theme is essential for creating an engaging user experience. A well-designed header not only captures attention but also facilitates easy navigation. Start by evaluating your current header layout and considering the following elements:
- Logo Placement: Ensure your logo is prominently displayed to boost brand recognition.
- Navigation Menu: Organize your menu items logically for seamless browsing.
- Search Functionality: Add a search bar to help users find content quickly.
- Call-to-Action Buttons: Include buttons that lead to important pages, such as Signup or Contact Us.
Utilizing the Eduma theme’s built-in customization tools allows you to modify the header layout effortlessly. Consider experimenting with different layouts to find what works best for your audience. For example, you might opt for a centered logo with the navigation menu below it, or a left-aligned logo with a horizontal menu that follows.
Another inspiring approach is to incorporate a layered header effect. This can be achieved by adding a transparent background that changes color when users scroll. Not only does this add a modern touch, but it also enhances usability by allowing users to easily identify your brand as they navigate through your site.
| Feature | Benefit |
|---|---|
| Sticky Header | Keeps navigation accessible as users scroll. |
| Dropdown Menus | Organizes subcategories for cleaner navigation. |
| Social Media Links | Encourages social engagement and sharing. |
Customization doesn’t stop with layout; consider the colors and fonts used within the header. Choose colors that align with your branding and create a cohesive look. Selecting readable fonts will ensure your header is both visually appealing and practical. This attention to detail can significantly enhance the overall user experience.
Lastly, always keep your audience in mind during the customization process. Gathering feedback through user testing can provide valuable insights into how your header performs. Simple changes can make a significant impact, so don’t hesitate to iterate based on user interaction.
Incorporating Social Media Links Effectively
Integrating social media links within your website’s header is an essential strategy for enhancing user engagement and expanding your reach. By strategically placing these links, you provide visitors with easy access to your social channels, encouraging them to connect with your brand beyond the confines of your site.
To implement social media links effectively, consider the following:
- Choose the Right Platforms: Focus on the social media platforms where your audience is most active. This might include Facebook, Twitter, Instagram, or LinkedIn. Tailoring your selection can significantly boost traffic and interaction.
- Placement Matters: Ensure that your social media icons are prominently displayed in the header section. This visibility increases the likelihood of clicks and interactions.
- Use Eye-Catching Icons: Utilize recognizable and visually appealing icons for each platform. Consistency in style and color can enhance the overall aesthetic of your header while making the links stand out.
- Responsive Design: Ensure that your social media links are mobile-friendly. Test their appearance on various devices to guarantee accessibility and usability for all visitors.
When designing your header, it’s also valuable to consider the use of tooltips. When users hover over a social media icon, a tooltip can appear, providing context about what they can expect if they click. This small yet impactful addition can enhance user experience and drive engagement.
| Platform | Target Audience | Best Content Type |
|---|---|---|
| General public, varied demographics | Videos, images, articles | |
| Young adults, creatives | High-quality images, stories | |
| Professionals, B2B | Industry insights, networking content | |
| News seekers, enthusiasts | Quick updates, links |
By following these guidelines, you’ll not only enhance the functionality of your website but also create a stronger community around your brand. Remember, effective integration of social media links can transform your header into a gateway for deeper connections and heightened engagement!
Selecting Fonts and Colors that Reflect Your Vision
Choosing the right fonts and colors is not just about aesthetics; it’s about telling your story and creating a memorable brand identity. In the Eduma WordPress theme, you have the power to transform your header section into a visual representation of your vision. Here are some key considerations to guide your selection process.
Understand Your Brand Personality
Your choice of fonts and colors should resonate with the essence of your brand. Consider the emotions you want to evoke. For instance:
- Modern and Professional: Opt for sleek sans-serif fonts and a monochromatic color palette.
- Creative and Fun: Play with quirky fonts and bright, vibrant colors.
- Classic and Trustworthy: Traditional serif fonts combined with earthy tones can convey stability.
Prioritize Readability
While creativity is important, legibility should never be compromised. Ensure that your chosen fonts are easy to read across various devices. A good rule of thumb is to keep:
- Header Fonts: Bold and distinctive, making a strong first impression.
- Body Fonts: Clear and straightforward, allowing for easy comprehension.
Create a Color Palette
Your color palette should not only reflect your brand’s personality but also ensure harmony. Use color theory to your advantage. Here’s a simple guideline to create your palette:
| Color Type | Purpose | Example Shades |
|---|---|---|
| Primary | Main brand color | #3498db |
| Secondary | Complementary accents | #2ecc71 |
| Background | Neutral base for content | #ffffff |
Limit Your Choices
In design, less is often more. Limit your font choices to two or three styles to maintain visual coherence. This approach not only simplifies your header but also enhances the overall user experience. You can use:
- One font for headings
- One font for body text
- Optional: A third font for accents or quotes
Test and Iterate
Once you’ve made your selections, don’t shy away from testing them. Gather feedback from peers or potential users. A/B testing can help you determine which font and color combinations resonate best with your audience. Remember, your header is often the first interaction users have with your brand, so make it count.

Adding Engaging Call-to-Actions in the Header
Incorporating compelling Call-to-Actions (CTAs) in your header can significantly enhance user engagement and drive conversions. When visitors land on your site, the header is often their first point of interaction. It’s essential to make this interaction as impactful as possible. Here are some strategies to create effective CTAs that resonate with your audience:
- Create urgency: Use time-sensitive language to encourage immediate action. Phrases like “Limited Time Offer” or ”Join Now for Exclusive Benefits” can prompt users to click.
- Be clear and concise: Ensure your message is straightforward. A simple “Subscribe” or “Get Started” can be more effective than a lengthy explanation.
- Visual appeal: Use contrasting colors and bold fonts to make your CTAs stand out. This visual hierarchy guides the visitor’s attention directly to your call-to-action.
Another effective tactic is to tailor your CTAs to specific segments of your audience. By understanding the needs and preferences of your visitors, you can craft personalized messages that resonate more. Consider A/B testing different phrases and designs to see what works best. Tools like Google Optimize can help track user interaction and optimize your CTAs over time.
Implementing social proof can also enhance the effectiveness of your CTAs. Adding elements such as testimonials or user counts can reassure visitors about the value of your offering. For instance, displaying a message like “Join 10,000+ Happy Subscribers!” can instill confidence and encourage action.
| CTA Type | Example | Best For |
|---|---|---|
| Urgency | “Sign Up Today!” | Time-sensitive offers |
| Clarity | “Download Now” | Simple actions |
| Social Proof | “Join 2,500+ Members!” | Building trust |
ensure that your CTAs are mobile-friendly. With a growing number of users accessing websites via mobile devices, it’s critical that your calls-to-action are easily clickable and accessible on smaller screens. Test the responsiveness of your header to guarantee that visitors can engage with your CTAs no matter how they access your site.
Utilizing Custom Widgets for a Unique Touch
In the quest for a distinctive website, custom widgets can serve as the perfect tool to infuse personality and functionality into your header section. Whether you want to showcase your latest courses, upcoming events, or even testimonials, custom widgets allow you to curate the information your visitors see first. By tailoring these elements, you ensure that your site resonates with your unique branding and educational objectives.
Here are some ways you can elevate your header using custom widgets:
- Course Highlight Widget: Feature your most popular or new courses right at the top. By using a stylish layout, you can draw attention to these key offerings, ensuring they capture the interest of potential students.
- Countdown Timer: Create urgency for upcoming events or course launches. A visually appealing countdown timer widget can motivate users to register or learn more before time runs out.
- Social Media Feed: Integrate a live feed from your social media channels. This not only keeps your content fresh but also helps in building a community around your educational offerings.
When implementing these widgets, consider the overall aesthetic of your header. Consistency in color schemes, font styles, and spacing can significantly enhance user experience. For instance, a widget-container class can be styled in your CSS to ensure that everything aligns perfectly:
.widget-container {
    display: flex;
    justify-content: space-between;
    padding: 20px;
    background-color: #f9f9f9;
}
To demonstrate the impact of these custom widgets, consider the following table that outlines potential features and their benefits:
| Widget Feature | Benefit |
|---|---|
| Multi-Column Layout | Increases visibility and organization of information. |
| Animated Effects | Captures attention and enhances engagement. |
| Custom Icons | Provides a unique identity and reinforces branding. |
Utilizing custom widgets not only transforms the visual appeal of your header but also streamlines user navigation. A well-organized header allows visitors to find crucial information quickly, reducing bounce rates and increasing the chances of conversion. Every element you choose to include should reflect your institution’s values and mission, ensuring that your unique touch is felt throughout the visitor’s experience.

Optimizing Mobile Responsiveness in Your Header
In today’s digital landscape, a seamless mobile experience is paramount. When optimizing your header for mobile devices, it’s essential to focus on clarity and accessibility. Your header is the first thing users see, so it should effectively communicate your brand while offering intuitive navigation.
Start by simplifying your header elements:
- Reduce the number of items in the navigation menu.
- Use icons instead of text where feasible to save space.
- Ensure that your logo is appropriately sized and doesn’t overwhelm the design.
Consider the placement of your call-to-action buttons: These should be prominent and easily clickable on smaller screens. Utilize contrasting colors to make them stand out, and remember to keep them above the fold for maximum visibility.
Implementing a responsive design framework can significantly enhance user experience. This means that elements like logos, menus, and buttons will automatically adjust to fit various screen sizes, ensuring that your site looks great on any device. You can achieve this by utilizing CSS media queries to adapt styles based on the device’s characteristics.
Testing is key: After making your adjustments, be sure to test your header on multiple devices. Consider using tools like Google’s Mobile-Friendly Test to identify any potential issues. Pay close attention to how easy it is for users to interact with your header elements.
Another essential aspect is the font size and type: Choose legible fonts that can be easily read on smaller screens. A good rule of thumb is to keep your font size at least 16px for body text and slightly larger for headers, ensuring readability without overwhelming the user.
always keep your audience in mind. Gather feedback from users to refine your header further. Creating a mobile-responsive header isn’t just about aesthetics; it’s about creating an engaging experience that encourages users to explore your site beyond the first click.
Testing and Previewing Your Header Changes
Once you’ve made adjustments to your header section, it’s crucial to ensure that your changes reflect your vision accurately. The Eduma WordPress theme provides various options to preview your modifications before finalizing them, allowing you to make any necessary tweaks. Here are some effective methods to test and preview your changes:
- Utilize the Live Customizer: Navigate to Appearance > Customize. This tool lets you see real-time changes as you edit your header settings. You can adjust colors, layouts, and typography while observing how each change impacts the overall design.
- Preview in Different Devices: Eduma’s responsive design means your header should look great on all devices. Use the device icons in the customizer to switch between desktop, tablet, and mobile views, ensuring your header is optimized for every screen size.
- Check Browser Compatibility: It’s vital to test your header across different browsers (Chrome, Firefox, Safari, etc.). This gives you a complete assurance that your design remains consistent and appealing regardless of where it’s viewed.
After implementing these changes, you can also leverage the Preview Changes button. This allows you to see your header adjustments without making them live on your site. It’s a perfect way to experiment with different styles and layouts until you find the one that resonates with your audience.
For a more comprehensive overview, consider creating a comparison table to weigh different header designs you explore. Here’s a simple format you can follow:
| Header Style | Pros | Cons |
|---|---|---|
| Centered Logo | Balanced appearance, easy to navigate. | May not fit all logos or titles. |
| Left-Aligned Logo | Professional look, popular option. | Can look cluttered with additional elements. |
| Full-Width Header | Creates an immersive experience. | May increase loading time if not optimized. |
Lastly, don’t forget to gather feedback from peers or your target audience. Share the preview link and solicit input on usability and aesthetics. This feedback can be invaluable in deciding the final layout, ensuring that your header is not only visually appealing but also functional and user-friendly.

Ensuring Accessibility and User-Friendliness
When it comes to editing your header section in the Eduma WordPress theme, is paramount. A well-structured header not only enhances aesthetic appeal but also plays a crucial role in user engagement. Here are some key strategies to consider:
- Use Clear Navigation: Ensure that your navigation menus are easily accessible. Use clear and concise labels that guide users effortlessly through your site.
- Responsive Design: Choose header elements that adapt beautifully to various screen sizes. This ensures that users on mobile devices have as much ease navigating your site as those on desktops.
- Readable Fonts: Select fonts that are easy to read. Contrast is essential; make sure that text stands out against the background for maximum visibility.
- Alt Text for Images: When adding logos or any images in the header, always include descriptive alt text. This ensures that visually impaired users can understand your site’s layout and branding.
- Keyboard Navigation: Ensure that all interactive elements within the header, such as menus and buttons, are navigable via keyboard shortcuts. This is essential for users who may not be able to use a mouse.
Implementing these practices not only caters to a wider audience but also enhances your site’s overall usability. A header that is intuitive and accessible encourages users to explore further, leading to increased engagement and satisfaction.
| Element | Accessibility Tip |
|---|---|
| Navigation Menu | Ensure links are keyboard-accessible and clearly labeled. |
| Logo | Include alt text for screen readers. |
| Search Bar | Make sure it is easily visible and functional on all devices. |
By prioritizing accessibility and user-friendliness in your header design, you’re not only enhancing the user experience but also positioning your website as a welcoming space for all visitors. Remember, a thoughtful header can set a positive tone for the entire website, inspiring users to immerse themselves in the content you provide.
Tips for Maintaining Consistency Across Your Website
Creating a cohesive look and feel throughout your website is essential for user experience and brand recognition. When editing the header section in the Eduma WordPress theme, there are several strategies you can implement to ensure consistency that resonates with your audience.
First and foremost, establish a color palette that reflects your brand identity. Use consistent colors for your header background, text, and any graphic elements. This not only creates a visually appealing design but also enhances brand recall. Here’s how you can maintain uniformity:
- Choose 3-5 primary colors and use them across all header elements.
- Utilize CSS variables in your theme to easily manage and apply your color scheme.
- Test color contrasts to ensure that text is legible against background colors.
Next, focus on typography. Select fonts that align with your brand personality and ensure they are consistently used in your header. Consider the following tips:
- Limit font usage to two or three types to avoid visual clutter.
- Match font weights and sizes for headings and body text to maintain hierarchy.
- Use web-safe fonts or integrate Google Fonts for a wider range of options.
Additionally, pay attention to the layout and spacing in your header. Consistent padding and margins make your website look professional. You can achieve this by:
- Using CSS Grid or Flexbox for responsive header layouts.
- Implementing uniform padding around header elements.
- Aligning icons and text in a consistent manner for easy navigation.
| Element | Best Practices |
|---|---|
| Color Scheme | 3-5 consistent colors |
| Typography | 2-3 font families |
| Spacing | Uniform padding and margins |
Lastly, don’t forget about the imagery and logos used in your header. High-quality, consistent visuals will strengthen your brand’s presence. Here’s how to ensure they support your overall design:
- Use a vector logo that scales well across devices.
- Incorporate relevant icons that match your brand style.
- Optimize images for fast loading speeds without sacrificing quality.
By focusing on these key areas—color, typography, layout, and imagery—you will create a header that not only looks great but also reinforces your brand’s message. Remember, consistency is crucial in building trust with your audience and enhancing their overall experience on your website.

Final Touches: Reviewing and Launching Your Updated Header
As you approach the final stages of your header redesign, it’s time to fine-tune every element to ensure it aligns with your vision and serves your audience effectively. Start by taking a step back and reviewing the changes you’ve implemented. This will give you a clearer perspective on how each adjustment contributes to the overall user experience.
Consider the following aspects during your review:
- Visual Hierarchy: Ensure that your header elements are arranged in a way that guides users’ attention to the most important items first.
- Color Schemes: Verify that the colors you’ve chosen are harmonious and reflect your brand’s identity while maintaining readability.
- Typography: Review font choices for clarity and style. The text should be easy to read on all devices.
- Mobile Responsiveness: Test how your header looks on different screen sizes to ensure a seamless experience for all users.
Once you’ve made the necessary adjustments, it’s crucial to gather feedback. Reach out to a few trusted users or colleagues and ask them to navigate your site. Their insights can uncover potential issues you may have overlooked and provide fresh ideas. Consider using a simple feedback form to structure their responses effectively.
Before you launch your updated header to the public, run through a checklist to ensure everything is in order:
| Checklist Item | Status |
|---|---|
| Review Content Alignment | ✅ |
| Check Links Functionality | ✅ |
| Test on Multiple Devices | ✅ |
| Confirm SEO Compatibility | ✅ |
After you’ve completed all the checks and are satisfied with the layout and functionality, it’s time to hit that launch button! Announce your new header on social media, emphasizing the enhancements and inviting users to explore your fresh design. This not only encourages engagement but also reinforces your commitment to providing an exceptional user experience.
remember that the launch is not the end of the journey. Monitor user interactions with the updated header and be open to further tweaks based on real-world usage. Continuous improvement is key to maintaining a modern and effective website. Embrace the feedback, celebrate your updates, and keep moving forward!
Frequently Asked Questions (FAQ)
Q&A: How To Edit Header Section In Eduma WordPress Theme?
Q1: Why should I edit the header section of my Eduma WordPress theme?
A1: The header is the first thing your visitors see when they land on your site. A well-designed header not only captures attention but also communicates your brand’s identity at a glance. By customizing the header in Eduma, you can create a memorable first impression, enhance user experience, and ultimately drive engagement. Imagine your website as a canvas—your header is the vibrant first stroke that sets the tone for the masterpiece that follows!
Q2: What specific elements can I edit in the Eduma header?
A2: In the Eduma theme, you have the power to customize several elements within the header, including your logo, site title, tagline, navigation menu, and even the colors and fonts. You can also add social media icons and call-to-action buttons. This flexibility allows you to create a cohesive and visually appealing design that resonates with your audience. Remember, a well-crafted header can turn casual visitors into loyal followers!
Q3: How do I access the header settings in the Eduma theme?
A3: Accessing the header settings is a breeze! Simply log into your WordPress dashboard, navigate to “Appearance,” and then select “Customize.” From there, you’ll find the “Header” section where you can begin to make changes. This user-friendly interface empowers you to make adjustments in real-time, so you can see the impact of your changes instantly. Take charge of your site’s look with just a few clicks!
Q4: Can I customize the header without any coding knowledge?
A4: Absolutely! One of the greatest advantages of the Eduma theme is its intuitive design, allowing even those with little to no coding experience to make significant changes. The theme offers various customization options through a visual editor, making it easy to tweak settings, fonts, and layouts. Dive in confidently, knowing that you can transform your header without needing to be a coding whiz!
Q5: How can I make my header stand out?
A5: To make your header truly shine, consider using contrasting colors, clear typography, and high-quality images. Including a compelling call-to-action can also draw attention. Additionally, don’t shy away from creativity! Using unique design elements that reflect your brand’s personality can set you apart from the competition. Think of your header as your brand’s introduction—make it unforgettable!
Q6: Are there any best practices I should follow when editing my header?
A6: Yes! Keep it simple and clutter-free to enhance usability. Ensure that your logo is clear and clickable, leading visitors back to the homepage. Use a consistent color palette that aligns with your brand, and ensure that navigation is straightforward. Remember, the goal is to guide your visitors seamlessly through your site while leaving a lasting impression.
Q7: What impact can a well-edited header have on my site’s performance?
A7: A well-crafted header can significantly enhance your site’s performance! It can lead to higher engagement rates, longer visit durations, and reduced bounce rates. By creating a user-friendly and visually appealing header, you encourage visitors to explore your site further, which can ultimately lead to conversions—be it sign-ups, purchases, or inquiries. Invest in your header today, and watch your site flourish!
Q8: How often should I update my header?
A8: There’s no one-size-fits-all answer, but it’s wise to review your header periodically—especially if you experience changes in your branding, offerings, or seasonal promotions. Keeping your header fresh and relevant helps maintain interest and shows your audience that you’re engaged with your content. Embrace the evolution of your brand and let it shine through your header!
Conclusion: Editing the header section of your Eduma WordPress theme is not just a task—it’s an opportunity to express your brand’s essence and captivate your audience. With each tweak, you can inspire, engage, and guide your visitors on an incredible journey through your website. So, take that step today and transform your header into a stunning gateway to your online world!
The Conclusion
As we conclude our journey into the world of editing the header section in the Eduma WordPress theme, remember that your website is not just a collection of pages; it’s a canvas for your vision and a reflection of your brand. With the tools and techniques we’ve explored, you’re now equipped to infuse personality and professionalism into your site.
Imagine the impact a beautifully crafted header can have on your visitors—it’s the first impression that can captivate and engage. Don’t hesitate to experiment with colors, fonts, and layouts until you find the perfect combination that resonates with your audience.
Embrace this creative process and let your unique voice shine through every pixel. By customizing your header, you’re not just enhancing aesthetics; you’re building an inviting gateway to your content, showcasing your commitment to quality and attention to detail.
So, take the leap! Dive into your Eduma theme, make those edits, and transform your header into a powerful tool that draws visitors in and encourages them to explore more. Your website is your story—make it unforgettable. Happy editing!


New Providers
Enjoy The Speed Of Downloading & Uploading With 1GBPS Port
Affordable Dedicated Servers & Colocation Services. Services: Dedicated Servers Colocation Private Cabinet Colocation DDoS Protection
Up to 85% off hosting + website builder

Latest News
- 8+ Free Construction Templates and Page DesignsJuly 11, 2026 16
- How to Create a Graphic Design Portfolio That Gets HiresJuly 11, 2026 16
- Otter Blocks 3.2.0: AI Page Building and a New Design LibraryJuly 11, 2026 15
- 11 Best Web Hosting Services for Developers 2026July 11, 2026 19
- How to Create a Webshop: A Step-by-Step GuideJuly 10, 2026 21

We specialize in providing Web hosting reviews. Where you can search for potential hosts.