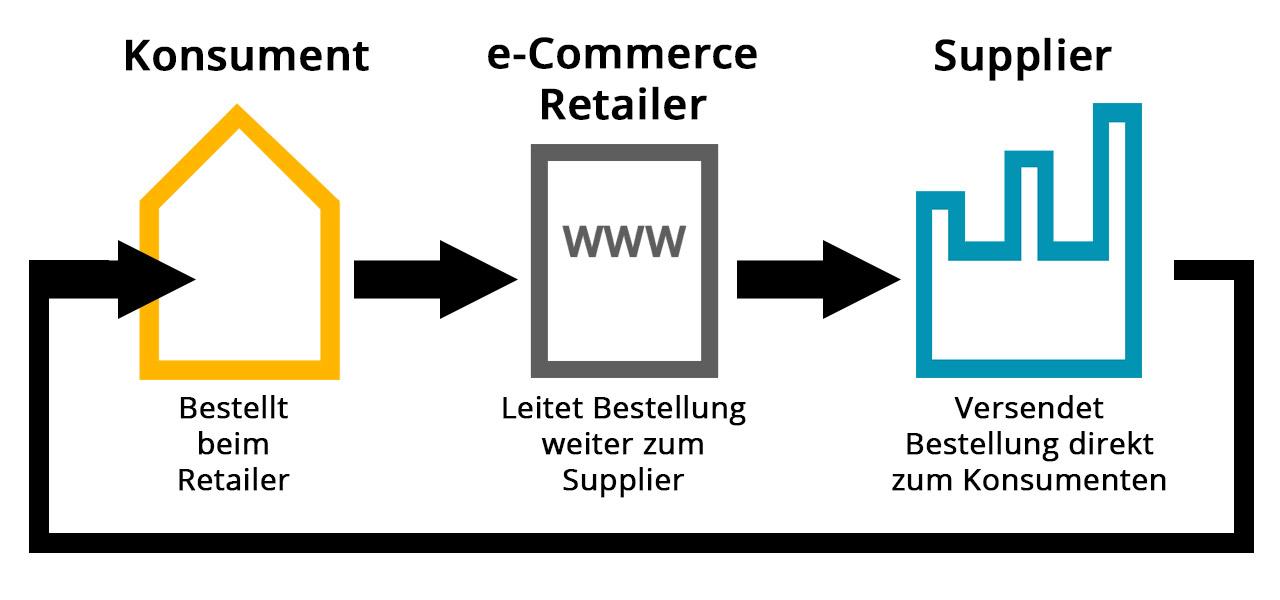
Are you ready to take your WooCommerce store to the next level? Shipping classes are your secret weapon! They help you set specific rates for different products, ensuring your customers pay exactly what they should. Let’s dive into how you can easily set them up!
How to Use Shipping Classes in WooCommerce: For Beginners
Are you ready to take your WooCommerce store to the next level? If you’re just starting out, navigating the world of shipping can feel a bit overwhelming. But fear not! One of the most effective ways to streamline your shipping process and enhance your customers’ experience is by using shipping classes. Think of shipping classes as the secret sauce that allows you to tailor your shipping options to different products, making sure that your customers get exactly what they need at checkout. In this article, we’ll break down how to use shipping classes in WooCommerce, step-by-step, so you can offer a seamless shopping experience without all the headache. Whether you’re selling bulky furniture or delicate jewelry, mastering shipping classes can help you save time, reduce costs, and ultimately boost your sales. So, let’s dive in and unlock the potential of your WooCommerce store together!
Understanding the Basics of Shipping Classes in WooCommerce
Shipping classes in WooCommerce are a powerful feature that allows store owners to effectively manage shipping rates based on the characteristics of their products. By defining shipping classes, you can easily group products that share similar shipping requirements, making it simpler for customers to understand their shipping costs at checkout.
To get started, you need to create your shipping classes. Navigate to WooCommerce > Settings > Shipping and then select the Shipping Classes tab. Here, you can add new classes by entering a name and a slug. Keep in mind that the names should be descriptive enough for both you and your customers. For example:
| Shipping Class | Description |
|---|---|
| Standard Shipping | Used for regular items that have standard shipping rates. |
| Heavy Items | For products that require higher shipping costs due to weight. |
| Fragile Items | For items that need special handling during shipping. |
Once you’ve set up your shipping classes, the next step is to assign them to your products. This is done under the Product Data section when editing a product. Simply select the appropriate shipping class from the dropdown menu. This ensures that each product has the correct shipping rules applied, which enhances the overall shopping experience.
After assigning shipping classes, it’s crucial to configure your shipping zones and methods. Go back to the Shipping tab in WooCommerce settings, and select Shipping Zones. Here, you can create different zones based on geographical locations and set specific shipping methods for each zone. By linking your shipping classes to these methods, you can specify unique rates for each class. For instance:
- Standard Shipping: $5 flat rate
- Heavy Items: $15 flat rate
- Fragile Items: $10 flat rate + insurance
Utilizing shipping classes not only streamlines the shipping process but also offers transparency to your customers. They can easily see the shipping costs associated with their selected items and make informed decisions at checkout. Additionally, this method can help reduce cart abandonment by providing clear expectations regarding shipping fees.
Lastly, remember to continually evaluate and adjust your shipping classes as your product range evolves. Regularly revisiting your shipping strategy ensures that you remain competitive and meet your customers’ expectations, fostering loyalty and repeat purchases.
Why Shipping Classes Matter for Your Online Store
Understanding the significance of shipping classes in your online store can dramatically enhance your customer experience and boost your bottom line. When you categorize products into different shipping classes, you gain the ability to charge shipping costs based on the specific needs of each product type. This results in more precise shipping fees, which can lead to increased customer satisfaction and reduced cart abandonment.
Consider the following benefits of using shipping classes effectively:
- Customized Shipping Rates: Different products may require different shipping methods or rates. For instance, heavy items might incur higher shipping costs compared to lightweight products. By utilizing shipping classes, you can ensure that your customers are charged accurately.
- Improved Customer Trust: Transparent shipping costs build trust. When customers see realistic shipping prices, they are less likely to abandon their carts due to unexpected fees at checkout.
- Promotional Opportunities: Shipping classes can be used strategically to create promotional offers. You could offer free shipping on specific classes, encouraging customers to purchase those items.
Implementing shipping classes in WooCommerce allows for flexibility in your operations. For example, you can create classes for fragile items, oversized products, or even digital downloads, each with its own set of shipping rules. This categorization not only streamlines your logistics but also helps in effective inventory management.
Here’s a quick overview of how shipping classes can affect your shipping rates:
| Shipping Class | Example Products | Base Rate |
|---|---|---|
| Standard | T-shirts, Mugs | $5.00 |
| Heavy | Furniture, Appliances | $20.00 |
| Fragile | Glassware, Electronics | $10.00 |
| Digital | E-books, Online Courses | Free |
Moreover, using shipping classes allows for better comparisons of your shipping options against competitors. If you know the shipping class of your products and have analyzed your competitors’ pricing structures, you can set competitive rates that attract customers without sacrificing profit margins.
embracing shipping classes in your WooCommerce store is more than just a feature; it’s a strategic move that can significantly impact your sales and customer loyalty. By providing clear, accurate, and fair shipping options, you not only enhance the shopping experience but also position your store as a trustworthy place for online shoppers.
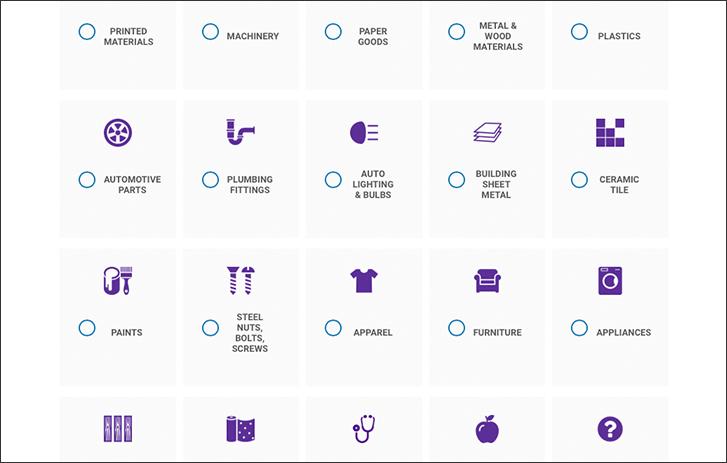
Setting Up Your First Shipping Class: A Step-by-Step Guide
Creating your first shipping class in WooCommerce can seem daunting, but it’s a breeze once you break it down into manageable steps. Here’s how you can effectively set up a shipping class that caters to your specific needs and enhances your customers’ shopping experience.
First, navigate to your WordPress dashboard and click on WooCommerce in the sidebar. From the dropdown, select Settings, then click on the Shipping tab. Within this section, you will see the option for Shipping Classes. This is your starting point!
Next, you’ll want to add a new shipping class. Click on the Add Shipping Class button, and you’ll be prompted to fill out a few fields:
- Shipping Class Name: Choose a descriptive name that reflects the type of products this class will cover, such as “Heavy Items” or “Free Shipping.”
- Slug: This is the URL-friendly version of the shipping class name. Keep it simple and relevant.
- Description: Provide a brief explanation of the shipping class, which can help you remember its purpose later.
Once you’ve filled in the necessary details, click Save Changes. Congratulations! You’ve just created a shipping class. Now, it’s time to assign this class to your products.
To do this, go to the product edit page for the items you want to include in your new shipping class. In the Product Data section, navigate to the Shipping tab. Here, you will find a dropdown menu for Shipping Class. Select the class you just created and save your changes. Repeat this process for any other products that should share this shipping class.
you’ll want to configure the rates for your shipping class. Return to the Shipping Zones section under the Shipping tab in your WooCommerce settings. Click on the shipping zone you want to edit, and then add the necessary shipping methods. For example, you can set a flat rate for heavy items or offer free shipping for specific classes. Here’s a simple overview of how to set it up:
| Shipping Class | Rate Type | Amount |
|---|---|---|
| Heavy Items | Flat Rate | $15.00 |
| Free Shipping | Free | $0.00 |
| International | Flat Rate | $30.00 |
With your shipping classes set up and rates configured, you’re now ready to provide a seamless shipping experience for your customers. Enjoy the flexibility that shipping classes bring to your WooCommerce store!
Assigning Shipping Classes to Your Products Made Easy
Assigning shipping classes to your products in WooCommerce is an essential step for managing your online store’s shipping strategy effectively. With the right setup, you can streamline your shipping process and enhance customer satisfaction. Here’s how to do it easily!
First, navigate to your WooCommerce settings. Head over to WooCommerce > Settings > Shipping. If you haven’t set up shipping zones yet, now’s the perfect time! Shipping zones allow you to define different rates and classes based on geographic areas. Once you’ve established your zones, you can create shipping classes tailored to specific products.
To create a shipping class, go to the Shipping Classes tab within the shipping settings. Here, you can add classes for items that require special handling or different shipping rates, like:
- Heavy Items: For products that are bulky or heavy.
- Fragile Goods: Items that need careful handling.
- Free Shipping: Products eligible for free delivery.
Once you’ve established your shipping classes, it’s time to assign them to individual products. You can do this by editing a product in your catalog. Within the product data section, locate the Shipping tab. Here, you’ll find a dropdown menu where you can select the shipping class you want to assign. This makes it easy to categorize products based on their shipping needs without any hassle.
To give you a clearer picture, here’s a simple table summarizing how shipping classes can impact your shipping strategy:
| Shipping Class | Rate Type | Applicable Products |
|---|---|---|
| Standard | Flat Rate | General items |
| Heavy | Calculated Shipping | Furniture, Equipment |
| Fragile | Premium Rate | Glassware, Electronics |
| Free Shipping | No Charge | Promotional items |
Remember, the goal of using shipping classes is to ensure that your customers have a seamless shopping experience. By clearly defining shipping options, you not only enhance transparency but also encourage trust in your brand. So, take the time to set up shipping classes that reflect your product offerings and customer needs!
assigning shipping classes in WooCommerce is not only straightforward but also crucial for optimizing your shipping strategy. With just a few clicks, you can manage shipping costs effectively, ensuring a smoother operation for your online store. Get started today and watch how it transforms your shipping process!
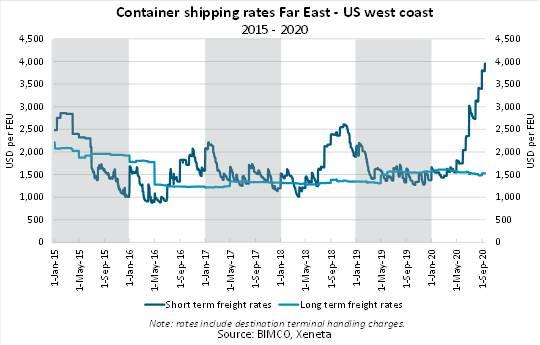
Creating Multiple Shipping Rates for Different Classes
Setting up multiple shipping rates based on different classes can significantly enhance your WooCommerce store’s flexibility and customer satisfaction. By categorizing your products into distinct classes, you can tailor shipping options that best fit the nature of each product. This is particularly useful for businesses dealing with various product types, such as clothing, electronics, and fragile items.
To start, you need to create your shipping classes in WooCommerce. Here’s how to do it:
- Go to your WordPress dashboard.
- Select WooCommerce and then Settings.
- Navigate to the Shipping tab.
- Click on Shipping Classes.
- Add a new shipping class by entering a name and description, then save your changes.
After creating your shipping classes, you can assign them to products. To do this, edit a product in your WooCommerce store:
- Scroll down to the Product Data section.
- Click on the Shipping tab.
- Select the appropriate shipping class from the dropdown menu.
- Update or publish the product to save your changes.
Now that your products are categorized into shipping classes, it’s time to set different rates for each class. You can do this by creating shipping zones:
- Return to the Shipping tab in WooCommerce settings.
- Click on Add shipping zone to define a new zone based on the locations you wish to cover.
- Once the zone is created, click on Add shipping method to include various methods like Flat Rate, Free Shipping, or Local Pickup.
For the Flat Rate shipping method, you can specify different costs based on shipping classes. For example:
| Shipping Class | Flat Rate Cost |
|---|---|
| Standard | $5.00 |
| Express | $10.00 |
| Heavy Items | $15.00 |
| Fragile | $20.00 |
With these rates, you can ensure that your shipping fees reflect the costs and nature of the items being shipped. It’s essential to always consider your profit margins and customer expectations when setting these rates. Ultimately, offering multiple shipping rates tailored to different classes not only boosts your operational efficiency but also improves customer experience, leading to increased loyalty and sales.
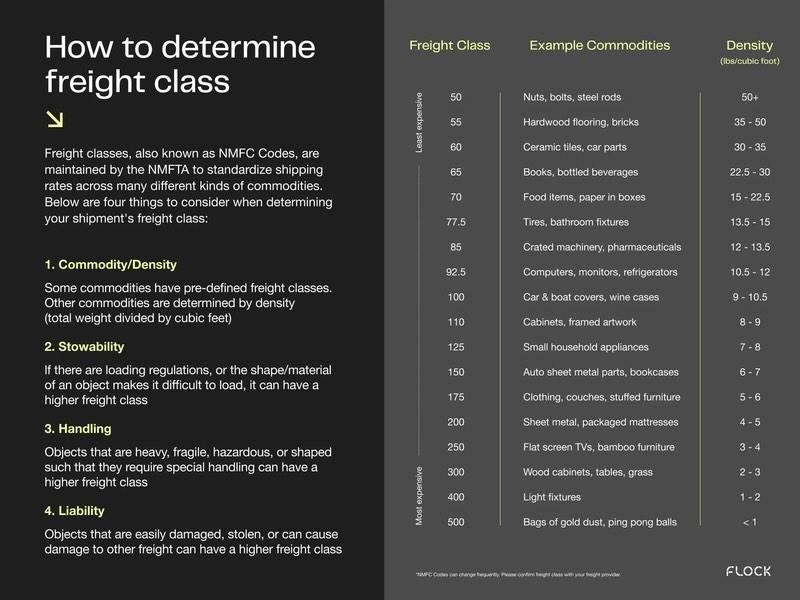
Best Practices for Managing Shipping Classes Effectively
Troubleshooting Common Issues with Shipping Classes
Shipping classes can significantly enhance your WooCommerce store’s efficiency, but they may sometimes lead to confusion or errors. Here are some common issues users face and how to troubleshoot them effectively.
- The shipping class is not assigned to the product correctly.
- The shipping zones are misconfigured.
- The rates set for specific shipping classes are incorrect.
To resolve this, double-check the assignment of shipping classes in the product settings and ensure the rates in your shipping settings reflect your desired pricing.
- Navigate to the product edit page and confirm the shipping class is selected.
- Save changes and refresh the product page.
- If using bulk editing, ensure all selected products have the correct shipping class assigned.
- Use clear and distinct names for each shipping class.
- Group similar products under the same shipping class to avoid confusion.
- Consider using a color-coding system in your WooCommerce settings to visually differentiate between classes.
| Issue | Solution |
|---|---|
| Incorrect Shipping Costs | Check product assignment and shipping zone settings. |
| Missing Shipping Classes | Ensure the correct class is assigned to products. |
| Confusion with Classes | Use distinct names and group similar products. |
- Incompatibilities with other plugins, such as those that modify shipping behavior.
- Cache issues that prevent the latest changes from appearing.
- Misconfigured checkout settings.
Try clearing your cache, disabling conflicting plugins, and reviewing your checkout configurations to ensure everything is set up properly.
- Rates are uniformly applied in each zone.
- There are no overlapping or conflicting shipping zones.
- Shipping classes are consistent across all applicable products.
A quick audit of your shipping settings can help you align rates and avoid confusion for your customers.

Enhancing Customer Experience with Smart Shipping Options
When it comes to e-commerce, the shipping experience can make or break a customer’s journey. By utilizing WooCommerce’s shipping classes, you can offer a range of smart shipping options that not only enhance the customer experience but also cater to diverse needs. Here’s how you can leverage these options effectively.
One of the primary benefits of using shipping classes is the ability to set specific rates for different types of products. This flexibility allows you to:
- Differentiate between product types: For example, bulky items might require higher shipping fees compared to lightweight products.
- Offer free shipping: Use shipping classes to designate certain items for free shipping promotions, encouraging customers to purchase more.
- Implement weight-based shipping: Set classes based on the weight of products to ensure fair pricing across your catalog.
Creating shipping classes in WooCommerce is straightforward. Navigate to the shipping settings in your WooCommerce dashboard and define the classes based on your product categories. Assign these classes to individual products, and you’re ready to go! This setup allows you to easily manage and adjust shipping rates as your inventory changes.
Moreover, consider offering local delivery options as part of your shipping classes. Many customers appreciate swift service, and by providing flexible delivery choices, you can enhance their overall satisfaction. You could create classes such as:
| Delivery Option | Estimated Time | Cost |
|---|---|---|
| Standard Delivery | 3-5 Business Days | $5.00 |
| Express Delivery | 1-2 Business Days | $15.00 |
| Same-Day Delivery | Within 24 Hours | $25.00 |
Additionally, it’s wise to communicate shipping details clearly on your product pages. Customers are more likely to complete their purchases if they understand the shipping process upfront. Use engaging visuals and concise, persuasive copy to highlight the benefits of your shipping options.
Lastly, don’t underestimate the power of customer feedback. Encourage reviews and suggestions regarding your shipping classes. Monitoring feedback can provide invaluable insights that can help you refine your options, ultimately leading to better customer retention and satisfaction.
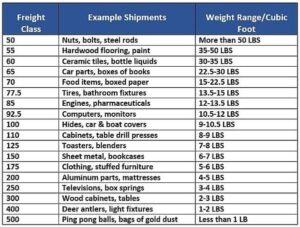
Leveraging Shipping Classes for Increased Sales and Efficiency
When it comes to optimizing your WooCommerce store, one of the most impactful strategies is utilizing shipping classes. These classes allow you to categorize your products based on various shipping criteria, enabling you to create a more tailored shopping experience for your customers while increasing your operational efficiency.
By assigning different shipping classes to your products, you can control the shipping rates based on product size, weight, or specific shipping requirements. For instance, you might have:
- Standard Shipping: For lightweight items.
- Heavy Items: For larger, bulkier products that require special handling.
- Free Shipping: For promotional items or orders over a certain amount.
Using shipping classes not only helps in managing shipping costs effectively, but it also enhances customer satisfaction. When customers see transparent and accurate shipping fees during checkout, they are more likely to complete their purchases. Nobody likes surprises at the end of their shopping journey!
Let’s dive a bit deeper into how these classes can drive sales. By creating specific rules and rates for each class, you can run targeted promotions. For instance, you could offer free shipping on one class of items, encouraging customers to add more to their cart to qualify. Here’s a simple table that outlines how you might structure your shipping classes and their associated strategies:
| Shipping Class | Rate Strategy | Promotion Idea |
|---|---|---|
| Standard Shipping | $5 flat rate | Free shipping on orders over $50 |
| Heavy Items | $10 flat rate | 10% off for bulk orders |
| Free Shipping | Free | Buy one, get one 50% off |
Moreover, monitoring your shipping class performance through analytics can provide insights into customer preferences and purchasing behavior. This data is invaluable for adjusting your shipping strategies to maximize profitability. If you notice a particular shipping class seeing low conversion rates, it might be time to reevaluate your pricing model or promotional tactics.
Lastly, remember that customer trust is crucial in e-commerce. By clearly defining shipping classes and their associated costs on your product pages and during checkout, you’re not only streamlining the purchasing process but also building credibility. Customers appreciate transparency, and when they feel informed, they are more likely to convert and return for future purchases.

Final Tips for Mastering Shipping Classes in WooCommerce
To effectively manage your shipping classes in WooCommerce, it’s essential to understand how they interact with your overall shipping strategy. Here are some practical tips to help you refine your approach:
- Keep it Simple: Start with a few basic shipping classes. As your product range grows, you can expand on these classes. This will help you maintain clarity and prevent confusion during the checkout process.
- Group Similar Products: Assign categories of products to specific shipping classes. For example, if you sell both heavy furniture and lightweight accessories, create separate classes for each. This ensures that shipping calculations are both accurate and fair to customers.
- Utilize Flat Rate Shipping: Consider using flat-rate shipping in conjunction with your classes. This can simplify pricing for customers, as they’ll know what to expect at checkout without any unpleasant surprises.
- Test Your Setup: Before going live, conduct thorough tests with different products and shipping classes. Use the built-in WooCommerce sandbox mode to simulate transactions and ensure that everything calculates correctly.
Another key aspect is to regularly review your shipping classes to adapt to changing business needs:
- Monitor Shipping Reports: Keep an eye on your shipping reports in WooCommerce. These insights can reveal which classes are most frequently used, allowing you to adjust your strategies accordingly.
- Solicit Customer Feedback: Don’t hesitate to ask your customers about their shipping experience. Their feedback can provide invaluable insights into how your shipping classes are perceived and if changes are needed.
For a clearer overview of your shipping classes, consider visual aids like tables. Below is a simple example of how you might categorize different products based on their shipping classes:
| Shipping Class | Products Included | Shipping Cost |
|---|---|---|
| Standard | Books, Clothing | $5.00 |
| Heavy | Furniture, Appliances | $30.00 |
| Express | Electronics, Gifts | $15.00 |
Ultimately, success is about customization. Tailor your shipping classes to fit your unique business model and customer needs. With these strategies, you can streamline your shipping process, enhance customer satisfaction, and potentially boost your sales.
Frequently Asked Questions (FAQ)
Q&A: How to Use Shipping Classes in WooCommerce: For Beginners
Q1: What are shipping classes in WooCommerce?
A1: Great question! Shipping classes in WooCommerce are essentially a way to group products that share similar shipping attributes. For instance, if you sell both lightweight items and heavy appliances, you can create different shipping classes for each. This way, you can set specific shipping rates based on the class, ensuring that your customers are charged accurately for shipping.
Q2: Why should I use shipping classes?
A2: Using shipping classes can save you a lot of headaches down the road! They allow for greater flexibility in your shipping options, enabling you to tailor shipping costs to different types of products. This means you can avoid overcharging or undercharging your customers, which boosts customer satisfaction and can even improve your store’s credibility. Plus, it makes your shipping process more efficient!
Q3: How do I create shipping classes in WooCommerce?
A3: It’s super simple! Just go to your WordPress dashboard, navigate to “WooCommerce” > “Settings,” and then click on the “Shipping” tab. From there, you’ll see an option for “Shipping classes.” Click on it, and you can add new classes by entering a name, slug, and description. Once you’ve saved your changes, you can assign these classes to individual products.
Q4: How do I assign a shipping class to a product?
A4: Once you have your shipping classes set up, it’s time to assign them to products! Go to the product edit page in your WooCommerce dashboard. Under the “Product data” section, look for the “Shipping” tab. You’ll see a dropdown menu where you can select the relevant shipping class for that product. This way, whenever someone adds that product to their cart, the correct shipping rates will automatically apply.
Q5: Can I set different shipping rates for each class?
A5: Absolutely! This is one of the best features of shipping classes! After you’ve created your classes, you need to go back to the “Shipping Zones” section under the “Shipping” tab. Here, you can set specific rates for each shipping class. This means that lightweight items might have a flat rate, while heavy items can have a higher rate based on weight or size.
Q6: What if I have multiple shipping zones?
A6: No problem! WooCommerce allows you to set up multiple shipping zones, each with its own set of shipping classes and rates. This is particularly useful if you sell to different regions and want to offer tailored shipping options. Just make sure to set up your zones first, then apply the shipping classes accordingly.
Q7: Are there any plugins I need for advanced shipping options?
A7: While WooCommerce’s built-in functionality is quite robust, there are plenty of plugins available if you want to take your shipping to the next level. Plugins like “Table Rate Shipping” or “WooCommerce Advanced Shipping” offer more complex options, such as conditional shipping rates based on cart contents. These can really enhance your shipping strategy if you have a wide variety of products.
Q8: Any final tips for beginners?
A8: Definitely! Start simple. Make sure you understand your product range and how shipping costs will affect your pricing strategy. Test different shipping rates and classes to see what works best for your customers. And don’t forget to communicate shipping costs clearly on your site to avoid surprises at checkout. Happy selling!
By following these tips, you can effectively utilize shipping classes in WooCommerce, making shipping a breeze for both you and your customers. So go ahead, give it a try—you’ll be glad you did!
Final Thoughts
Wrap-Up: Mastering Shipping Classes in WooCommerce
And there you have it! You’re now equipped with all the essential tools to effectively use shipping classes in WooCommerce. Whether you’re just starting your online store or looking to enhance your existing setup, understanding shipping classes can really elevate your customer experience and streamline your operations.
Remember, the right shipping strategy can make all the difference in turning a casual visitor into a loyal customer. With the ability to tailor shipping options based on product types, weights, or dimensions, you’re not just offering shipping; you’re providing a service that caters directly to your customers’ needs.
So go ahead, set up those shipping classes, and watch how it simplifies your workflow while boosting customer satisfaction. If you have any questions or need further clarification, don’t hesitate to reach out! Happy selling, and may your WooCommerce journey be as rewarding as it is profitable!


