Unlock the full potential of your Eduma theme with Elementor! This step-by-step guide will empower you to create stunning, customized online courses that captivate your audience. Transform your vision into reality and elevate the learning experience today!
How To Use Elementor For Eduma: A Step-by-Step Guide
Unlock Your Creative Potential: A Step-by-Step Guide to Using Elementor with Eduma
In a world where online learning has become a cornerstone of education, creating a visually stunning and functional website is no longer just a luxury—it’s a necessity. Enter Elementor, the powerful page builder that transforms your vision into reality, and Eduma, the premier WordPress theme designed specifically for educators and e-learning platforms. If you’ve ever felt daunted by the complexities of web design or wished you could elevate your educational content to new heights, you’re in the right place.
This comprehensive guide will walk you through the process of integrating Elementor with Eduma, empowering you to craft a website that not only captivates your audience but also enhances their learning experience. Imagine a space where vibrant visuals meet seamless navigation, drawing students in and keeping them engaged. With each step in this guide, you’ll gain the tools and confidence to bring your unique educational offerings to life. Get ready to unleash your creativity and transform your online presence—your journey to an inspiring e-learning platform starts here!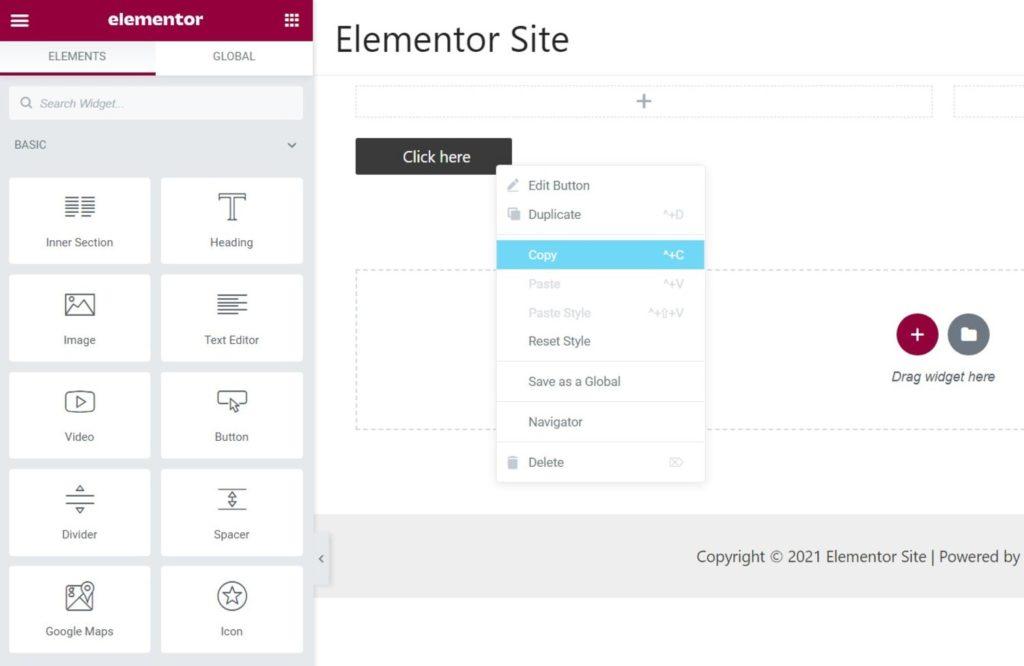
The Power of Elementor in Transforming Eduma Websites
When it comes to building modern educational websites, Elementor stands out as a game-changer, especially for those utilizing the Eduma theme. This powerful page builder not only enhances the aesthetic appeal of your website but also significantly boosts its functionality. With a user-friendly interface, you can create stunning layouts without needing extensive coding knowledge, making it accessible for both beginners and seasoned developers.
One of the most exciting aspects of using Elementor with Eduma is the array of customizable templates available. You can easily choose from pre-designed layouts that cater to various educational needs. This allows you to:
- Showcase courses with engaging visuals.
- Highlight testimonials to build credibility.
- Integrate interactive elements like quizzes and forms seamlessly.
With Elementor’s drag-and-drop functionality, you can manipulate every aspect of your site’s design. Adjust your typography, colors, and spacing to align with your brand identity. The customization options are virtually limitless, allowing you to:
- Create a unique user experience that resonates with your target audience.
- Enhance user engagement through visually appealing content.
- Optimize your site’s performance by maintaining fast load times with well-designed elements.
Another significant advantage is the integration of third-party widgets. These widgets can add functionality such as countdown timers for course enrollments, progress bars for student achievements, and much more. Here’s a simple comparison of some effective widgets you might consider:
| Widget | Purpose | Benefit |
|---|---|---|
| Countdown Timer | Urgency for course registration | Increases enrollment rates |
| Progress Bar | Shows course completion | Motivates learners |
| Testimonials Slider | Showcase student feedback | Builds trust and credibility |
the responsive design capabilities of Elementor ensure that your Eduma website looks stunning on all devices. With more users accessing online courses via mobile, having a site that automatically adjusts to different screen sizes is crucial. This not only improves user experience but also positively impacts your SEO rankings.
By harnessing the power of Elementor within the Eduma framework, you can create a dynamic and engaging online learning environment that not only attracts students but also retains them. The combination of intuitive design, functionality, and personalization can transform your educational website into a thriving hub of learning.
Unlocking the Potential of Eduma with Elementor
Eduma, a powerful education WordPress theme, paired with Elementor, unlocks a world of possibilities for those looking to create a dynamic online learning environment. With its user-friendly drag-and-drop interface, Elementor simplifies the web design process, allowing you to craft visually stunning pages without needing extensive coding knowledge. By leveraging this synergy, you can bring your educational vision to life.
Start by installing the Elementor plugin on your WordPress site. Once activated, navigate to your Eduma theme settings and enable Elementor support. This integration opens the doors to a myriad of design options. You can create custom layouts that reflect your unique style and resonate with your audience. Consider the following features to enhance your Eduma site:
- Custom Headers and Footers: Design your headers and footers to ensure consistency and branding throughout your site.
- Interactive Course Listings: Use Elementor’s elements to showcase courses in an engaging manner, incorporating visual elements that draw attention.
- Testimonials and Reviews: Build trust by displaying student testimonials in eye-catching formats.
To effectively utilize Elementor with Eduma, it’s crucial to understand the various widgets available. These widgets can be dragged into your pages and customized according to your needs. Here are a few essential widgets you might consider:
| Widget | Description |
|---|---|
| Text Editor | Perfect for adding course descriptions and educational content. |
| Image Gallery | Showcase images from courses, events, or student projects. |
| Countdown Timer | Create urgency for course registrations or events with a visual countdown. |
Additionally, leveraging the power of templates can save you time and ensure a cohesive look across your site. Elementor offers a variety of pre-designed templates specifically tailored for educational websites. Customize these templates to suit your branding and course offerings, or use them as a foundation to build your own unique pages.
Lastly, remember to optimize your pages for mobile responsiveness. With the increasing number of learners accessing content on mobile devices, ensuring your site looks great on all screens is essential. Elementor allows you to preview and adjust your layouts for different devices easily, giving you full control over the user experience.
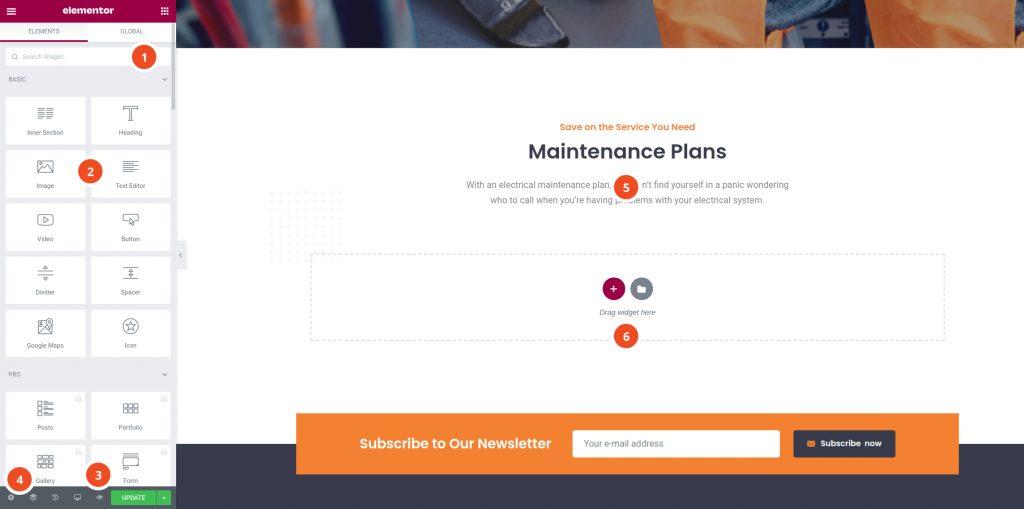
Getting Started with Elementor: A Quick Setup Guide
Embarking on your journey with Elementor to enhance your Eduma theme is a breeze. Follow these essential steps to craft stunning pages that captivate your audience:
1. Installation and Activation:
- Navigate to your WordPress dashboard.
- Go to Plugins > Add New.
- Search for “Elementor” and click Install Now.
- After installation, click Activate.
2. Configuring Global Settings:
Before diving into creating pages, optimize your global settings to ensure a consistent design across your site.
- Go to Elementor > Settings.
- Choose your default colors and typography that resonate with your brand.
- Enable or disable Elementor for specific post types as necessary.
3. Creating Your First Page:
Start building your masterpiece by creating a new page:
- From the dashboard, navigate to Pages > Add New.
- Click the Edit with Elementor button.
- Explore the user-friendly interface where you can drag and drop elements onto your canvas.
4. Designing with Widgets:
Elementor offers a rich selection of widgets that can enhance the functionality of your page. Here are some key widgets to consider:
| Widget | Description |
|---|---|
| Heading | To grab attention with impactful titles. |
| Image | Add stunning visuals to enrich your content. |
| Button | Create call-to-action buttons that drive engagement. |
| Video | Integrate video content to enhance learning experiences. |
5. Preview and Publish:
After crafting your page, it’s crucial to preview it before making it live. Use the Preview button to see how it looks on various devices.
Once satisfied, hit the Publish button and watch your creation come to life.
With these steps, you’re well on your way to mastering Elementor and transforming your Eduma site into a stunning educational platform. Dive in and start building today!
Navigating the Elementor Interface: Your New Best Friend
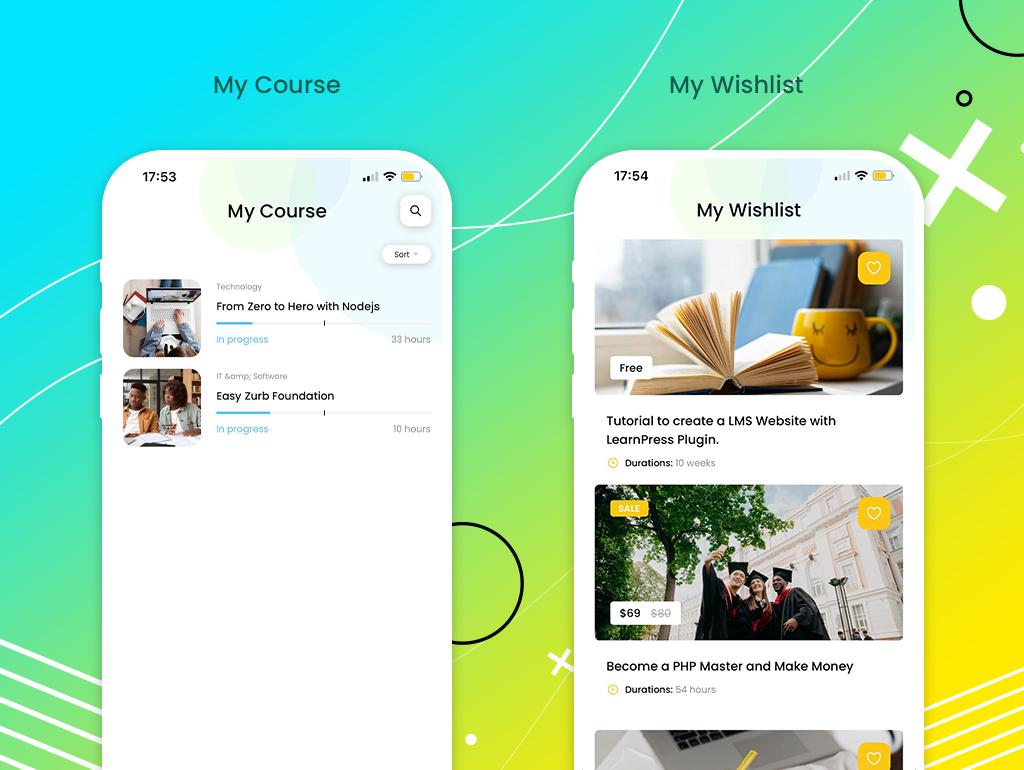
Creating Stunning Course Pages with Elementor
Designing Course Pages that Captivate
Creating an exceptional course page can significantly enhance the learning experience for your students. With the power of Elementor and the Eduma theme, you have everything you need to design visually striking and highly functional course pages. Here’s how to create stunning course pages that not only attract but also engage your audience.
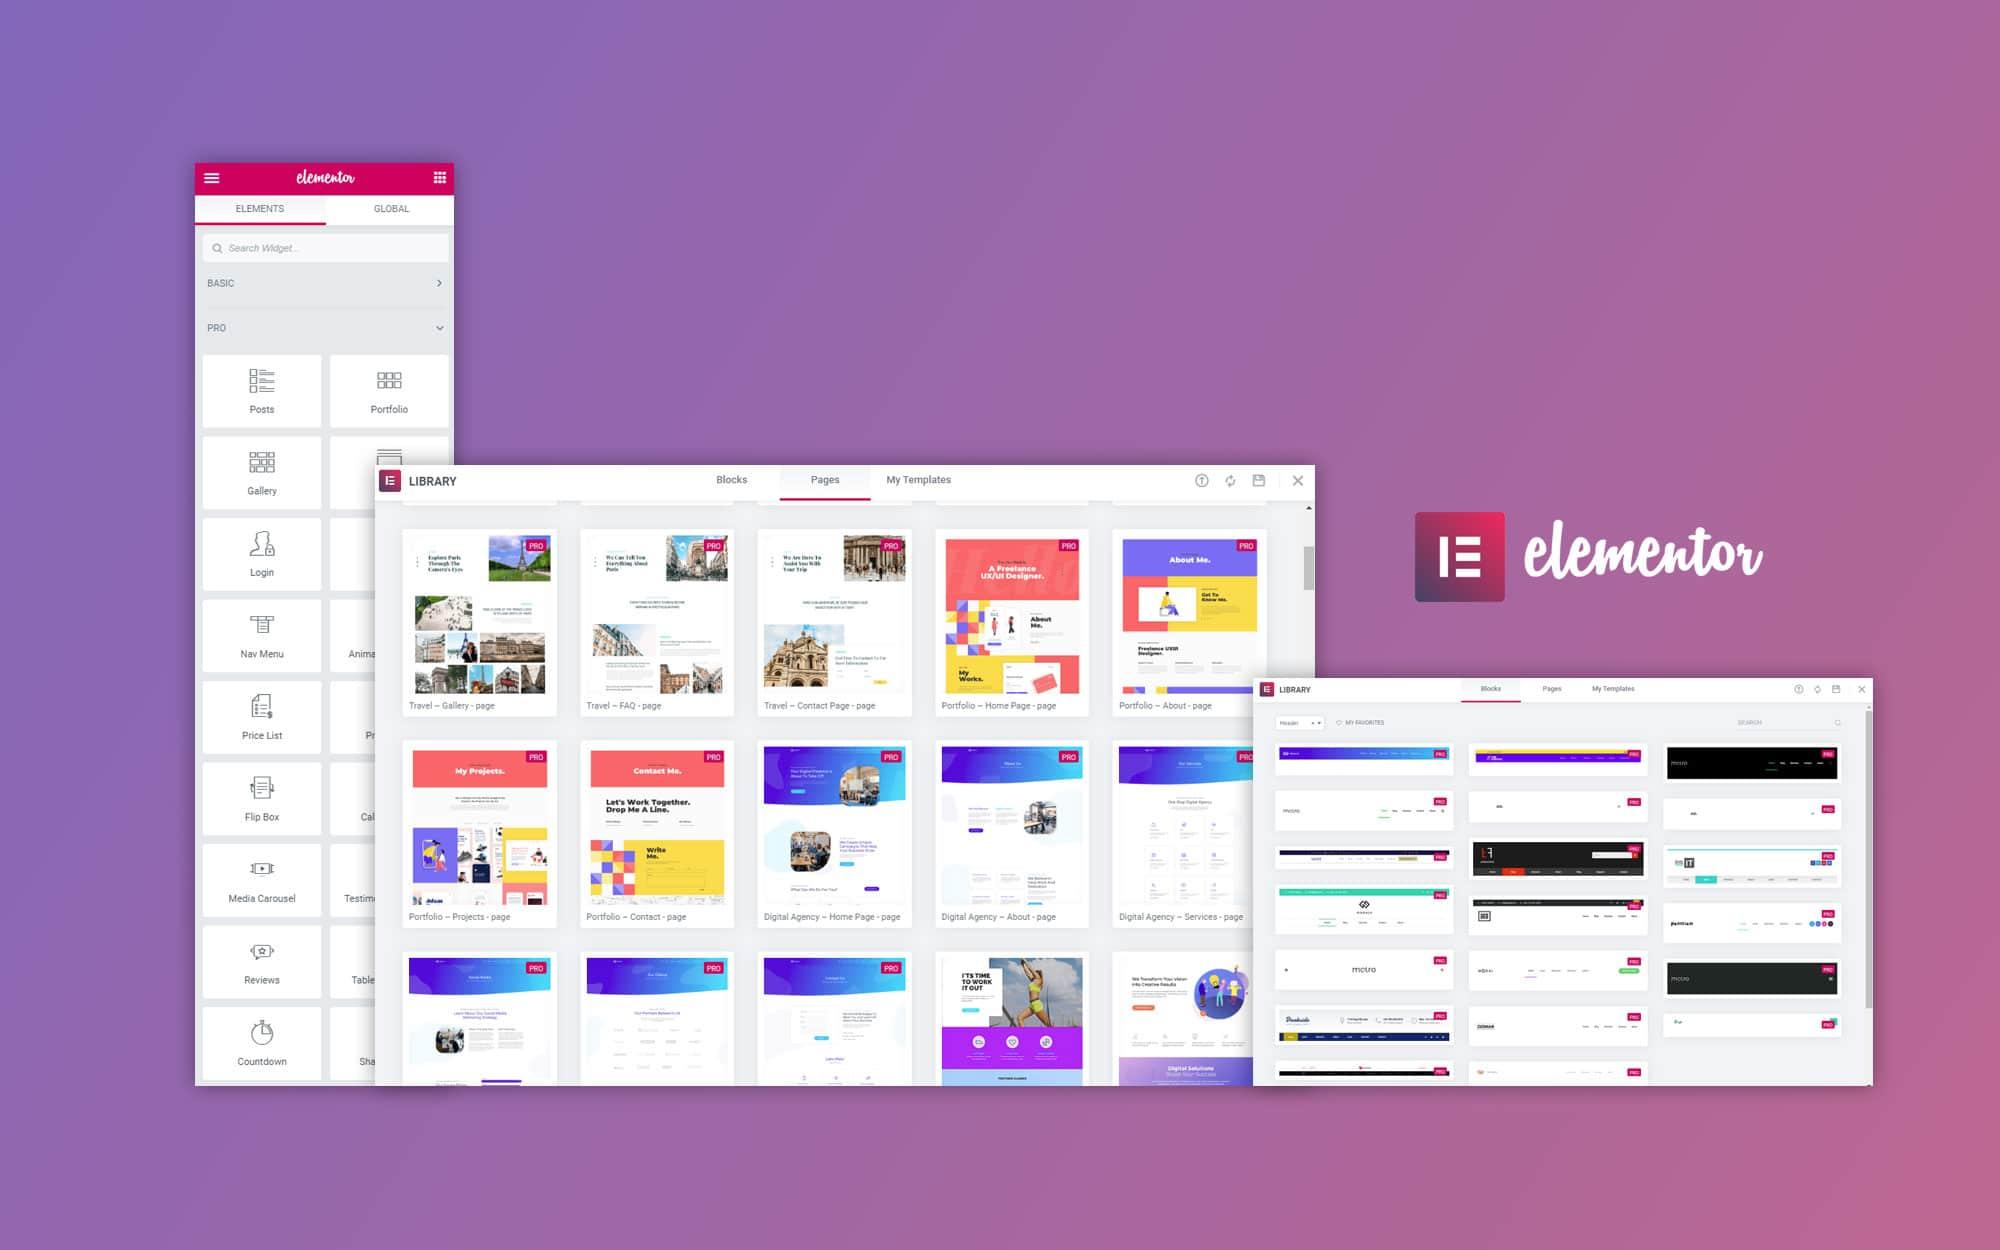
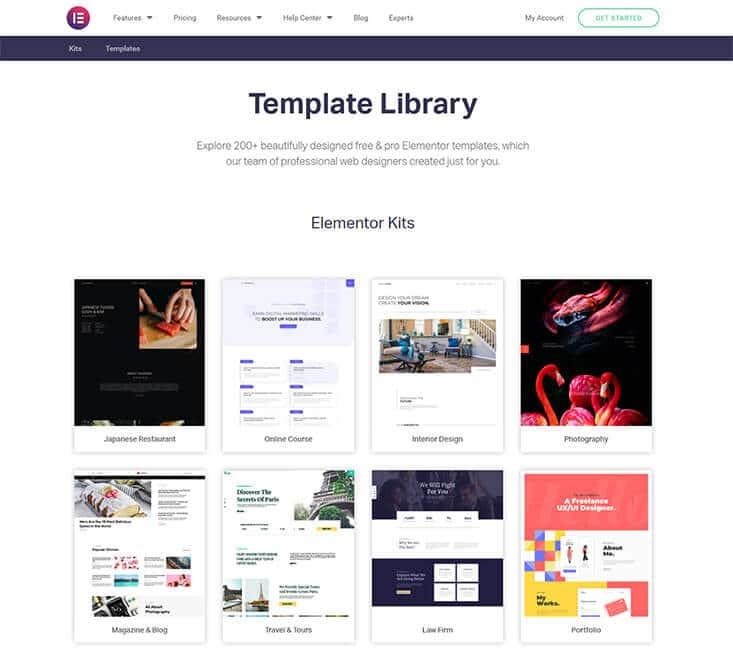
Utilizing Pre-made Templates
Elementor offers a range of pre-made templates specifically designed for educational purposes. These templates allow you to:
- Save Time: Get a head start on your design without starting from scratch.
- Maintain Consistency: Ensure your course pages align with your brand identity.
- Optimize for Mobile: Choose responsive designs that look great on all devices.
Customization Options
Once you’ve selected a template, dive into the customization options. Elementor’s drag-and-drop feature makes it easy to modify every element of your course page. Focus on:
- Typography: Use legible fonts and appropriate sizes for easy reading.
- Color Schemes: Choose colors that evoke the right emotions for your courses.
- Imagery: Incorporate high-quality images and videos to create a dynamic visual experience.
Adding Course Information
Create a dedicated section for course details, including:
- Course Title: Clear and captivating titles grab attention.
- Course Description: Briefly outline what students can expect to learn.
- Instructor Profiles: Humanize your courses by adding instructor bios and photos.
Integrating Features for Enhanced Engagement
Utilize Elementor’s widgets to make your course pages interactive. Consider integrating:
- Countdown Timers: Create urgency for enrollment.
- Tabbed Content: Organize information neatly without overwhelming users.
- Testimonials: Showcase student success stories to build trust.
Table of Course Offerings
| Course Name | Duration | Price |
|---|---|---|
| Web Development 101 | 6 Weeks | $299 |
| Digital Marketing Mastery | 8 Weeks | $399 |
| Graphic Design Fundamentals | 4 Weeks | $199 |
Final Touches
ensure your course page is optimized for search engines and easy to navigate. Include call-to-action buttons that lead to the enrollment process. Remember, a beautifully designed course page not only attracts students but also enhances their learning journey. With Elementor and Eduma, you are well-equipped to make a lasting impression.
Utilizing Pre-built Templates for Fast Results
In the world of web design, time is often of the essence. When using Elementor with Eduma, pre-built templates can be your secret weapon for creating stunning pages in record time. With just a few clicks, you can leverage these expertly crafted designs to elevate your educational website, ensuring that every aspect not only looks polished but also aligns with your branding.
One of the key benefits of utilizing pre-built templates is consistency. These templates are designed to maintain visual harmony across your site, making it easier for visitors to navigate and engage with your content. By choosing a template that resonates with your target audience, you can create a strong foundation for your educational offerings.
Moreover, pre-built templates are fully customizable, allowing you to add your personal touch without starting from scratch. Here are some advantages of using these templates:
- Quick Setup: Save hours of design time.
- Responsive Design: Templates are optimized for all devices.
- SEO-Ready: Built with search engine best practices in mind.
- User-Friendly: Simplifies the design process, even for beginners.
To give you a better understanding, consider the following table that outlines a few popular Eduma templates and their features:
| Template Name | Features |
|---|---|
| Online Course Template | Course listings, student testimonials, and easy navigation. |
| Instructor Profile Template | Personal branding, course management, and social links. |
| Event Registration Template | Countdown timer, registration forms, and agenda layout. |
By taking advantage of these templates, you’re not just speeding up the creation process; you’re also ensuring that your site stands out in a competitive market. You can focus more on the content quality and educational value you provide, while the template takes care of the aesthetics. This approach allows you to transform your vision into reality with minimal effort.
Ultimately, utilizing pre-built templates is about working smarter, not harder. With Elementor’s vast library, you can find the perfect fit for your unique needs and goals, setting the stage for an engaging user experience. Embrace these resources and watch your educational platform flourish.
Customizing Your Layout: Tips for Engaging User Experience
Crafting a Visually Stunning Layout
When customizing your layout with Elementor for Eduma, the first step is understanding the importance of visual hierarchy. Use contrasting colors and typography that resonates with your educational theme to guide your users’ attention. This not only enhances readability but also creates a seamless navigation experience.
Consider the use of white space effectively. It allows your content to breathe, making it easier for users to focus on key areas without feeling overwhelmed. Here are some practical tips for utilizing white space:
- Increase margins and padding around sections.
- Group related elements closely while maintaining space from unrelated ones.
- Balance text with images to maintain engagement.
Creating Intuitive Navigation
Navigation should be straightforward and intuitive. Use Elementor’s drag-and-drop functionality to place navigation menus in prominent locations. A well-organized layout includes:
- Sticky headers that remain visible as users scroll.
- Breadcrumbs that guide users back to previous pages.
- Clear call-to-action buttons placed strategically throughout the layout.
Incorporating Dynamic Content
Engagement increases significantly when users can interact with dynamic content. Elementor allows you to integrate elements such as:
- Animated text that captures attention.
- Image sliders to showcase multiple features in one space.
- Video backgrounds that create a more immersive experience.
Responsive Design Considerations
With a significant number of users accessing your site via mobile devices, ensuring your layout is responsive is crucial. Use Elementor’s responsive settings to fine-tune how your content appears on different devices. Pay attention to:
- Font sizes that are readable on smaller screens.
- Element arrangement that adapts accordingly.
- Touch-friendly buttons and menus.
Feedback and Iteration
After launching your customized layout, gather user feedback to understand their experience. Use this information to make iterative improvements. Consider conducting A/B testing on different layouts to identify what resonates most with your audience. Remember, an engaging user experience is a continuous journey, not a destination.
Sample Layout Table:
| Layout Element | Purpose | Suggested Action |
|---|---|---|
| Header | Brand recognition | Include logo and tagline |
| Hero Image | First impression | Use high-quality visuals |
| Footer | Contact info | Integrate social links and quick links |

Incorporating Interactive Elements to Enhance Learning
Engaging learners in a digital environment is crucial for effective education. By incorporating interactive elements into your Eduma site using Elementor, you can transform passive learning experiences into dynamic ones. This not only fosters greater retention but also stimulates curiosity and critical thinking among students.
Here are some captivating interactive elements you can integrate:
- Quizzes and Polls: Utilize Elementor’s built-in widgets to create quizzes that assess understanding in real time. Polls can encourage participation and provide instant feedback to both educators and students.
- Interactive Video Content: Embed videos that include clickable elements, allowing students to engage with the content actively. This could mean answering questions or exploring related resources directly from the video.
- Gamification Features: Implement badges, leaderboards, or progress trackers to motivate learners. This competitive edge can increase engagement and drive completion rates.
- Live Chat and Forums: Facilitate peer interaction and immediate support by incorporating live chat features or discussion forums where students can ask questions and share insights.
In addition to these elements, consider integrating a feedback loop system. This could be in the form of a simple feedback form or a more complex survey at the end of modules. It not only provides insights into student satisfaction but also informs you about areas for improvement.
| Interactive Element | Benefits |
|---|---|
| Quizzes | Enhances retention and understanding |
| Gamification | Boosts motivation and engagement |
| Live Chat | Encourages collaboration and immediate support |
| Interactive Videos | Increases engagement through multimedia |
don’t underestimate the power of storytelling in your interactive elements. Creating narratives that resonate with learners can foster emotional connections to the material, making the learning experience not just informative, but also memorable.
Optimizing Your Eduma Site for Mobile Devices
In today’s digital landscape, ensuring that your Eduma site is optimized for mobile devices is not just a luxury—it’s a necessity. With a growing number of users accessing educational content on their smartphones and tablets, providing a seamless mobile experience is crucial for retaining visitors and enhancing engagement.
One of the first steps in optimizing your site is to choose a responsive design. Elementor provides a plethora of responsive templates that automatically adjust to different screen sizes. Here’s how you can make the most of this feature:
- Utilize Mobile Editing: Within Elementor, switch to the mobile view and tweak elements such as padding, margins, and typography to ensure everything looks perfect.
- Hide/Show Elements: Take advantage of Elementor’s visibility options to hide certain elements on mobile devices, streamlining your layout for smaller screens.
- Optimize Images: Always use appropriately sized images. Upload images in the formats best suited for web use and ensure they are responsive to avoid slow loading times.
Another vital aspect is the speed of your website. Mobile users expect swift access to information, and even a one-second delay can lead to a significant drop in engagement. Consider the following:
| Optimization Strategy | Description |
|---|---|
| Minimize HTTP Requests | Reduce the number of elements on your pages. |
| Leverage Browser Caching | Store frequently accessed resources for quicker load times. |
| Use a Content Delivery Network (CDN) | Distribute your content across global servers to improve access speed. |
Don’t forget to test your site’s mobile friendliness using tools like Google’s Mobile-Friendly Test. This will help you identify further areas for improvement. Pay attention to:
- Touch targets: Make buttons and links large enough for easy tapping.
- Font sizes: Ensure text is legible without zooming.
- Navigation: Simplify your menu structure for easy access on the go.
always keep user feedback in mind. Encourage your visitors to share their experience on mobile devices. Use surveys or quick feedback forms to gather insights that can guide your future optimizations.
Boosting SEO with Elementor: Best Practices
Optimizing Your Content Structure
When using Elementor, ensure that your content structure is optimized for both user experience and search engines. Start by utilizing header tags effectively. Use
for your main title, followed by Utilizing Alt Text for Images
Images play a crucial role in engagement on your website, but they should not be overlooked when it comes to SEO. Always add alt text to your images within Elementor. This text should describe the image accurately and include relevant keywords. Not only does this improve accessibility, but it also provides an additional opportunity for your content to be indexed by search engines.
Implementing Internal Linking
Building a strong internal linking structure is essential. Use Elementor to create links between relevant pages and posts on your site. This encourages visitors to explore more of your content and signals to search engines that your site is a comprehensive resource. Key points to consider include:
- Use descriptive anchor text that reflects the linked content.
- Avoid excessive linking—focus on quality over quantity.
- Regularly update links to ensure they remain relevant.
Page Speed Optimization
Page speed is a crucial ranking factor. Elementor allows you to optimize images, utilize lazy loading, and implement caching solutions effectively. To enhance your site’s speed:
- Compress images using tools like TinyPNG before uploading.
- Minimize CSS and JavaScript files.
- Leverage browser caching to improve load times for returning visitors.
Mobile Responsiveness
With a significant amount of web traffic coming from mobile devices, ensuring that your site is fully responsive is non-negotiable. Elementor provides tools to adjust your layouts specifically for mobile. Focus on:
- Testing your site on multiple devices and screen sizes.
- Using mobile-friendly fonts and button sizes.
- Ensuring touch elements are appropriately spaced.
Engaging Meta Descriptions
Don’t underestimate the power of a compelling meta description. This brief summary appears in search results and can significantly influence click-through rates. Write engaging meta descriptions for each page:
- Keep it under 160 characters.
- Include primary keywords naturally.
- Convey a clear call to action.
Monitoring and Improving SEO
Lastly, regularly review your SEO performance. Use tools like Google Analytics and Search Console to track your metrics. This data will inform you of what’s working and what needs improvement. Consider creating a simple table for tracking key metrics:
| Metric | Current Value | Target Value |
|---|---|---|
| Organic Traffic | 1,000 | 1,500 |
| Page Load Time | 3.5s | 2.0s |
| CTR | 2.5% | 4.0% |
Integrating Plugins for Added Functionality
To truly unlock the potential of your Eduma theme with Elementor, integrating various plugins can significantly enhance the functionality and user experience of your website. These plugins can extend the capabilities of Elementor, making your educational site more interactive, engaging, and effective in delivering content.
Here are some essential plugins that can complement your Elementor and Eduma setup:
- Elementor Pro: If you haven’t already, upgrading to Elementor Pro opens up a plethora of advanced widgets and features, including custom forms, slides, and a theme builder that can transform your entire site.
- LearnDash: Integrating LearnDash with Elementor allows you to create stunning course layouts. You can visually design your course content, quizzes, and learner profiles without any coding knowledge.
- WPForms: For seamless communication, WPForms can be integrated to create custom forms for registrations, inquiries, and feedback, enhancing user interaction.
- WooCommerce: If you plan to sell courses or educational materials, WooCommerce is a must-have plugin. It integrates beautifully with Elementor, allowing you to design custom product pages that attract and convert visitors.
- Elementor Add-ons: Explore various third-party add-ons like Essential Addons or Ultimate Addons for Elementor, which provide additional elements and templates to enrich your design options.
When implementing these plugins, ensure to take advantage of the compatibility features they offer with Elementor. For example, many plugins provide custom widgets that can be dragged and dropped into your Elementor layouts, making customization effortless.
To help you visualize which plugins to use for specific functionalities, consider the following table:
| Plugin | Functionality | Use Case |
|---|---|---|
| Elementor Pro | Advanced Widgets | Custom forms and theme building |
| LearnDash | Course Management | Creating online courses with customized layouts |
| WPForms | Form Creation | Contact forms and registration |
| WooCommerce | E-commerce | Selling courses and educational materials |
| Essential Addons | Additional Elements | Enhanced design and functionality options |
As you incorporate these plugins, keep your audience’s needs in mind. What features will make their learning experience smoother? What tools can help you engage them more effectively? By thoughtfully integrating plugins, you can create a powerful educational platform that not only delivers content but also fosters a vibrant community.
Creating Dynamic Content with Elementor Widgets
One of the most powerful features of Elementor is its ability to create dynamic content, allowing you to personalize your website in ways that resonate with your audience. When working with Eduma, you can harness the capabilities of Elementor widgets to display tailored content dynamically, engaging your visitors like never before.
To get started, consider utilizing the following Elementor widgets that excel in delivering dynamic content:
- Posts Widget: Showcase your latest courses or blog posts with stunning layouts and filters.
- Testimonials Widget: Highlight student reviews dynamically, enhancing credibility and trust.
- Portfolio Widget: Display your courses in an eye-catching format, allowing potential learners to browse easily.
- Countdown Timer Widget: Create urgency around course sign-ups or upcoming events.
To make full use of these widgets, consider the following steps:
- Choose the relevant widget from the Elementor panel.
- Customize its settings to reflect the dynamic content you wish to display.
- Utilize custom fields or advanced custom fields to source data dynamically.
- Preview the changes in real-time to ensure they align with your vision.
Integrating dynamic content is not just about aesthetics; it boosts user interaction significantly. For instance, using the Posts Widget allows you to create a grid of courses that updates automatically as new content is added, keeping your website fresh and engaging. Additionally, the Testimonials Widget can pull in student feedback dynamically, ensuring your visitors see the most recent and relevant reviews.
You can also implement advanced features through Elementor’s integration with WordPress custom post types, which allows for remarkable flexibility. Consider setting up a table to display course details dynamically:
| Course Name | Instructor | Start Date |
|---|---|---|
| Web Development 101 | Jane Doe | October 15, 2023 |
| Graphic Design Basics | John Smith | November 1, 2023 |
| SEO Strategies | Emily Johnson | November 10, 2023 |
By structuring your content dynamically with Elementor, you not only enhance the visual appeal of your Eduma site but also enrich the user experience. Every visitor will feel the relevance of what they see, making them more likely to engage, enroll, and ultimately succeed in their learning journey.

Testing and Launching Your Eduma Site Like a Pro
Once you’ve designed your Eduma site using Elementor, it’s time to ensure everything runs smoothly before you launch. Testing your site is a crucial step that can make a significant difference in the user experience you provide. Begin by navigating through every page and functionality to catch any glitches or inconsistencies. Pay attention to the following areas:
- Responsiveness: Check how your site looks and operates on different devices, including desktops, tablets, and smartphones.
- Loading Speed: Use tools like Google PageSpeed Insights to analyze and improve the loading time of your site.
- Functionality: Test all buttons, forms, and interactive elements to ensure they work as intended.
After rigorous testing, it’s beneficial to gather feedback from a small group of users. This beta testing phase can unveil insights you might have overlooked. Consider creating a simple feedback form where users can report issues or suggest improvements. Highlight the importance of their input with a strong call to action, encouraging them to share their experiences.
As you prepare for your launch, don’t overlook the power of SEO optimization. Ensure that each page is optimized with relevant keywords, meta tags, and alt text for images. Utilize the built-in SEO features in Elementor and your WordPress settings to enhance visibility and attract organic traffic.
| Task | Status |
|---|---|
| Responsive Design Check | ✔️ Complete |
| Speed Optimization | ✔️ In Progress |
| User Testing Feedback | ✔️ Pending |
| SEO Optimization | ✔️ Not Started |
once all tests are completed and adjustments made, plan a strategic launch. Consider creating a buzz on social media platforms, sharing sneak peeks of your site, and outlining the value it provides to users. A well-executed launch can significantly boost initial traffic and engagement, setting the stage for a successful online presence.

Ongoing Maintenance and Updates for Lasting Success
To ensure your Eduma site remains competitive and engaging, it’s essential to prioritize ongoing maintenance and updates. Here are some key practices to adopt:
- Regular Backups: Schedule automatic backups of your site to safeguard your content and settings. This ensures you can restore your site quickly in case of any issues.
- Plugin and Theme Updates: Keep your Elementor and Eduma themes up-to-date to benefit from the latest features and security patches. Regular updates not only enhance performance but also improve user experience.
- Performance Monitoring: Utilize tools like Google PageSpeed Insights to monitor your website’s performance. Aim for a loading time of under three seconds to retain visitors’ attention.
Another crucial aspect is to engage with your audience consistently. Regularly update your content to reflect current trends and to keep your educational materials fresh. This can include:
- New Courses: Continuously add new courses and resources to attract returning visitors.
- Blog Posts: Publish insightful articles that resonate with your audience, showcasing your expertise and enhancing your site’s SEO.
- Community Engagement: Create forums or discussion boards to foster community interactions among learners.
Consider setting up a content calendar to plan your updates and ensure a consistent workflow. This will not only help in maintaining quality but also in strategizing your marketing efforts effectively.
Lastly, invest time in analyzing user feedback and behavior. Implementing changes based on user insights can significantly enhance the overall user experience, ultimately leading to higher retention and satisfaction rates. Utilize surveys, comment sections, or direct feedback forms to gather valuable insights from your audience.
Your commitment to continual improvement will not only enhance the functionality of your Eduma site but will also pave the way for lasting success in your educational endeavors.
Frequently Asked Questions (FAQ)
Q&A: How To Use Elementor For Eduma: A Step-by-Step Guide
Q1: What is Eduma and why should I use it for my online education platform?
A1: Eduma is a powerful WordPress theme specifically designed for educational institutions, online courses, and e-learning platforms. With its user-friendly interface and extensive features, Eduma provides the perfect foundation for creating engaging and interactive learning experiences. By using Eduma, you can elevate your educational offerings, attract more students, and make learning accessible to everyone. Imagine transforming your educational vision into reality with just a few clicks!
Q2: How does Elementor enhance the Eduma theme?
A2: Elementor is a leading page builder that allows you to design stunning websites without any coding knowledge. When combined with Eduma, Elementor unlocks a world of creative possibilities. You can customize your site’s layout, add dynamic content, and utilize various widgets to create visually appealing and functional pages—all while maintaining the integrity of Eduma’s educational focus. With Elementor, you have the power to create a unique online learning environment that captivates and inspires your students!
Q3: Do I need any technical skills to use Elementor with Eduma?
A3: Not at all! One of the most appealing aspects of Elementor is its intuitive drag-and-drop interface, which makes it accessible for users of all skill levels. You don’t need to be a coding expert or a web designer to create beautiful pages. Our step-by-step guide will walk you through the entire process, empowering you to build your educational site with confidence and ease.
Q4: What are the first steps to getting started with Elementor for Eduma?
A4: To kick off your journey, first, ensure you have the Eduma theme installed on your WordPress site. Then, install and activate Elementor. Once you have both set up, you can start creating your first page! With our guide, you’ll learn how to navigate the Elementor interface, incorporate essential Eduma features, and use pre-built templates to save time. Each step will inspire you to explore your creativity and build a site that reflects your educational mission.
Q5: Can I customize my online courses using Elementor?
A5: Absolutely! Elementor allows you to customize every aspect of your online courses. You can create engaging course pages with interactive elements, add video content, showcase instructor profiles, and highlight testimonials. The possibilities are endless! Our guide provides tips on effectively using Elementor’s features to enhance your course presentations, making learning more enjoyable for your students.
Q6: What if I run into issues while using Elementor with Eduma?
A6: Don’t worry! Every journey has its challenges, but you’re not alone. Our comprehensive guide includes troubleshooting tips and links to helpful resources, including forums and support communities. Additionally, both Elementor and Eduma offer excellent customer support, ensuring you can get assistance whenever needed. Embrace the learning curve, and let each challenge be a stepping stone to creating something extraordinary!
Q7: How will using Elementor with Eduma benefit my students?
A7: By utilizing Elementor with Eduma, you create a visually appealing, organized, and user-friendly online learning environment. This enhances student engagement, improves course navigation, and ultimately leads to better learning outcomes. Your students will appreciate the seamless experience, motivating them to participate more actively and succeed in their educational endeavors. You have the power to inspire and empower the next generation of learners—let’s make it happen!
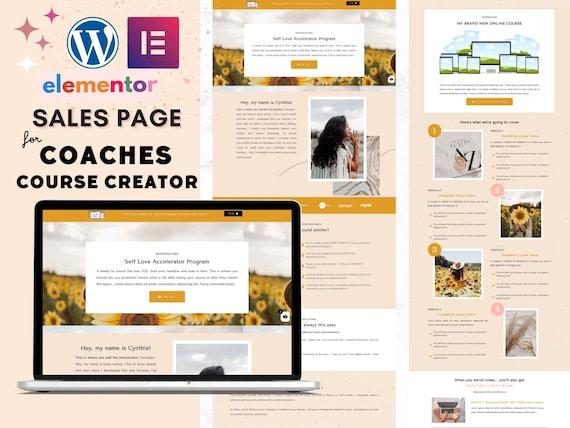
Q8: Can I see examples of websites built with Elementor and Eduma?
A8: Yes! There are numerous inspiring examples of educational websites that leverage the power of Elementor and Eduma. These sites showcase the versatility and creativity achievable through this combination. Our guide features a section where you can explore these examples to spark your imagination and motivate you to create your masterpiece. Remember, every great educator started with a dream—let yours take flight!
Q9: How can I get started right away?
A9: Your journey to creating an impactful online education platform starts now! Check out our complete step-by-step guide on how to use Elementor with Eduma. Armed with inspiration and our practical tips, you’re ready to build a site that not only looks amazing but also delivers exceptional value to your students. Take that first leap—your educational adventure awaits!
Future Outlook
As we conclude our journey through the intricacies of using Elementor with the Eduma theme, remember that the power to create an exceptional online learning platform lies firmly in your hands. With the step-by-step guidance provided, you are now equipped with the tools and knowledge necessary to transform your vision into reality. Imagine the impact your unique educational experience will have on students around the globe—empowering them to learn, grow, and succeed.
Don’t hesitate to experiment with the features and unleash your creativity. Your passion for education deserves to shine through a beautifully crafted website that not only attracts learners but also engages and inspires them to reach their fullest potential.
So go ahead—dive in, make it yours, and let the world see what you can achieve with Elementor and Eduma. The future of education awaits, and it starts with you!


New Providers
Enjoy The Speed Of Downloading & Uploading With 1GBPS Port
Affordable Dedicated Servers & Colocation Services. Services: Dedicated Servers Colocation Private Cabinet Colocation DDoS Protection
Up to 85% off hosting + website builder

Latest News
- 8+ Free Construction Templates and Page DesignsJuly 11, 2026 16
- How to Create a Graphic Design Portfolio That Gets HiresJuly 11, 2026 16
- Otter Blocks 3.2.0: AI Page Building and a New Design LibraryJuly 11, 2026 15
- 11 Best Web Hosting Services for Developers 2026July 11, 2026 19
- How to Create a Webshop: A Step-by-Step GuideJuly 10, 2026 21

We specialize in providing Web hosting reviews. Where you can search for potential hosts.